
Unit tests keep your Angular app reliable as it grows. They catch regressions early, make refactors safe, and let you run tests in CI so teammates and deploy pipelines can trust the app’s behavior. In this tutorial, we’ll use Jasmine, a behavior-driven JavaScript testing framework, to write tests, and Karma as the test runner that executes those tests (typically in Chrome/ChromeHeadless). The Angular CLI scaffolds the testing setup for you, so you can start writing specs right away.
What you’ll learn in this guide:
-
How to create an Angular 20 project prepared for unit testing.
-
How to run tests and where the test files live.
-
How to write and run simple Jasmine specs (components, services, pipes).
-
Practical tips for debugging, running headless tests, and CI-ready test runs.
Quick note on versions: this tutorial is written for Angular 20 (the current stable major release) and the Angular CLI that targets it. If you follow the steps below, you’ll be on a modern, supported stack.
Project setup (Angular 20)
Prerequisites
-
Node.js: an active LTS or maintenance LTS version (install Node from nodejs.org). Angular tooling requires a supported Node LTS; check Angular’s compatibility if you’re on a very new/very old Node. angular.dev
-
npm, pnpm, or yarn installed (npm comes with Node).
-
A code editor (VS Code recommended).
1) Install/update Angular CLI
Install (or update) the Angular CLI globally:
# npm
npm install -g @angular/cli

# or with pnpm
pnpm install -g @angular/cli

# or with yarn
yarn global add @angular/cli
The Angular docs recommend installing the CLI this way: the official @angular/cli package is kept up to date on npm.
Tip: if you already have
@angular/cliinstalled and want the latest, you can eithernpm i -g @angular/cli@latestor uninstall then reinstall (npm uninstall -g @angular/cli && npm i -g @angular/cli@latest).
2) Create a new Angular 20 project
Create a new project (interactive):
ng new angular20-testingThe CLI will ask a few questions (routing, stylesheet format, strict mode). Pick the options you prefer. If you want non-interactive defaults:
ng new angular20-testing --defaultsBy default, the Angular CLI scaffolds testing support (Jasmine + Karma) into new projects, so you can run ng test immediately.
3) Install dependencies & open the project
If you used --defaults, they are installed automatically. Otherwise:
cd angular20-testing
npm install
Open the project in your editor:
code .4) Run the default test suite
The CLI creates a small example spec file so you can verify the test runner quickly.
Run:
ng testWhat happens:
-
ng testspins up Karma and launches a browser (by default, it runs in watch mode). -
The CLI will run the generated test(s) and keep watching for file changes (handy during development).
To run tests once (CI-style) you can pass--watch=falseor configure a headless browser (e.g.ChromeHeadless) in your CI environment. The CLI constructs the full Karma/Jasmine configuration automatically; you can customize further if needed.
5) Where tests live (convention)
-
Test files use the
.spec.tssuffix and typically sit next to the source file, e.g.src/app/app.component.spec.tsorsrc/app/services/my.service.spec.ts. -
The
angular.jsonproject config contains the"test"architect target thatng testuses; the CLI builds the test config in memory by default. If you want an explicitkarma.conf.js, you can generate it.
6) Optional: generate a Karma config
If you want a physical karma.conf.js to customize locally (not required), run:
ng generate config karmaThis produces a local Karma configuration you can edit.
Sanity-check example (create-and-run a tiny spec)
Create a tiny utility and a test to confirm your test runner works (this is optional but quick):
src/app/utils/math.ts
export function add(a: number, b: number) {
  return a + b;
}
src/app/utils/math.spec.ts
import { add } from './math';
describe('math.add', () => {
it('adds two numbers', () => {
expect(add(2, 3)).toBe(5);
});
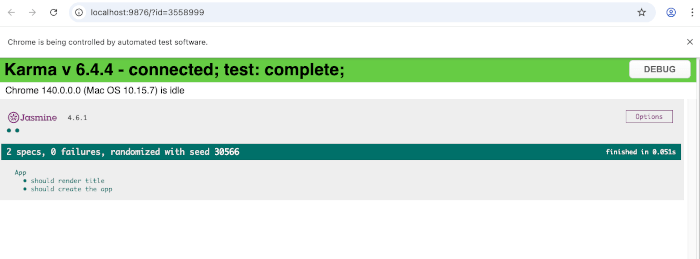
});Run ng test — you should see that spec pass in the test output. This is a fast way to confirm your environment is wired up.
Quick troubleshooting tips
-
If
ng testfails to launch a browser in CI, usesChromeHeadlessand ensures Chrome is available in the CI environment. -
If tests hang, check for leftover
asynctimers, unclosed Observables, or Zone-related issues inside your tests. -
Make sure Node version meets Angular’s compatibility guidance.
Jasmine & Karma Essentials
Before diving into testing Angular components and services, let’s get familiar with the two key players in the testing setup:
-
Jasmine → the testing framework that provides functions like
describe,it, andexpect. It lets you structure and write tests. -
Karma → the test runner that launches a browser, executes the Jasmine specs inside it, and reports results back in the console.
Both come preconfigured when you create an Angular project with the CLI.
Jasmine Basics
A Jasmine test file (.spec.ts) is made of suites and specs:
-
describe()→ defines a test suite (a group of related tests). -
it()→ defines an individual test case inside a suite. -
expect()→ assertion function to compare actual vs expected results. -
beforeEach()/afterEach()→ setup and teardown logic before/after each spec.
Example:
describe('Array operations', () => {
  let numbers: number[];

  beforeEach(() => {
    numbers = [1, 2, 3];
  });

  it('should contain 3 elements', () => {
    expect(numbers.length).toBe(3);
  });

  it('should include number 2', () => {
    expect(numbers).toContain(2);
  });

  afterEach(() => {
    // cleanup if needed
  });
});
👉 Notes:
-
You can nest
describe()blocks to organize tests hierarchically. -
Jasmine provides many matchers beyond
toBe, liketoEqual,toContain,toBeTruthy,toThrow, etc.
Karma Basics
Karma is configured via Angular CLI by default. When you run:
ng testHere’s what happens:
-
Angular CLI compiles your app and test files.
-
Karma starts a browser (Chrome by default).
-
Jasmine specs run in that browser.
-
Test results are displayed in the terminal (and optionally in the browser).
Karma Configuration
Although Angular CLI hides most of the Karma setup, you can generate and edit karma.conf.js if needed:
ng generate config karmaCommon configuration points:
-
Browsers → by default, it runs in Chrome; for CI use
ChromeHeadless. -
Reporters → customize how test results are shown (
progress,dots,junit, etc.). -
Coverage → configure Istanbul coverage reporters.
Example snippet (karma.conf.js):
module.exports = function (config) {
  config.set({
    browsers: ['Chrome'],
    frameworks: ['jasmine'],
    reporters: ['progress'],
    files: ['src/**/*.spec.ts'],
  });
};
How Jasmine & Karma Work Together
-
Jasmine provides the syntax for writing tests.
-
Karma runs those tests inside a browser environment and shows the results.
-
The Angular CLI handles the integration, so you rarely need to wire them up manually.
✅ With these basics in mind, you’re ready to start writing real tests for Angular code.
Writing Your First Unit Test (Utility Function)
Before testing Angular components and services, let’s start small with a pure TypeScript utility function. This is the simplest way to understand Jasmine’s syntax and see Karma in action.
Step 1: Create a Utility Function
Inside your Angular project, create a folder for shared utilities:
mkdir src/app/utilsAdd a simple math helper:
src/app/utils/math.ts
export function multiply(a: number, b: number): number {
  return a * b;
}
Step 2: Create a Test File (.spec.ts)
Angular CLI convention is to keep test files alongside the code they test. So, create:
src/app/utils/math.spec.ts
import { multiply } from './math';

describe('multiply utility', () => {
  it('should return the correct product of two numbers', () => {
    expect(multiply(2, 3)).toBe(6);
  });

  it('should return 0 if one factor is 0', () => {
    expect(multiply(0, 10)).toBe(0);
  });

  it('should handle negative numbers', () => {
    expect(multiply(-2, 4)).toBe(-8);
  });
});
Step 3: Run the Tests
Run:
ng test-
Karma will start a browser and execute the Jasmine tests.
-
You should see output like:
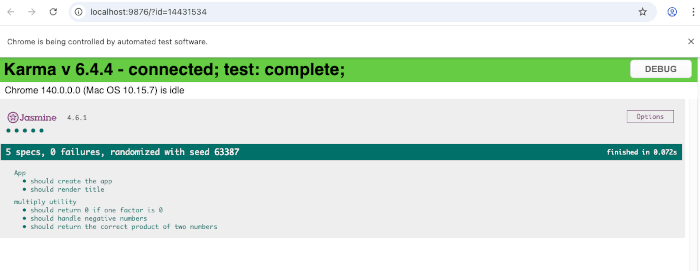
Step 4: What’s Happening?
-
describe()creates a test suite (“multiply utility”). -
it()defines individual test cases. -
expect()checks that the function behaves as expected.
This mirrors the real-world test structure you’ll use for Angular services, components, pipes, and directives.
✅ Now that we’ve seen Jasmine in action with a utility function.
Testing Angular Components
Angular components are the heart of your app, and testing them ensures your UI behaves as expected. To do this, Angular provides the TestBed utility, which sets up a lightweight testing module to create and interact with components.
Step 1: Generate a New Component
Use Angular CLI to generate a component named counter:
ng generate component counterThis creates:
src/app/counter/
  ├── counter.component.ts
  ├── counter.component.html
  ├── counter.component.css
  └── counter.component.spec.ts
Step 2: Implement the Component
Let’s make a simple counter with increment/decrement buttons:
src/app/counter/counter.ts
import { Component } from '@angular/core';

@Component({
  selector: 'app-counter',
  imports: [],
  templateUrl: './counter.html',
  styleUrl: './counter.scss'
})
export class Counter {
  count = 0;

  increment() {
    this.count++;
  }

  decrement() {
    this.count--;
  }
}
src/app/counter/counter.html
<h2>Counter Component</h2>
<p>Current Count: {{ count }}</p>
<button (click)="increment()">Increment</button>
<button (click)="decrement()">Decrement</button>
Step 3: Write Tests for the Component
Open the generated spec file and replace its contents:
src/app/counter/counter.spec.ts
import { ComponentFixture, TestBed } from '@angular/core/testing';

import { Counter } from './counter';

describe('Counter', () => {
  let component: Counter;
  let fixture: ComponentFixture<Counter>;

  beforeEach(async () => {
    await TestBed.configureTestingModule({
      declarations: [Counter]
    }).compileComponents();

    fixture = TestBed.createComponent(Counter);
    component = fixture.componentInstance;
    fixture.detectChanges();
  });

  it('should create the component', () => {
    expect(component).toBeTruthy();
  });

  it('should start with count = 0', () => {
    expect(component.count).toBe(0);
  });

  it('should increment the count when increment() is called', () => {
    component.increment();
    expect(component.count).toBe(1);
  });

  it('should decrement the count when decrement() is called', () => {
    component.decrement();
    expect(component.count).toBe(-1);
  });

  it('should render the count in the template', () => {
    component.count = 5;
    fixture.detectChanges(); // update the template
    const compiled = fixture.nativeElement as HTMLElement;
    expect(compiled.querySelector('p')?.textContent).toContain('5');
  });

  it('should increment the count when Increment button is clicked', () => {
    const compiled = fixture.nativeElement as HTMLElement;
    const incrementButton = compiled.querySelector('button:first-of-type') as HTMLButtonElement;
    incrementButton.click();
    fixture.detectChanges();
    expect(compiled.querySelector('p')?.textContent).toContain('1');
  });

  it('should decrement the count when Decrement button is clicked', () => {
    const compiled = fixture.nativeElement as HTMLElement;
    const decrementButton = compiled.querySelector('button:last-of-type') as HTMLButtonElement;
    decrementButton.click();
    fixture.detectChanges();
    expect(compiled.querySelector('p')?.textContent).toContain('-1');
  });
});
Step 4: Run the Tests
Run:
ng testYou should see all CounterComponent tests passing ✅.
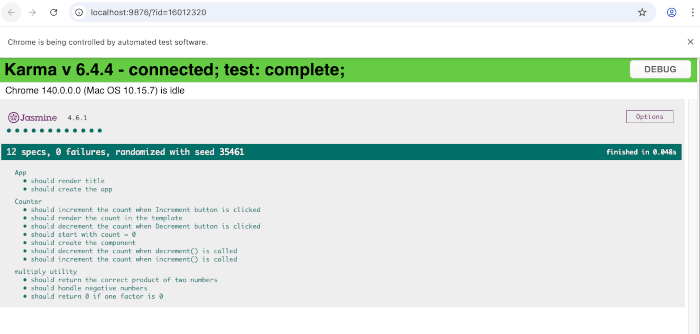
What We Learned
-
TestBedconfigures a testing module and compiles the component. -
fixturegives access to both the component instance and its rendered DOM. -
We can test class logic (
increment(),decrement()) and DOM interactions (button clicks) in the same suite.
Testing Angular Services with HTTP
Most Angular apps rely on services to fetch or send data. Testing them ensures your API interactions work correctly — without needing a real backend. Angular provides two key tools for this:
-
HttpClientTestingModule→ a mock HTTP module that replaces the realHttpClient. -
HttpTestingController→ lets you simulate and control HTTP requests in your tests.
Step 1: Generate a Service
Create a PostsService that fetches posts from a public API:
ng generate service postsThis creates src/app/posts.ts and its spec file.
import { HttpClient } from '@angular/common/http';
import { Injectable } from '@angular/core';
import { Observable } from 'rxjs';

export interface Post {
  id: number;
  title: string;
  body: string;
}

@Injectable({
  providedIn: 'root'
})
export class Posts {
  private apiUrl = 'https://jsonplaceholder.typicode.com/posts';

  constructor(private http: HttpClient) { }

  getPosts(): Observable<Post[]> {
    return this.http.get<Post[]>(this.apiUrl);
  }

  getPostById(id: number): Observable<Post> {
    return this.http.get<Post>(`${this.apiUrl}/${id}`);
  }
}
Step 3: Write Tests with HttpClientTestingModule
Replace the contents of the generated spec file:
src/app/posts.service.spec.ts
import { TestBed } from '@angular/core/testing';
import { Post, Posts } from './posts';
import { HttpTestingController, provideHttpClientTesting } from '@angular/common/http/testing';
import { provideHttpClient } from '@angular/common/http';
describe('Posts', () => {
let service: Posts;
let httpMock: HttpTestingController;
beforeEach(() => {
TestBed.configureTestingModule({
providers: [
provideHttpClient(),
provideHttpClientTesting(),
Posts,
]
});
service = TestBed.inject(Posts);
httpMock = TestBed.inject(HttpTestingController);
});
afterEach(() => {
httpMock.verify(); // ensures no outstanding requests
});
it('should fetch all posts', () => {
const dummyPosts: Post[] = [
{ id: 1, title: 'Post 1', body: 'Content 1' },
{ id: 2, title: 'Post 2', body: 'Content 2' }
];
service.getPosts().subscribe(posts => {
expect(posts.length).toBe(2);
expect(posts).toEqual(dummyPosts);
});
const req = httpMock.expectOne('https://jsonplaceholder.typicode.com/posts');
expect(req.request.method).toBe('GET');
req.flush(dummyPosts); // simulate server response
});
it('should fetch a post by ID', () => {
const dummyPost: Post = { id: 99, title: 'Test Post', body: 'Test Content' };
service.getPostById(99).subscribe(post => {
expect(post).toEqual(dummyPost);
});
const req = httpMock.expectOne('https://jsonplaceholder.typicode.com/posts/99');
expect(req.request.method).toBe('GET');
req.flush(dummyPost);
});
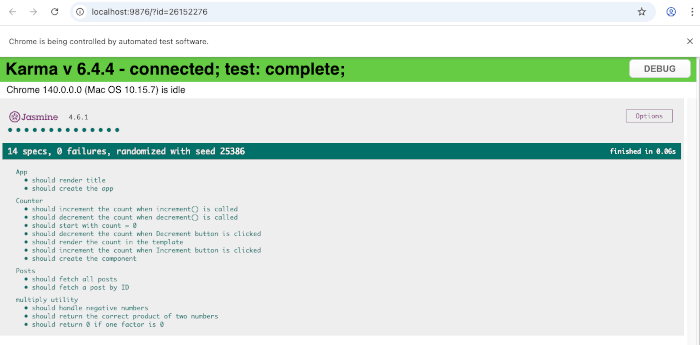
});Step 4: Run the Tests
ng test✅ Both tests should pass — and no real network calls are made.
Key Takeaways
-
HttpClientTestingModuleprovides a fake HTTP backend for unit tests. -
HttpTestingControllerlets you expect requests (expectOne) and send mock responses (flush). -
httpMock.verify()ensures no unexpected HTTP calls remain at the end of a test.
Testing Pipes and Directives
In addition to components and services, you’ll often need to test custom pipes and directives in Angular applications. Pipes transform data in templates, while directives extend the behavior of DOM elements. Both play critical roles in making apps dynamic and reusable, so they deserve dedicated tests.
1. Testing a Custom Pipe
Let’s create a simple pipe that capitalizes the first letter of each word.
capitalize.pipe.ts
import { Pipe, PipeTransform } from '@angular/core';

@Pipe({
  name: 'capitalize',
  standalone: true
})
export class CapitalizePipe implements PipeTransform {
  transform(value: string): string {
    if (!value) return '';
    return value
      .split(' ')
      .map(word => word.charAt(0).toUpperCase() + word.slice(1))
      .join(' ');
  }
}
capitalize.pipe.spec.ts
import { CapitalizePipe } from './capitalize.pipe';

describe('CapitalizePipe', () => {
  let pipe: CapitalizePipe;

  beforeEach(() => {
    pipe = new CapitalizePipe();
  });

  it('should capitalize the first letter of each word', () => {
    const result = pipe.transform('angular unit testing');
    expect(result).toBe('Angular Unit Testing');
  });

  it('should return empty string for null or undefined', () => {
    expect(pipe.transform('')).toBe('');
    expect(pipe.transform(null as any)).toBe('');
    expect(pipe.transform(undefined as any)).toBe('');
  });
});
✅ This test ensures the pipe behaves correctly with valid input and edge cases.
2. Testing a Custom Directive
Next, let’s build a directive that changes the background color of an element when hovered.
highlight.directive.ts
import { Directive, ElementRef, HostListener, Input } from '@angular/core';

@Directive({
  selector: '[appHighlight]',
  standalone: true
})
export class HighlightDirective {
  @Input('appHighlight') highlightColor = 'yellow';

  constructor(private el: ElementRef) {}

  @HostListener('mouseenter') onMouseEnter() {
    this.highlight(this.highlightColor);
  }

  @HostListener('mouseleave') onMouseLeave() {
    this.highlight('');
  }

  private highlight(color: string) {
    this.el.nativeElement.style.backgroundColor = color;
  }
}
highlight.directive.spec.ts
import { Component } from '@angular/core';
import { ComponentFixture, TestBed } from '@angular/core/testing';
import { By } from '@angular/platform-browser';
import { HighlightDirective } from './highlight.directive';

@Component({
  template: `<p appHighlight="lightblue">Hover me!</p>`,
  standalone: true,
  imports: [HighlightDirective]
})
class TestHostComponent {}

describe('HighlightDirective', () => {
  let fixture: ComponentFixture<TestHostComponent>;

  beforeEach(() => {
    TestBed.configureTestingModule({
      imports: [TestHostComponent]
    });
    fixture = TestBed.createComponent(TestHostComponent);
    fixture.detectChanges();
  });

  it('should highlight background on mouse enter', () => {
    const pEl = fixture.debugElement.query(By.css('p'));
    pEl.triggerEventHandler('mouseenter');
    fixture.detectChanges();
    expect(pEl.nativeElement.style.backgroundColor).toBe('lightblue');
  });

  it('should remove highlight on mouse leave', () => {
    const pEl = fixture.debugElement.query(By.css('p'));
    pEl.triggerEventHandler('mouseleave');
    fixture.detectChanges();
    expect(pEl.nativeElement.style.backgroundColor).toBe('');
  });
});
✅ We used a host test component to attach the directive realistically.
✅ The tests simulate mouseenter and mouseleave events to verify DOM style changes.
📌 At this point, readers have seen tests for:
-
Pipes (pure function-like transformations).
-
Directives (DOM manipulation and event response).
Testing Angular Forms (Reactive & Template-Driven)
Forms are a cornerstone of Angular applications, and ensuring they work correctly is essential. Angular provides two main approaches: Reactive Forms and Template-Driven Forms. Both can be tested effectively with Jasmine and TestBed.
1. Testing a Reactive Form
Let’s create a simple login form using Reactive Forms.
login.component.ts
import { Component } from '@angular/core';
import { FormBuilder, FormGroup, Validators, ReactiveFormsModule } from '@angular/forms';

@Component({
  selector: 'app-login',
  standalone: true,
  template: `
    <form [formGroup]="loginForm">
      <input formControlName="email" placeholder="Email" />
      <input formControlName="password" placeholder="Password" type="password" />
      <button [disabled]="!loginForm.valid">Login</button>
    </form>
  `,
  imports: [ReactiveFormsModule]
})
export class LoginComponent {
  loginForm: FormGroup;

  constructor(private fb: FormBuilder) {
    this.loginForm = this.fb.group({
      email: ['', [Validators.required, Validators.email]],
      password: ['', Validators.required],
    });
  }
}
login.component.spec.ts
import { ComponentFixture, TestBed } from '@angular/core/testing';
import { ReactiveFormsModule } from '@angular/forms';
import { LoginComponent } from './login.component';

describe('LoginComponent (Reactive Forms)', () => {
  let fixture: ComponentFixture<LoginComponent>;
  let component: LoginComponent;

  beforeEach(() => {
    TestBed.configureTestingModule({
      imports: [ReactiveFormsModule, LoginComponent]
    });

    fixture = TestBed.createComponent(LoginComponent);
    component = fixture.componentInstance;
    fixture.detectChanges();
  });

  it('should create the form with email and password controls', () => {
    expect(component.loginForm.contains('email')).toBeTrue();
    expect(component.loginForm.contains('password')).toBeTrue();
  });

  it('should make email control required', () => {
    const control = component.loginForm.get('email');
    control?.setValue('');
    expect(control?.valid).toBeFalse();
  });

  it('should validate email format', () => {
    const control = component.loginForm.get('email');
    control?.setValue('invalid-email');
    expect(control?.valid).toBeFalse();
    control?.setValue('[email protected]');
    expect(control?.valid).toBeTrue();
  });

  it('should disable login button when form is invalid', () => {
    const button: HTMLButtonElement = fixture.nativeElement.querySelector('button');
    expect(button.disabled).toBeTrue();

    component.loginForm.setValue({ email: '[email protected]', password: '12345' });
    fixture.detectChanges();
    expect(button.disabled).toBeFalse();
  });
});
✅ These tests check:
-
Form structure.
-
Required and email validation.
-
Button disabled state depending on validity.
2. Testing a Template-Driven Form
For comparison, let’s build a signup form using Template-Driven Forms.
signup.component.ts
import { Component } from '@angular/core';
import { FormsModule, NgForm } from '@angular/forms';

@Component({
  selector: 'app-signup',
  standalone: true,
  template: `
    <form #signupForm="ngForm">
      <input name="username" ngModel required />
      <input name="email" ngModel required email />
      <button [disabled]="!signupForm.valid">Sign Up</button>
    </form>
  `,
  imports: [FormsModule]
})
export class SignupComponent {}
signup.component.spec.ts
import { ComponentFixture, TestBed } from '@angular/core/testing';
import { FormsModule } from '@angular/forms';
import { SignupComponent } from './signup.component';

describe('SignupComponent (Template-Driven Forms)', () => {
  let fixture: ComponentFixture<SignupComponent>;

  beforeEach(async () => {
    await TestBed.configureTestingModule({
      imports: [FormsModule, SignupComponent]
    }).compileComponents();

    fixture = TestBed.createComponent(SignupComponent);
    fixture.detectChanges();
  });

  it('should disable the button when form is invalid and enable when valid', async () => {
    const button: HTMLButtonElement = fixture.nativeElement.querySelector('button');
    const usernameInput: HTMLInputElement = fixture.nativeElement.querySelector('input[name="username"]');
    const emailInput: HTMLInputElement = fixture.nativeElement.querySelector('input[name="email"]');

    // wait for the form to initialize
    await fixture.whenStable();
    fixture.detectChanges();

    // now Angular has attached NgForm, should be invalid initially
    expect(button.disabled).toBeTrue();

    // Fill inputs with valid data
    usernameInput.value = 'JohnDoe';
    usernameInput.dispatchEvent(new Event('input'));
    emailInput.value = '[email protected]';
    emailInput.dispatchEvent(new Event('input'));

    await fixture.whenStable();
    fixture.detectChanges();

    expect(button.disabled).toBeFalse();
  });
});
✅ This test simulates user input in a template-driven form.
✅ It verifies that Angular automatically updates form validity and disables/enables the button.
📌 At this stage, readers now understand how to test:
-
Reactive Forms (direct FormGroup/FormControl manipulation).
-
Template-Driven Forms (user-driven interaction via
ngModel).
Testing Routing & Navigation with Angular Router
Routing is another core part of Angular applications, allowing users to navigate between views. In unit tests, we often need to verify that:
-
Routes are configured correctly.
-
Navigation works as expected.
-
Components render properly when routes change.
Angular provides RouterTestingHarness (newer, preferred) and RouterTestingModule (older, still available but being phased out). For Angular 20, we’ll use the harness API.
1. Example Routing Setup
Let’s define a simple app with two routes:
-
/home→HomeComponent -
/about→AboutComponent
home.component.ts
import { Component } from '@angular/core';

@Component({
  selector: 'app-home',
  standalone: true,
  template: `<h1>Home Page</h1>`
})
export class HomeComponent {}
about.component.ts
import { Component } from '@angular/core';

@Component({
  selector: 'app-about',
  standalone: true,
  template: `<h1>About Page</h1>`
})
export class AboutComponent {}
app.routes.ts
import { Routes } from '@angular/router';
import { AboutComponent } from './about.component';
import { HomeComponent } from './home.component';

export const routes: Routes = [
  { path: 'home', component: HomeComponent },
  { path: 'about', component: AboutComponent },
  { path: '', redirectTo: 'home', pathMatch: 'full' }
];
2. Testing Routes with RouterTestingHarness
Instead of manually wiring up navigation, Angular 15+ provides RouterTestingHarness for simulating route changes and rendering components.
app.routes.spec.ts
import { TestBed } from '@angular/core/testing';
import { provideRouter } from '@angular/router';
import { RouterTestingHarness } from '@angular/router/testing';
import { routes } from './app.routes';
import { HomeComponent } from './home.component';
import { AboutComponent } from './about.component';

describe('App Routing', () => {
  let harness: RouterTestingHarness;

  beforeEach(async () => {
    await TestBed.configureTestingModule({
      providers: [provideRouter(routes)]
    }).compileComponents();

    harness = await RouterTestingHarness.create();
  });

  it('should navigate to /home and render HomeComponent', async () => {
    const home = await harness.navigateByUrl('/home', HomeComponent);
    expect(home).toBeInstanceOf(HomeComponent);
  });

  it('should navigate to /about and render AboutComponent', async () => {
    const about = await harness.navigateByUrl('/about', AboutComponent);
    expect(about).toBeInstanceOf(AboutComponent);
  });

  it('should redirect "" to /home', async () => {
    const redirect = await harness.navigateByUrl('/', HomeComponent);
    expect(redirect).toBeInstanceOf(HomeComponent);
  });
});
3. Why Use RouterTestingHarness?
-
Cleaner syntax: No need to inject Router and manually trigger navigation.
-
Automatic stabilization: Waits for navigation and rendering before assertions.
-
Future-proof: Recommended in Angular 16+ (replacing older
RouterTestingModule).
✅ At this point, we’ve covered:
-
Unit testing utilities, components, services, pipes, directives, forms, and now routing.
-
A full spectrum of Angular testing scenarios with Jasmine + Karma.
Conclusion and Best Practices
In this tutorial, you’ve learned how to set up and run unit tests in Angular 20 using Jasmine and Karma. We walked through testing different parts of an Angular app:
-
Utility functions (pure JavaScript functions like
multiply) -
Standalone components with inputs, outputs, and DOM interactions
-
HTTP services with
provideHttpClientTesting -
Pipes and directives to validate transformation and behavior
-
Reactive & template-driven forms to ensure validation works as expected
-
Routing and navigation with the new
RouterTestingHarness
By now, you should have a strong foundation for testing Angular applications and ensuring reliability as your app grows.
✅ Best Practices for Angular Unit Testing
-
Keep tests small and focused
-
Test one behavior at a time.
-
Avoid over-testing Angular’s framework code — focus on your logic.
-
-
Prefer Standalone Components & Modern Test Harnesses
-
Angular 20’s testing APIs (
provideHttpClientTesting,RouterTestingHarness) are the recommended way forward. -
Avoid deprecated
HttpClientTestingModuleorRouterTestingModulewhen possible.
-
-
Use
TestBedwisely-
For simple utility functions, skip
TestBed. -
For components, services, directives, and pipes, use
TestBedfor realistic Angular behavior.
-
-
Mock dependencies
-
Use spies (
jasmine.createSpyObj) for service dependencies. -
Keep tests isolated — don’t call real APIs or hit external services.
-
-
Leverage Angular’s async testing utilities
-
Use
waitForAsync,fakeAsync, andtick()when testing async code. -
RouterTestingHarnessalready handles async navigation, so await it properly.
-
-
Write meaningful test names
-
Describe what the feature should do, not how it’s implemented.
-
Example:
should disable the submit button when form is invalid.
-
-
Aim for coverage, but value quality over quantity
-
80–90% coverage is a good target.
-
Focus on critical business logic, not trivial getters/setters.
-
-
Run tests continuously
-
Use
ng test --watchduring development. -
Integrate with CI/CD pipelines for automated quality checks.
-
🚀 Next Steps
-
Try End-to-End (E2E) testing with tools like Cypress or Playwright to complement unit tests.
-
Explore Component Harnesses from Angular CDK for robust component testing.
-
Keep upgrading tests alongside Angular versions to use the latest APIs.
With consistent testing practices, you’ll have more confidence shipping Angular apps at scale.
You can get the full source code on our GitHub.
If you don’t want to waste your time designing your front-end or your budget to spend by hiring a web designer, then Angular Templates is the best place to go. So, speed up your front-end web development with premium Angular templates. Choose your template for your front-end project here.
That's just the basics. If you need more deep learning about Angular, you can take the following cheap course:
- Angular - The Complete Guide (2025 Edition)
- Complete Angular Course 2025 - Master Angular in only 6 days
- Angular Deep Dive - Beginner to Advanced (Angular 20)
- Modern Angular 20 with Signals - The missing guide
- The Modern Angular Bootcamp
- Angular (Full App) with Angular Material, Angularfire & NgRx
- Angular Front End Development Beginner to Master 2025
- 30 Days of Angular: Build 30 Projects with Angular
- Angular 20 Full Course - Complete Zero to Hero Angular 20
- Angular Material In Depth (Angular 20)
Thanks!