In modern web development, delivering fast, SEO-friendly, and dynamic applications is essential. Angular Universal enables server-side rendering (SSR), ensuring that applications load quickly and are easily indexed by search engines. While our original tutorial focused on Angular 8 Universal with MongoDB, the ecosystem has undergone significant evolution.
With the release of Angular 20, developers can now leverage standalone components to simplify application architecture, reduce boilerplate, and improve maintainability. Combined with SSR and MongoDB, this modern stack provides an efficient foundation for building scalable, data-driven web applications.
In this updated tutorial, we’ll walk through how to build a full-stack web application using:
-
Angular 20 with Standalone Components for the frontend
-
Angular Universal for server-side rendering
-
Node.js + Express as the backend server
-
MongoDB as the database
By the end, you’ll have a fully functional Angular SSR app with MongoDB integration, optimized for performance, SEO, and modern Angular best practices.
What You’ll Build
-
An Angular 20 app created with
--ssr(hybrid rendering enabled) -
Standalone routing, signal-friendly setup, and hydration
-
A Node/Express server that:
-
serves Angular SSR using
@angular/ssr/node -
exposes REST endpoints under
/api/*
-
-
A MongoDB collection (users) accessed via the official Node driver (or Mongoose, optional)
Prerequisites
-
Node.js 18+ (LTS recommended)
-
Angular CLI 20.x
-
MongoDB 6+ running locally or on Atlas
-
A modern package manager (npm, pnpm, or yarn)
# install/update CLI
npm i -g @angular/cli@20


# verify
ng version
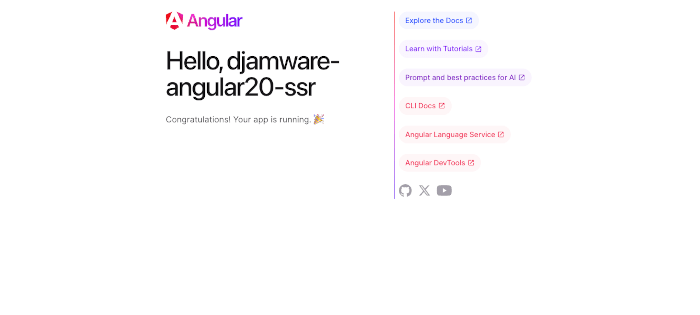
1) Create a New Angular 20 Project with SSR
First, we will create a new Angular 20 application by typing this command in the terminal.
# choose your styles and routing interactively
ng new djamware-angular20-ssr --ssr
cd djamware-angular20-ssr
This scaffolds:
-
src/main.tsandsrc/app/*with standalone components by default -
server.tsusing @angular/ssr (+ Node adapter when serving with Express) -
Build targets to prerender and run SSR
Run the app in dev mode (hybrid/SSR):
ng serve
# opens http://localhost:4200
Tip: for a purely static SSG build, you can later set the project outputMode to static in angular.json. For SSR per-route, we’ll add server routes shortly.
2) Project Layout (Standalone by Default)
A typical Angular 20 standalone layout:
src/
  app/
    app.component.ts # standalone root component
    app.routes.ts # route config
    app.config.ts # application providers (hydration, HttpClient options)
  main.ts # bootstrapApplication()
  main.server.ts # server bootstrap
server.ts # Express + Angular SSR Node app engine
Generate the new components:
ng g component home.component
ng g component users.component
app.html (example):
<header class="container">
  <h1>Djamware Angular 20 SSR + MongoDB</h1>
  <nav>
    <a routerLink="/">Home</a>
    <a routerLink="/users">Users</a>
  </nav>
</header>
<main class="container"><router-outlet /></main>
app.routes.ts (client routes):
import { Routes } from '@angular/router';

export const routes: Routes = [
  {
    path: '',
    loadComponent: () => import('./home.component/home.component').then(m => m.HomeComponent)
  },
  {
    path: 'users',
    loadComponent: () => import('./users.component/users.component').then(m => m.UsersComponent)
  },
  { path: '**', redirectTo: '' }
];
app.config.ts (hydration + Http transfer cache):
import { ApplicationConfig, provideBrowserGlobalErrorListeners, provideZoneChangeDetection } from '@angular/core';
import { provideRouter } from '@angular/router';

import { routes } from './app.routes';
import { provideClientHydration, withEventReplay, withHttpTransferCacheOptions } from '@angular/platform-browser';
import { provideHttpClient, withFetch } from '@angular/common/http';

export const appConfig: ApplicationConfig = {
  providers: [
    provideBrowserGlobalErrorListeners(),
    provideZoneChangeDetection({ eventCoalescing: true }),
    provideRouter(routes),
    provideClientHydration(
      withEventReplay(),
      withHttpTransferCacheOptions({ includePostRequests: false })
    ),
    provideHttpClient(
      withFetch()
    )
  ]
};main.ts:
import { bootstrapApplication } from '@angular/platform-browser';
import { appConfig } from './app/app.config';
import { App } from './app/app';

bootstrapApplication(App, appConfig)
  .catch((err) => console.error(err));
3) Enable Server Routing (per‑route SSR/SSG/CSR)
Create src/app/app.routes.server.ts to choose render modes per path.
import { RenderMode, ServerRoute } from '@angular/ssr';

export const serverRoutes: ServerRoute[] = [
  { path: '', renderMode: RenderMode.Prerender }, // Home is SSG
  { path: 'users', renderMode: RenderMode.Server }, // Users SSR (fetches DB)
  { path: '**', renderMode: RenderMode.Server },
];
Add server providers in src/app/app.config.server.ts:
import { mergeApplicationConfig, ApplicationConfig } from '@angular/core';
import { provideServerRendering, withRoutes } from '@angular/ssr';
import { appConfig } from './app.config';
import { serverRoutes } from './app.routes.server';

const serverConfig: ApplicationConfig = {
  providers: [
    provideServerRendering(withRoutes(serverRoutes))
  ]
};

export const config = mergeApplicationConfig(appConfig, serverConfig);
main.server.ts stays minimal:
import { bootstrapApplication } from '@angular/platform-browser';
import { App } from './app/app';
import { config } from './app/app.config.server';

const bootstrap = () => bootstrapApplication(App, config);

export default bootstrap;
4) Add MongoDB (Node driver) and API Layer
Install deps:
npm i mongodb express
# or, if you prefer Mongoose
# npm i mongoose express
Create an .env (or use environment variables):
MONGODB_URI="mongodb://localhost:27017/djamware_angular20"
PORT=4000
server.ts (Express + Angular SSR Node Adapter + API routes)
This file serves both SSR and exposes REST endpoints under /api/*.
import {
  AngularNodeAppEngine,
  createNodeRequestHandler,
  isMainModule,
  writeResponseToNodeResponse,
} from '@angular/ssr/node';
import express from 'express';
import { join } from 'node:path';
import 'dotenv/config';
import { MongoClient, Db } from 'mongodb';

const browserDistFolder = join(import.meta.dirname, '../browser');

const app = express();
const angularApp = new AngularNodeAppEngine();

let db: Db;

const mongoUri = process.env['MONGODB_URI'];
if (!mongoUri) {
  throw new Error('MONGODB_URI environment variable is not defined');
}

MongoClient.connect(mongoUri)
  .then(client => {
    db = client.db();
    console.log('Connected to MongoDB');
  })
  .catch(error => {
    console.error('Error connecting to MongoDB:', error);
  });

// --- Example REST API ---
app.get('/api/users', async (_req, res, next) => {
  try {
    const users = await db.collection('users').find({}).limit(50).toArray();
    res.json(users);
  } catch (err) { next(err); }
});


app.post('/api/users', async (req, res, next) => {
  try {
    const result = await db.collection('users').insertOne(req.body);
    res.status(201).json(result);
  } catch (err) { next(err); }
});

/**
 * Serve static files from /browser
 */
app.use(
  express.static(browserDistFolder, {
    maxAge: '1y',
    index: false,
    redirect: false,
  }),
);

/**
 * Handle all other requests by rendering the Angular application.
 */
app.use((req, res, next) => {
  angularApp
    .handle(req)
    .then((response) =>
      response ? writeResponseToNodeResponse(response, res) : next(),
    )
    .catch(next);
});

/**
 * Start the server if this module is the main entry point.
 * The server listens on the port defined by the `PORT` environment variable, or defaults to 4000.
 */
if (isMainModule(import.meta.url)) {
  const port = process.env['PORT'] || 4000;
  app.listen(port, (error) => {
    if (error) {
      throw error;
    }

    console.log(`Node Express server listening on http://localhost:${port}`);
  });
}

/**
 * Request handler used by the Angular CLI (for dev-server and during build) or Firebase Cloud Functions.
 */
export const reqHandler = createNodeRequestHandler(app);
Next, you can test the rest of PUT and DELETE using your own data to make sure the Angular 8 Universal SSR API is working.
5) Users Feature (Client) that Works with SSR
Create a simple Users component to display server data. It uses HttpClient and benefits from the SSR transfer cache.
src/app/user.component/users.component.ts:
import { CommonModule } from '@angular/common';
import { HttpClient } from '@angular/common/http';
import { Component, inject, signal } from '@angular/core';

@Component({
  selector: 'app-users.component',
  imports: [CommonModule],
  templateUrl: './users.component.html',
  styleUrl: './users.component.scss'
})
export class UsersComponent {
  private http = inject(HttpClient);
  users = signal<any[]>([]);
  loading = signal(true);


  constructor() {
    this.http.get<any[]>('/api/users').subscribe({
      next: (list) => { this.users.set(list); },
      error: (err) => console.error(err),
      complete: () => this.loading.set(false)
    });
  }
}src/app/user.component/users.component.html:
<h2>Users</h2>
@if (loading()) {
<p>Loading…</p>
}
<ul>
  <li *ngFor="let u of users()">
    {{ u.name }} <small>({{ u.email }})</small>
  </li>
</ul>
Because we enabled
provideClientHydration()and Http transfer cache, the initial GET made on the server is serialized into the HTML and reused on the client—no double fetch.
6) Seed the Database (Optional)
Create a quick script to seed docs.
// tools/seed.ts (run with tsx or ts-node)
import 'dotenv/config';
import { MongoClient } from 'mongodb';


async function run() {
  const client = new MongoClient(process.env['MONGODB_URI']!);
  await client.connect();
  const db = client.db();
  await db.collection('users').deleteMany({});
  await db.collection('users').insertMany([
    { name: 'Alice', email: '[email protected]' },
    { name: 'Bob', email: '[email protected]' },
    { name: 'Charlie', email: '[email protected]' },
  ]);
  await client.close();
  console.log('Seeded users.');
}
run();
7) Scripts & Running
Add helpful scripts to package.json:
{
  ...
  "scripts": {
    "ng": "ng",
    "start": "ng serve",
    "build": "ng build",
    "watch": "ng build --watch --configuration development",
    "test": "ng test",
    "build:ssr": "ng build && ng run djamware-angular20-ssr:server",
    "serve:ssr": "node dist/djamware-angular20-ssr/server/server.mjs",
    "seed": "tsx tools/seed.ts"
  },
  ...
}
Production-like flow:
npm run build:ssr
PORT=4000 npm run serve:ssr
# open http://localhost:4000
8) Migration Notes (Angular 8 → 20
If you are updating an existing Angular 8 Universal + MongoDB project to Angular 20 with standalone components, here are the key changes and considerations:
1. Angular Universal Setup
-
Angular 8: Required manual setup with
@nguniversal/express-engineand Angular schematics. -
Angular 20: Provides streamlined Universal integration using the Angular CLI. The
ng add @nguniversal/express-enginecommand configures most files automatically.
2. Standalone Components
-
Angular 8: Relied on
NgModulefor declaring components. -
Angular 20: Encourages the use of standalone components, eliminating the need for feature modules. Components, directives, and pipes can now declare
standalone: true.
3. Routing
-
Angular 8: Used
RouterModule.forRoot()insideAppModule. -
Angular 20: Routes are defined directly in a
routes.tsfile and imported withprovideRouter()inmain.ts.
4. Server-Side Rendering (SSR)
-
Angular 8: Required
server.tscustomization with Express. -
Angular 20: Still uses Express by default, but integrates more seamlessly with Angular Universal. Less boilerplate is needed.
5. Dependency Injection
-
Angular 8: Services were usually provided in
app.module.tsor withprovidedIn: 'root'. -
Angular 20: DI has improved with functional providers (e.g.,
provideHttpClient()) and better tree-shaking.
6. HTTP Client
-
Angular 8: Imported
HttpClientModuleinAppModule. -
Angular 20: Use
provideHttpClient()insidemain.tsfor a cleaner, standalone setup.
7. TypeScript & RxJS Updates
-
Angular 20 requires newer versions of TypeScript (5.x+) and RxJS (7.x+), which introduce stricter typing and updated operators compared to Angular 8.
8. MongoDB Integration
-
MongoDB connection setup (via Mongoose or MongoDB Node.js driver) remains similar, but now benefits from async/await and improved ES module support in Node.js.
Final Thoughts
Migrating from Angular 8 to Angular 20 requires updating the architecture to use standalone components, functional providers, and modern Angular Universal tooling. While the learning curve may feel steep, the result is a cleaner, more maintainable, and future-proof application.
9) Conclusion and Next Steps
In this updated tutorial, we’ve modernized the original Angular 8 Universal + MongoDB SSR application to Angular 20 with standalone components. By doing so, we gained a cleaner architecture, reduced module boilerplate, and improved maintainability — while still retaining the benefits of server-side rendering and MongoDB integration.
🔑 Key Takeaways
- Standalone Components → simplify Angular development by removing the dependency on
NgModules. - Angular Universal → provides SEO benefits, faster perceived load times, and improved user experiences.
- MongoDB Integration → allows scalable, data-driven applications with a NoSQL backend.
- SSR with Express → bridges frontend and backend, giving developers full control over rendering and data handling.
🚀 Next Steps
- Deploy to Production
- Host the Angular Universal app on platforms like Vercel, Netlify, or your own Node.js server.
- Optimize Performance
- Implement caching strategies, lazy loading, and MongoDB indexing.
- Enhance Security
- Add authentication (JWT, OAuth2) and sanitize user inputs.
- Add Modern Features
- Integrate APIs, real-time communication with WebSockets, or GraphQL.
✅ You now have a complete Angular 20 Universal + MongoDB SSR project as a strong starting point for building modern, production-ready web applications.
You can get the full source code on our GitHub.
If you don’t want to waste your time designing your front-end or your budget to spend by hiring a web designer, then Angular Templates is the best place to go. So, speed up your front-end web development with premium Angular templates. Choose your template for your front-end project here.
That's just the basics. If you need more deep learning about Angular, you can take the following cheap course:
- Angular - The Complete Guide (2025 Edition)
- Complete Angular Course 2025 - Master Angular in only 6 days
- Angular Deep Dive - Beginner to Advanced (Angular 20)
- Modern Angular 20 with Signals - The missing guide
- The Modern Angular Bootcamp
- Angular (Full App) with Angular Material, Angularfire & NgRx
- Angular Front End Development Beginner to Master 2025
- 30 Days of Angular: Build 30 Projects with Angular
- Angular 20 Full Course - Complete Zero to Hero Angular 20
- Angular Material In Depth (Angular 20)
Thanks!
