
Mobile apps today rely heavily on maps — for delivery tracking, ride-hailing, check-ins, travel planning, fitness tracking, and more. Flutter, with its single codebase and rich ecosystem, offers multiple ways to embed interactive maps into your Android and iOS apps.
In this tutorial, you will learn how to integrate three major map providers in Flutter:
-
Google Maps – the most widely used map service, rich with routing, places, and real-time data.
-
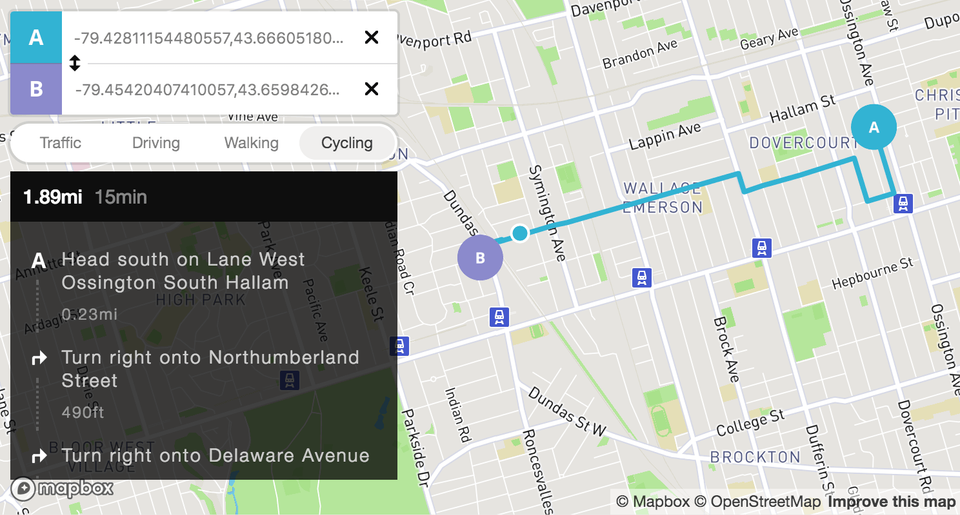
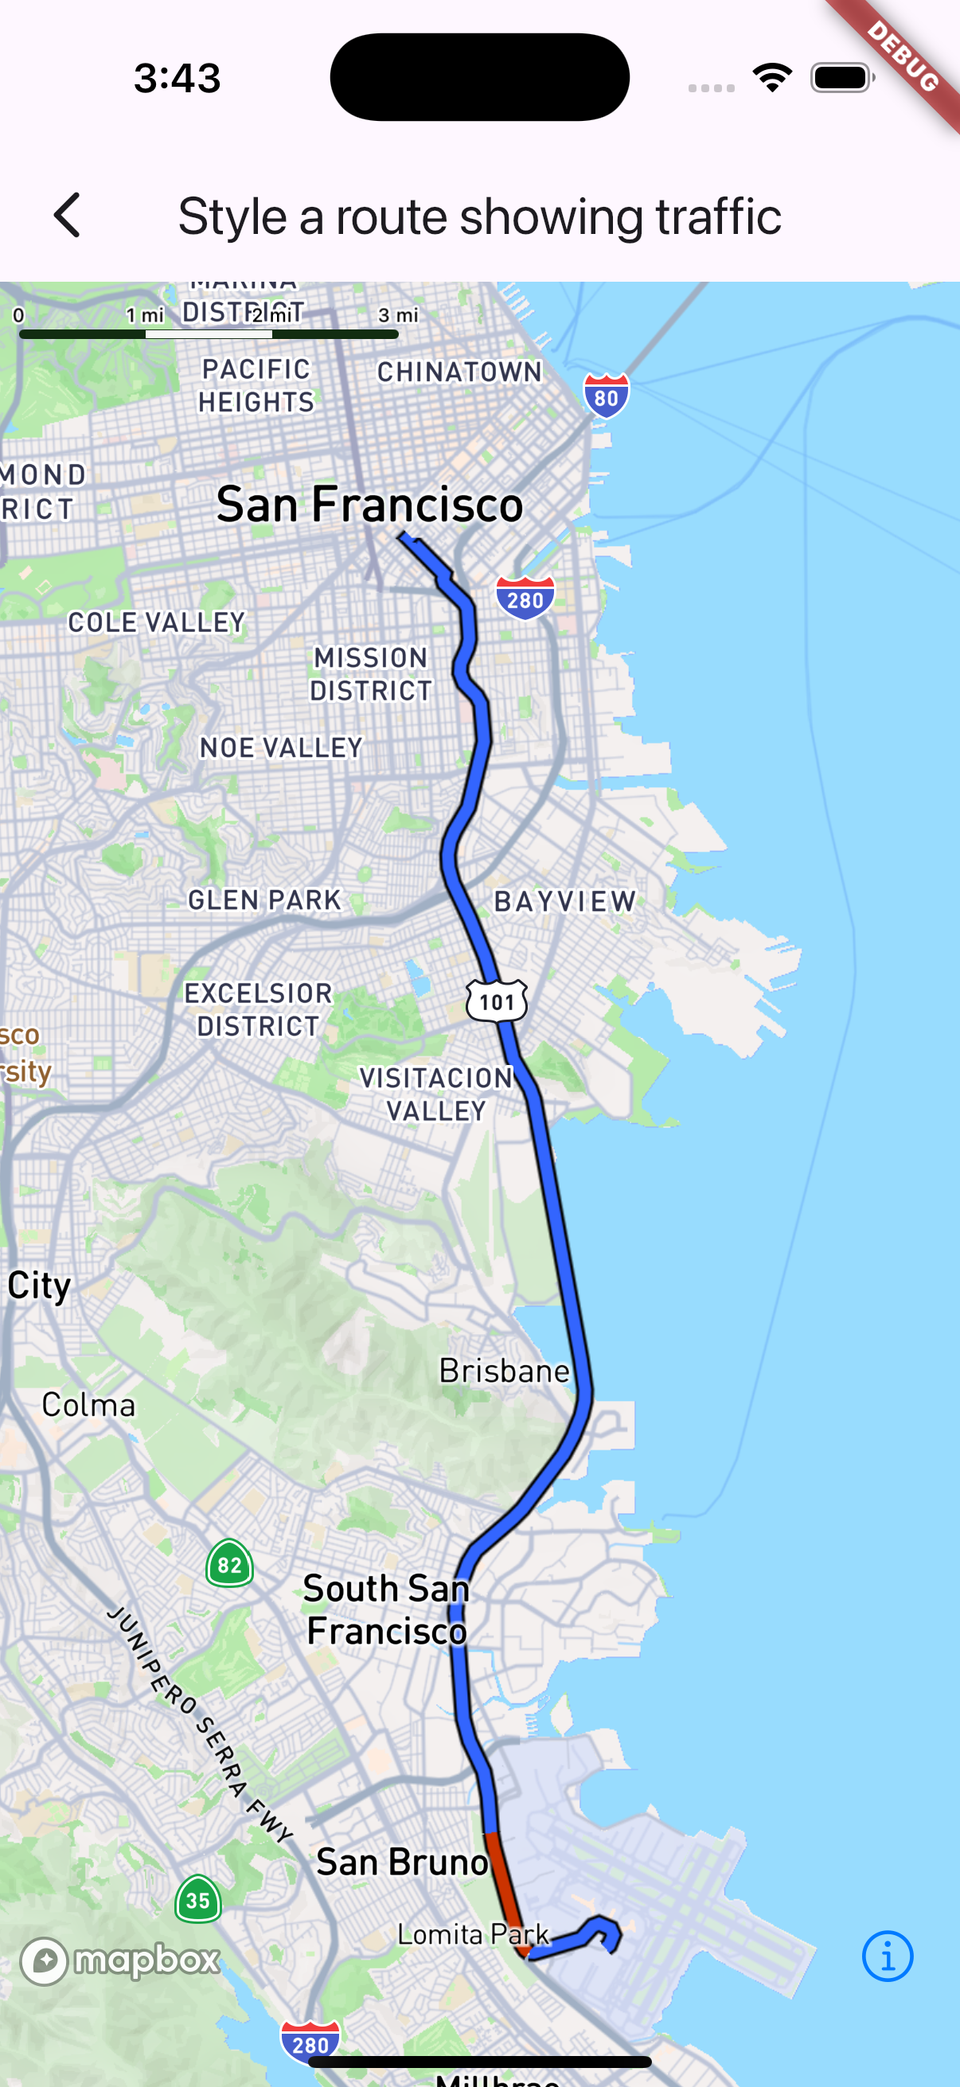
Mapbox – highly customizable maps with beautiful styles, vector tiles, and offline capabilities.
-
OpenStreetMap (OSM) – an open, community-driven map with no usage fees, ideal for hobbyists or budget-friendly apps.
We’ll walk through:
✔ Setting up each map provider
✔ Creating a minimal map widget
✔ Adding markers
✔ Handling user location
✔ Map interactions and gestures
✔ Drawing shapes (polylines, polygons, circles)
✔ Applying styles
✔ Implementing routing/directions
✔ Best practices & provider comparisons
By the end, you’ll have a fully working Flutter app that can switch between Google Maps, Mapbox, and OSM — giving you the flexibility to choose the best mapping solution for your project.
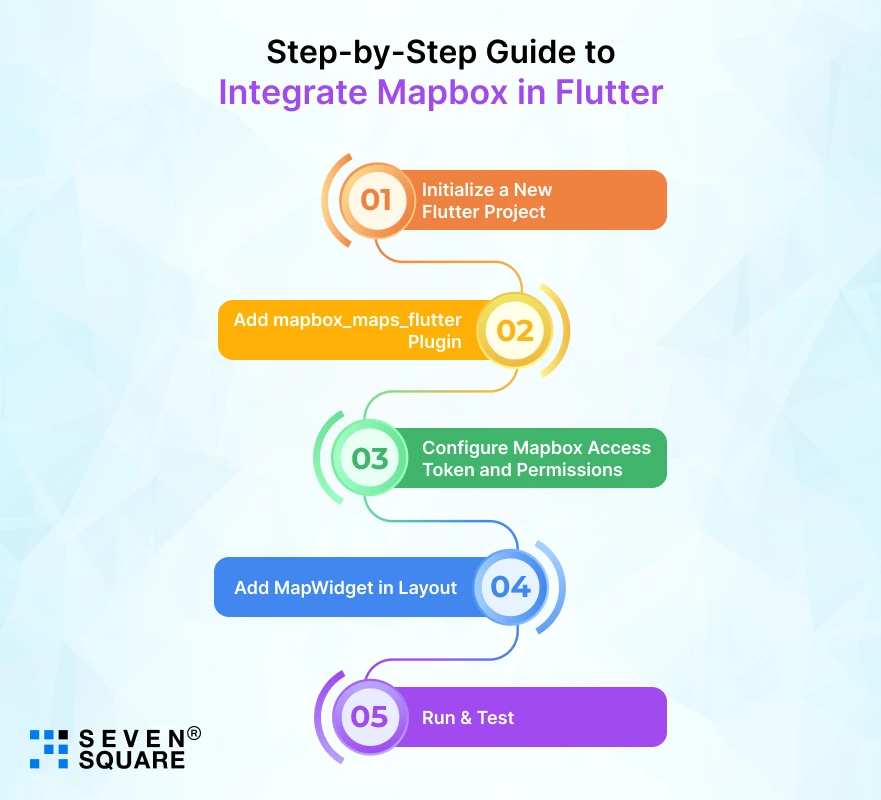
Project Setup
1. Create a New Flutter Project
flutter create flutter_maps_demo
cd flutter_maps_demo
Ensure you're using Flutter 3.22+ for the best plugin compatibility.
2. Add Dependencies
Open pubspec.yaml and add:
dependencies:
  flutter:
    sdk: flutter

  # The following adds the Cupertino Icons font to your application.
  # Use with the CupertinoIcons class for iOS style icons.
  cupertino_icons: ^1.0.8

  # Google Maps
  google_maps_flutter: ^2.5.0

  # Mapbox Maps
  mapbox_maps_flutter: ^2.17.0

  # OpenStreetMap via flutter_map
  flutter_map: ^8.2.2
  latlong2: ^0.9.0

  # Location package
  geolocator: ^14.0.2
Then run:
flutter pub get3. Android Setup
Google Maps
Add your API key in android/app/src/main/AndroidManifest.xml:
<meta-data
    android:name="com.google.android.geo.API_KEY"
    android:value="YOUR_GOOGLE_MAPS_API_KEY"/>
Mapbox
Add your access token:
<meta-data
    android:name="com.mapbox.token"
    android:value="YOUR_MAPBOX_ACCESS_TOKEN"/>
Location Permissions
<uses-permission android:name="android.permission.ACCESS_FINE_LOCATION"/>
<uses-permission android:name="android.permission.ACCESS_COARSE_LOCATION"/>
4. iOS Setup
In ios/Runner/AppDelegate.swift, enable Google Maps:
GMSServices.provideAPIKey("YOUR_GOOGLE_MAPS_API_KEY")In ios/Runner/Info.plist, add:
<key>NSLocationWhenInUseUsageDescription</key>
<string>Your location is required to show your current position on the map.</string>
This completes the setup.
Setting Up API Keys
Before showing the maps in your Flutter app, you must configure API keys or access tokens for each provider (except OpenStreetMap, which is free and keyless by default). Below are the complete steps to prepare Google Maps, Mapbox, and OSM.
1. Google Maps API Key Setup
Google Maps requires enabling a set of APIs and generating an API key.
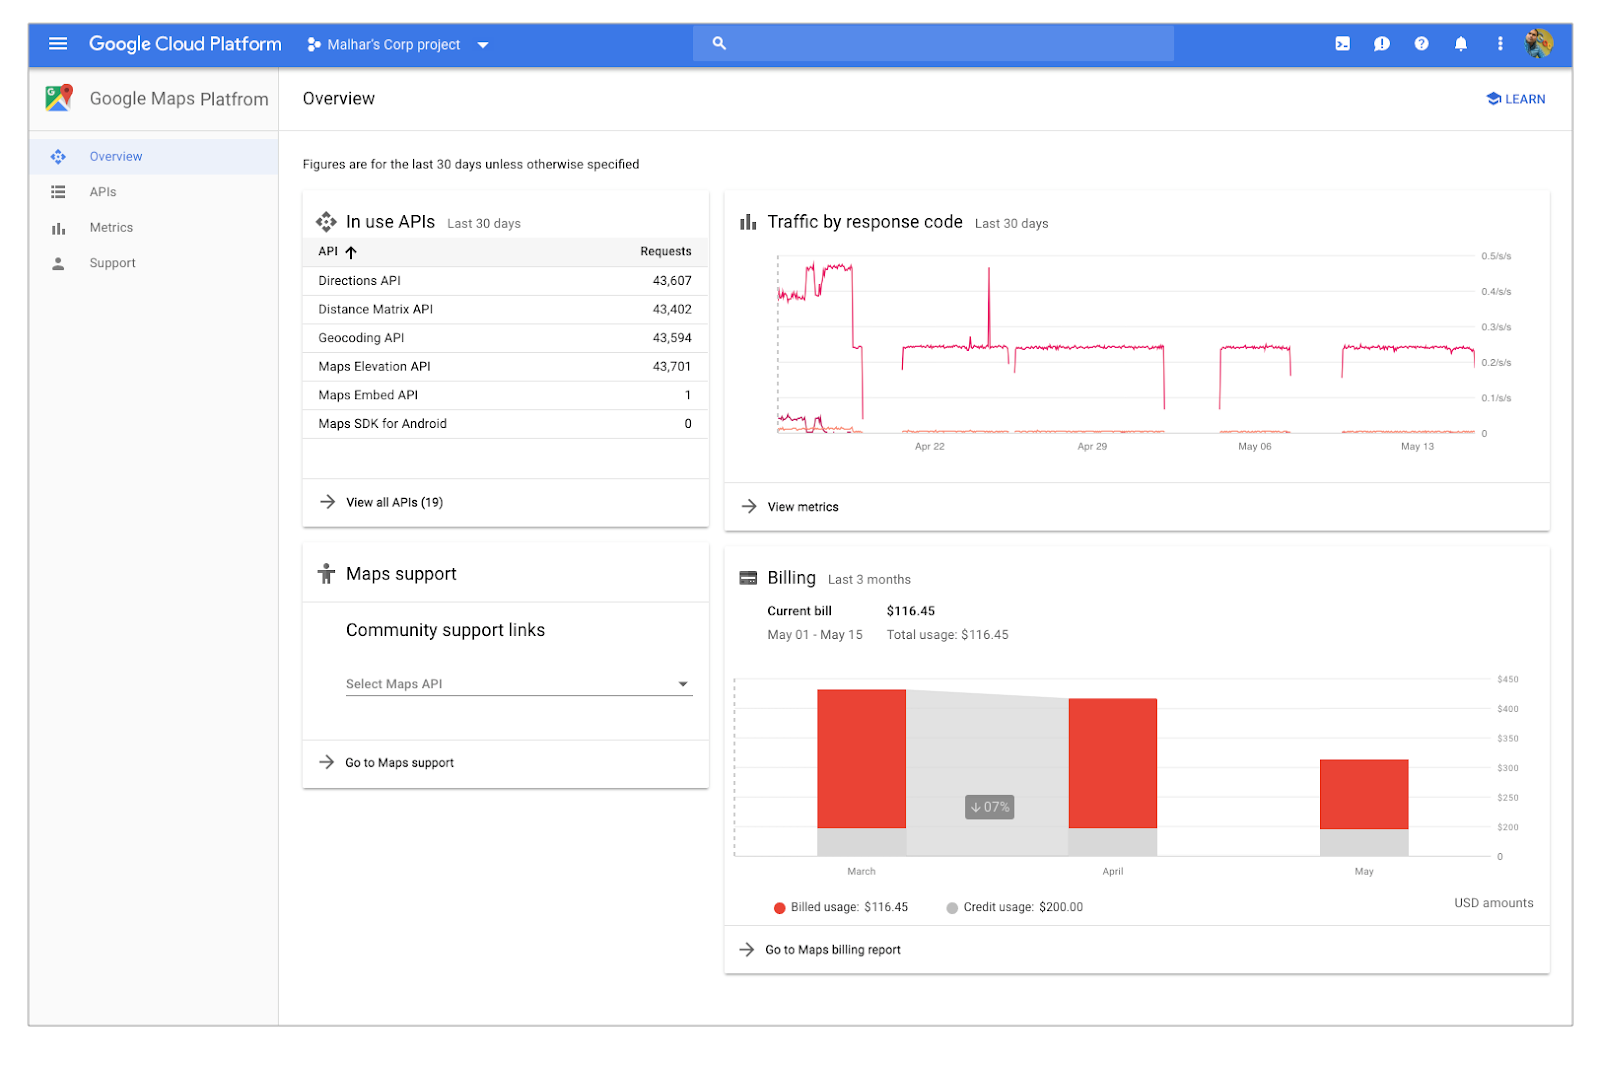
Step 1 — Open Google Cloud Console
Go to:
https://console.cloud.google.com/
Create a new project or select an existing one.
Step 2 — Enable the Required APIs
Navigate to:
APIs & Services → Library
Enable:
-
Maps SDK for Android
-
Maps SDK for iOS
-
(Optional) Directions API
-
(Optional) Places API
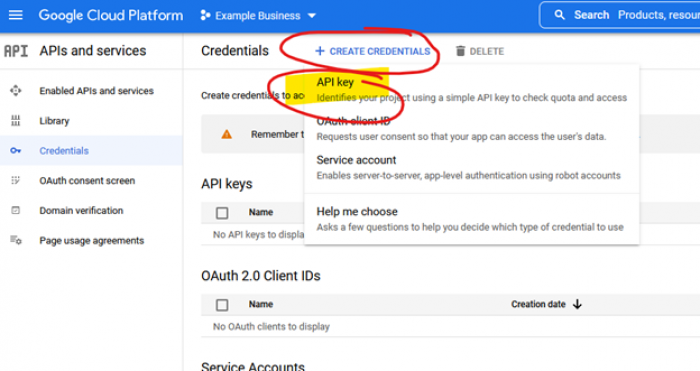
Step 3 — Create an API Key
Go to:
APIs & Services → Credentials → Create Credentials → API key
Copy the generated key.
Step 4 — Add Restrictions (Recommended)
Choose:
-
Application restrictions → Android apps / iOS apps
-
API restrictions → Restrict key usage to only Maps, Directions, Places
Step 5 — Add to Flutter Project
Android:
android/app/src/main/AndroidManifest.xml
<meta-data
  android:name="com.google.android.geo.API_KEY"
  android:value="YOUR_GOOGLE_MAPS_API_KEY"/>
iOS:
ios/Runner/AppDelegate.swift
GMSServices.provideAPIKey("YOUR_GOOGLE_MAPS_API_KEY")Google Maps is now ready.
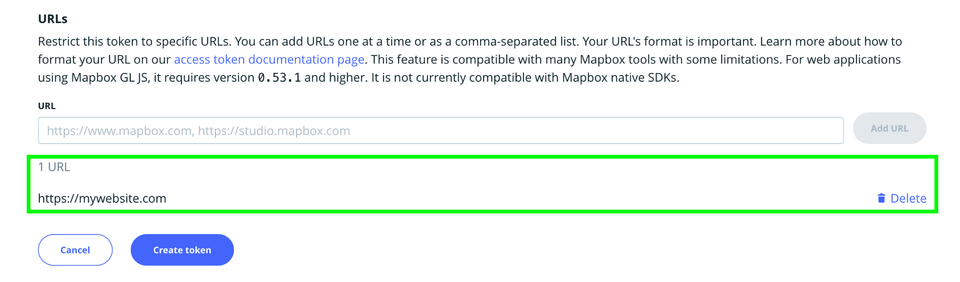
2. Mapbox Access Token Setup

Mapbox requires an Access Token and provides styling & navigation features.
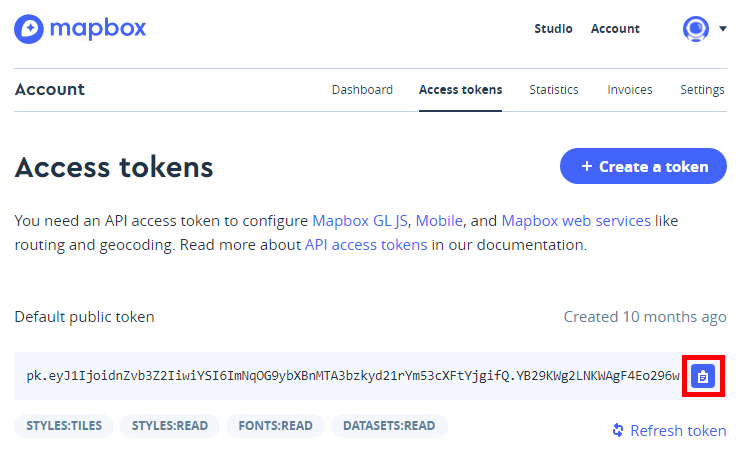
Step 1 — Log in to Mapbox Dashboard
https://account.mapbox.com/Step 2 — Create an Access Token
Go to:
Access tokens → Create new token
Recommended settings:
-
Token scopes:
styles:read,tiles:read,fonts:read,datasets:read -
URL restrictions: leave open for dev, restrict later for production
Copy the token.
Step 3 — Add Token to Flutter App
Android Manifest:
<meta-data
  android:name="com.mapbox.token"
  android:value="YOUR_MAPBOX_ACCESS_TOKEN"/>
iOS Info.plist:
<key>MBXAccessToken</key>
<string>YOUR_MAPBOX_ACCESS_TOKEN</string>
3. OpenStreetMap Setup


OpenStreetMap does not require an API key — however, you must follow:
-
OSM tile usage policies
-
Avoid heavy production traffic on the default tile server
-
Use alternative providers like:
-
MapTiler
-
OpenMapTiles
-
Stadia Maps
-
Thunderforest (requires a free key)
-
A typical tile setup in Flutter (using default OSM tiles):
TileLayer(
  urlTemplate: "https://tile.openstreetmap.org/{z}/{x}/{y}.png",
  userAgentPackageName: 'com.example.app',
)
4. Summary Table
| Provider | Requires API Key? | Pricing | Offline Support | Custom Styling |
|---|---|---|---|---|
| Google Maps | Yes | Pay-as-you-go | Limited | JSON styles |
| Mapbox | Yes | Free tier + paid | Excellent (vector tiles) | Full styling |
| OpenStreetMap | No | Free | Depends on tile provider | Depends on provider |
Your app is now fully prepared to load Google Maps, Mapbox, or OSM tiles.
Displaying a Basic Map
In this section, you will learn how to display a minimal map for each provider:
-
Google Maps
-
Mapbox
-
OpenStreetMap (OSM) using
flutter_map
We’ll create a simple UI that allows switching between map providers, but first, let’s implement the basic standalone map widgets.
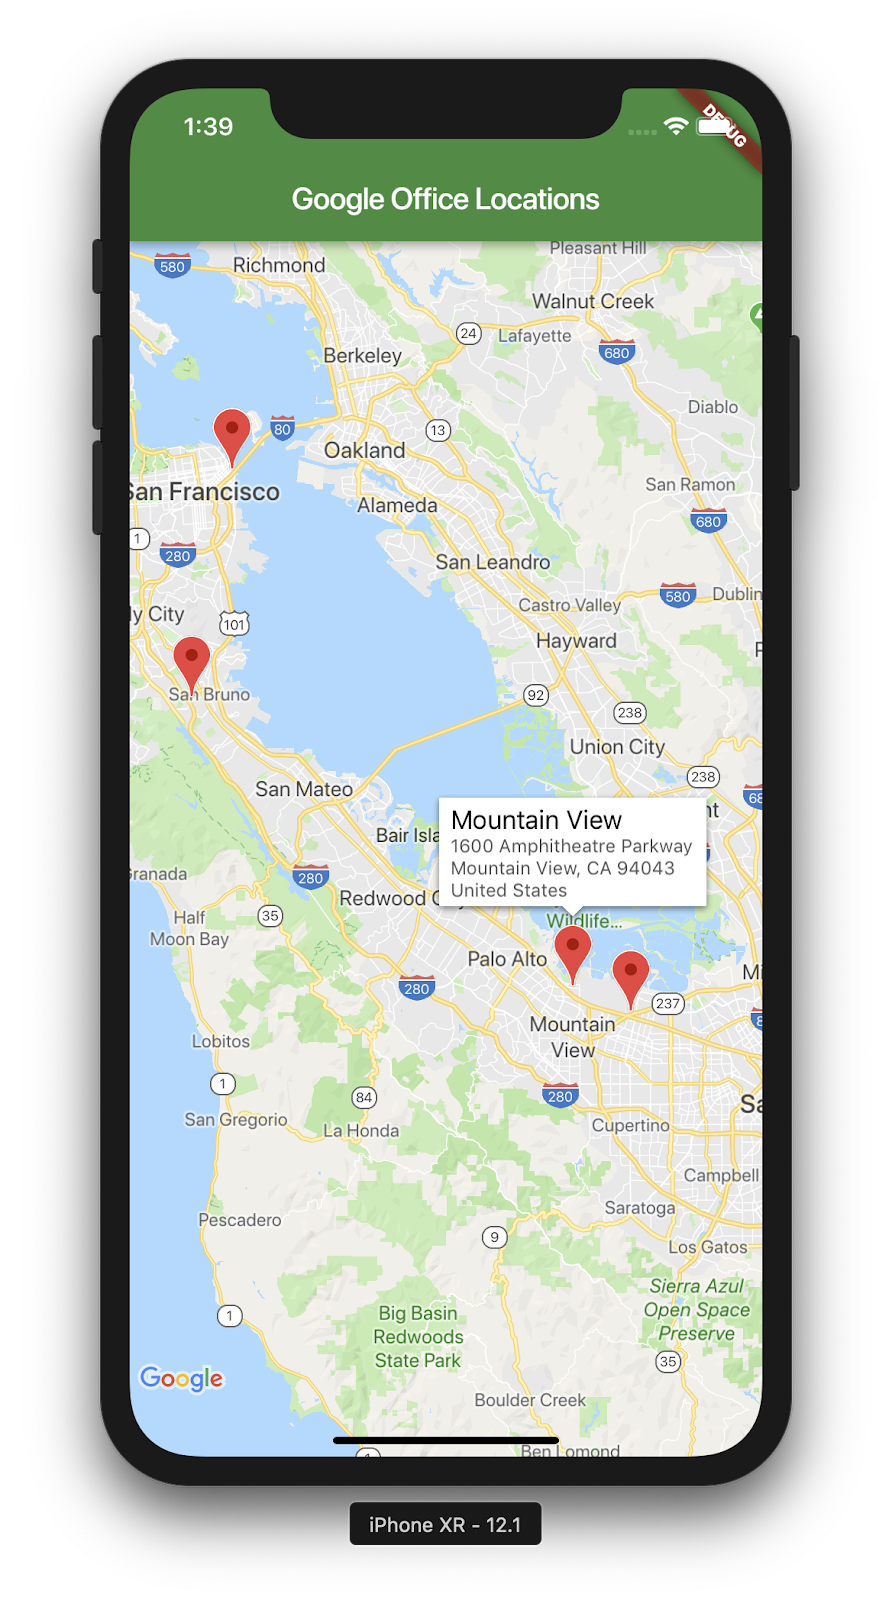
1. Google Maps — Basic Map Widget


Add this to google_map_view.dart:
import 'package:flutter/material.dart';
import 'package:google_maps_flutter/google_maps_flutter.dart';

class GoogleMapView extends StatefulWidget {
  const GoogleMapView({super.key});

  @override
  State<GoogleMapView> createState() => _GoogleMapViewState();
}

class _GoogleMapViewState extends State<GoogleMapView> {
  late GoogleMapController mapController;

  final LatLng initialPosition = const LatLng(-6.200000, 106.816666); // Jakarta

  @override
  Widget build(BuildContext context) {
    return GoogleMap(
      initialCameraPosition: CameraPosition(
        target: initialPosition,
        zoom: 12,
      ),
      onMapCreated: (controller) {
        mapController = controller;
      },
      myLocationEnabled: false,
      zoomControlsEnabled: false,
    );
  }
}
This displays a simple Google Map centered on Jakarta.
2. Mapbox — Basic Map Widget


Create mapbox_map_view.dart:
import 'package:flutter/material.dart';
import 'package:mapbox_maps_flutter/mapbox_maps_flutter.dart';

class MapboxMapView extends StatefulWidget {
  const MapboxMapView({super.key});

  @override
  State<MapboxMapView> createState() => _MapboxMapViewState();
}

class _MapboxMapViewState extends State<MapboxMapView> {
  MapboxMap? mapboxMap;

  @override
  Widget build(BuildContext context) {
    return MapWidget(
      styleUri: MapboxStyles.MAPBOX_STREETS,
      onMapCreated: (controller) {
        mapboxMap = controller;
        mapboxMap!.setCamera(
          CameraOptions(
            center: Point(coordinates: Position(106.816666, -6.200000)),
            zoom: 12,
          ),
        );
      },
    );
  }
}
Mapbox requires a style URI. Common styles include:
-
MapboxStyles.MAPBOX_STREETS -
MapboxStyles.SATELLITE -
MapboxStyles.OUTDOORS
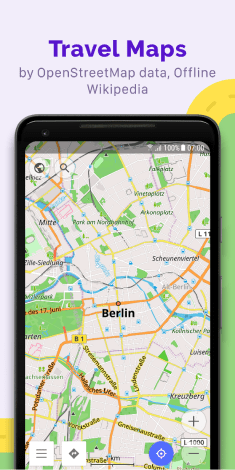
3. OpenStreetMap (flutter_map) — Basic Map Widget

Create osm_map_view.dart:
import 'package:flutter/material.dart';
import 'package:flutter_map/flutter_map.dart';
import 'package:latlong2/latlong.dart';

class OSMMapView extends StatelessWidget {
  const OSMMapView({super.key});

  final LatLng center = const LatLng(-6.200000, 106.816666); // Jakarta

  @override
  Widget build(BuildContext context) {
    return FlutterMap(
      options: MapOptions(
        initialCenter: center,
        initialZoom: 12,
      ),
      children: [
        TileLayer(
          urlTemplate: "https://tile.openstreetmap.org/{z}/{x}/{y}.png",
          userAgentPackageName: "com.example.flutter_maps_demo",
        )
      ],
    );
  }
}
This renders OSM tiles with zero configuration required.
4. Optional: Switching Between Map Providers
Create a simple tab view in main.dart:
import 'package:flutter/material.dart';
import 'package:flutter_maps_demo/widgets/google_map_view.dart';
import 'package:flutter_maps_demo/widgets/mapbox_map_view.dart';
import 'package:flutter_maps_demo/widgets/osm_map_view.dart';

void main() {
  runApp(const MyApp());
}

class MyApp extends StatelessWidget {
  const MyApp({super.key});

  @override
  Widget build(BuildContext context) {
    return MaterialApp(
      debugShowCheckedModeBanner: false,
      home: DefaultTabController(
        length: 3,
        child: Scaffold(
          appBar: AppBar(
            title: const Text("Flutter Maps Comparison"),
            bottom: const TabBar(
              tabs: [
                Tab(text: "Google"),
                Tab(text: "Mapbox"),
                Tab(text: "OSM"),
              ],
            ),
          ),
          body: const TabBarView(
            children: [GoogleMapView(), MapboxMapView(), OSMMapView()],
          ),
        ),
      ),
    );
  }
}
This provides a clean way to switch between the 3 map implementations during development.
5. Summary
At this point, your Flutter app can display:
| Map Provider | Widget | Configuration Required |
|---|---|---|
| Google Maps | GoogleMap |
API key (iOS + Android) |
| Mapbox | MapWidget |
Access token |
| OpenStreetMap | FlutterMap |
None (uses OSM tiles) |
You now have a strong foundation to build more advanced map features.
Adding Markers
Markers are essential for showing points of interest, pins, user-selected locations, and more.
In this section, we’ll cover how to add:
-
A single marker
-
Multiple markers
-
Custom markers (Google Maps is limited; Mapbox + OSM allow full customization)
We will implement markers for Google Maps, Mapbox, and OpenStreetMap (flutter_map).
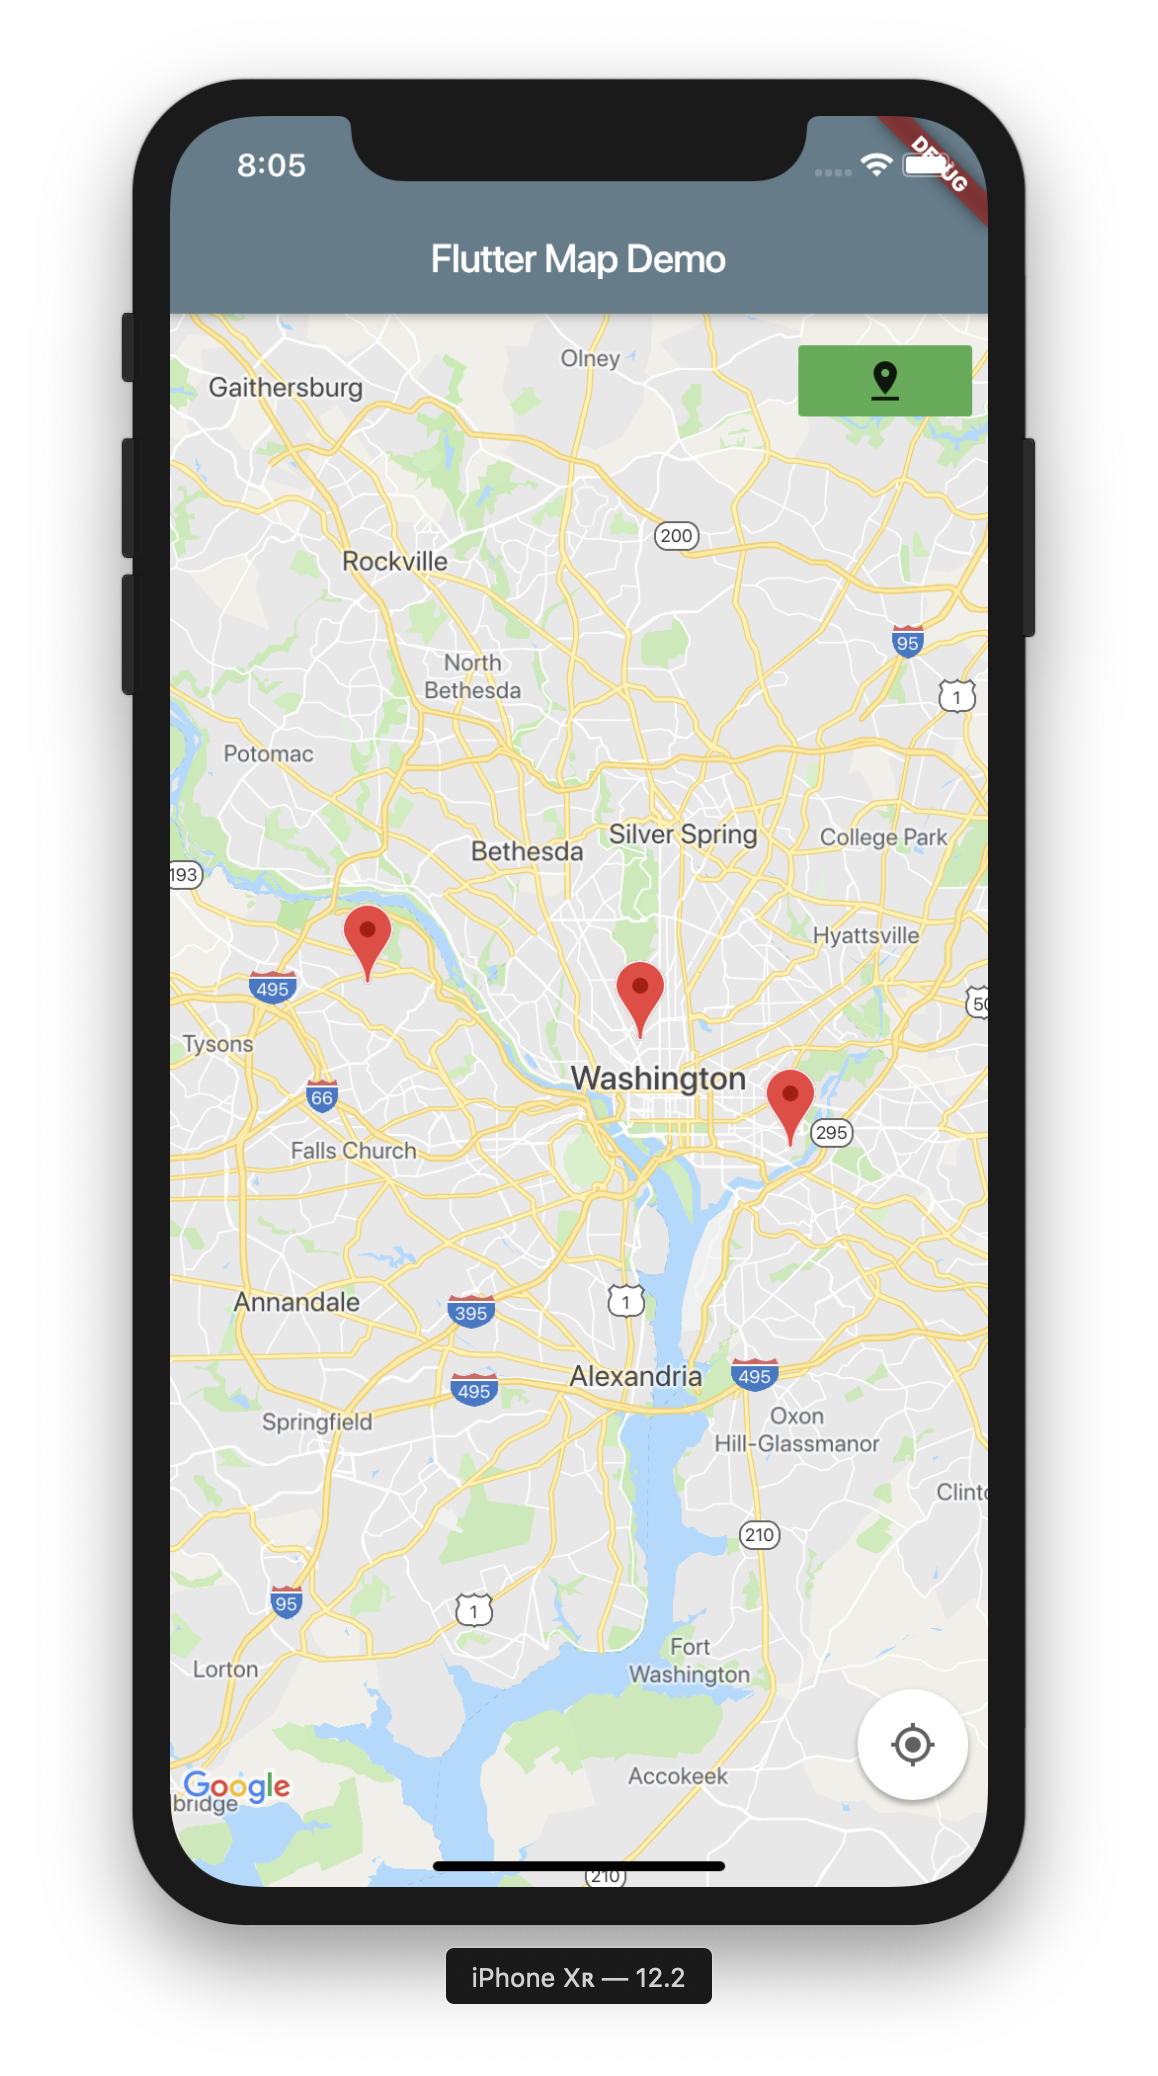
1. Adding Markers in Google Maps


Google Maps allows adding default markers easily. Custom image markers are supported but require asset conversion — we’ll cover that later.
Single Marker
Modify GoogleMapView:
class _GoogleMapViewState extends State<GoogleMapView> {
  late GoogleMapController mapController;

  final LatLng initialPosition = const LatLng(-6.200000, 106.816666);
  final Set<Marker> markers = {
    Marker(
      markerId: MarkerId("jakarta"),
      position: LatLng(-6.200000, 106.816666),
      infoWindow: InfoWindow(title: "Jakarta"),
    ),
  };

  @override
  Widget build(BuildContext context) {
    return GoogleMap(
      initialCameraPosition: CameraPosition(
        target: initialPosition,
        zoom: 12,
      ),
      markers: markers,
      onMapCreated: (controller) => mapController = controller,
    );
  }
}
Multiple Markers
You can generate markers dynamically:
  final List<LatLng> locations = [
    LatLng(-6.200000, 106.816666), // Jakarta
    LatLng(-6.914744, 107.609810), // Bandung
    LatLng(-7.250445, 112.768845), // Surabaya
  ];

  late Set<Marker> markers = locations.map((latLng) {
    return Marker(markerId: MarkerId(latLng.toString()), position: latLng);
  }).toSet();
2. Adding Markers in Mapbox
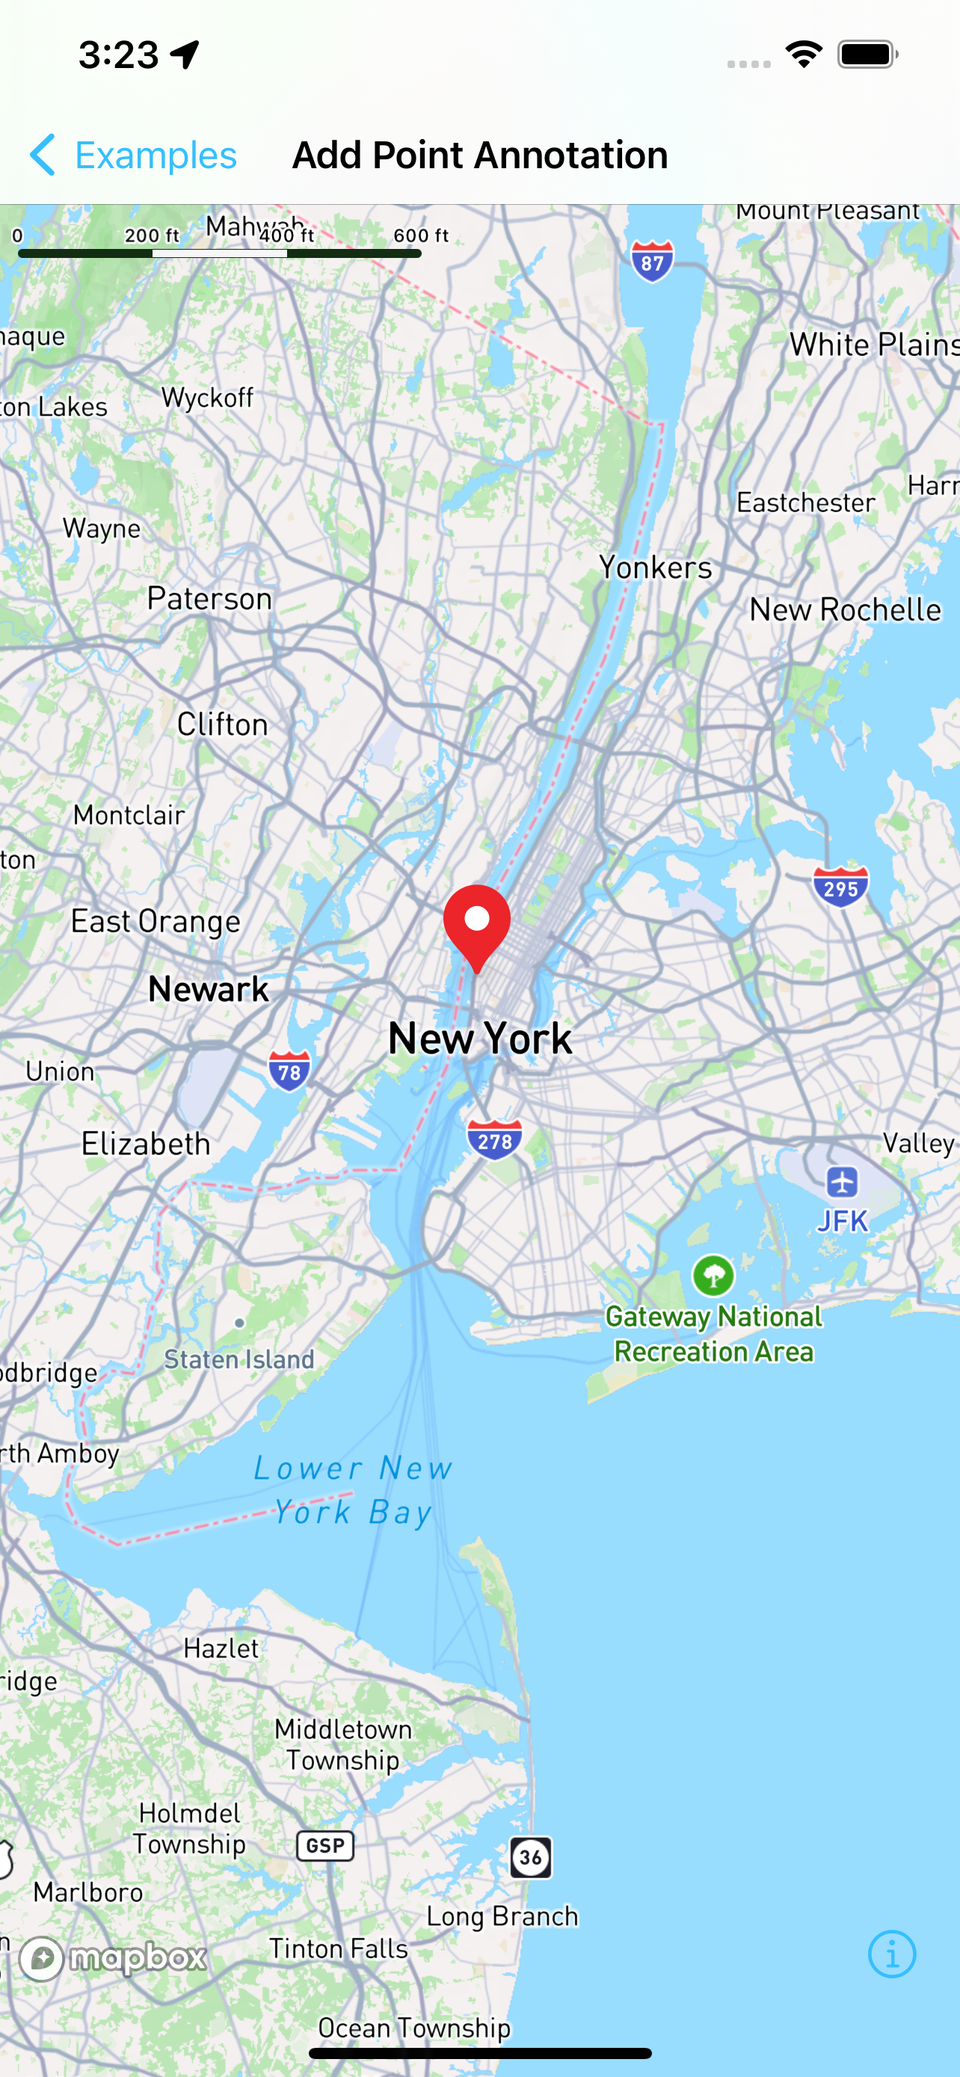

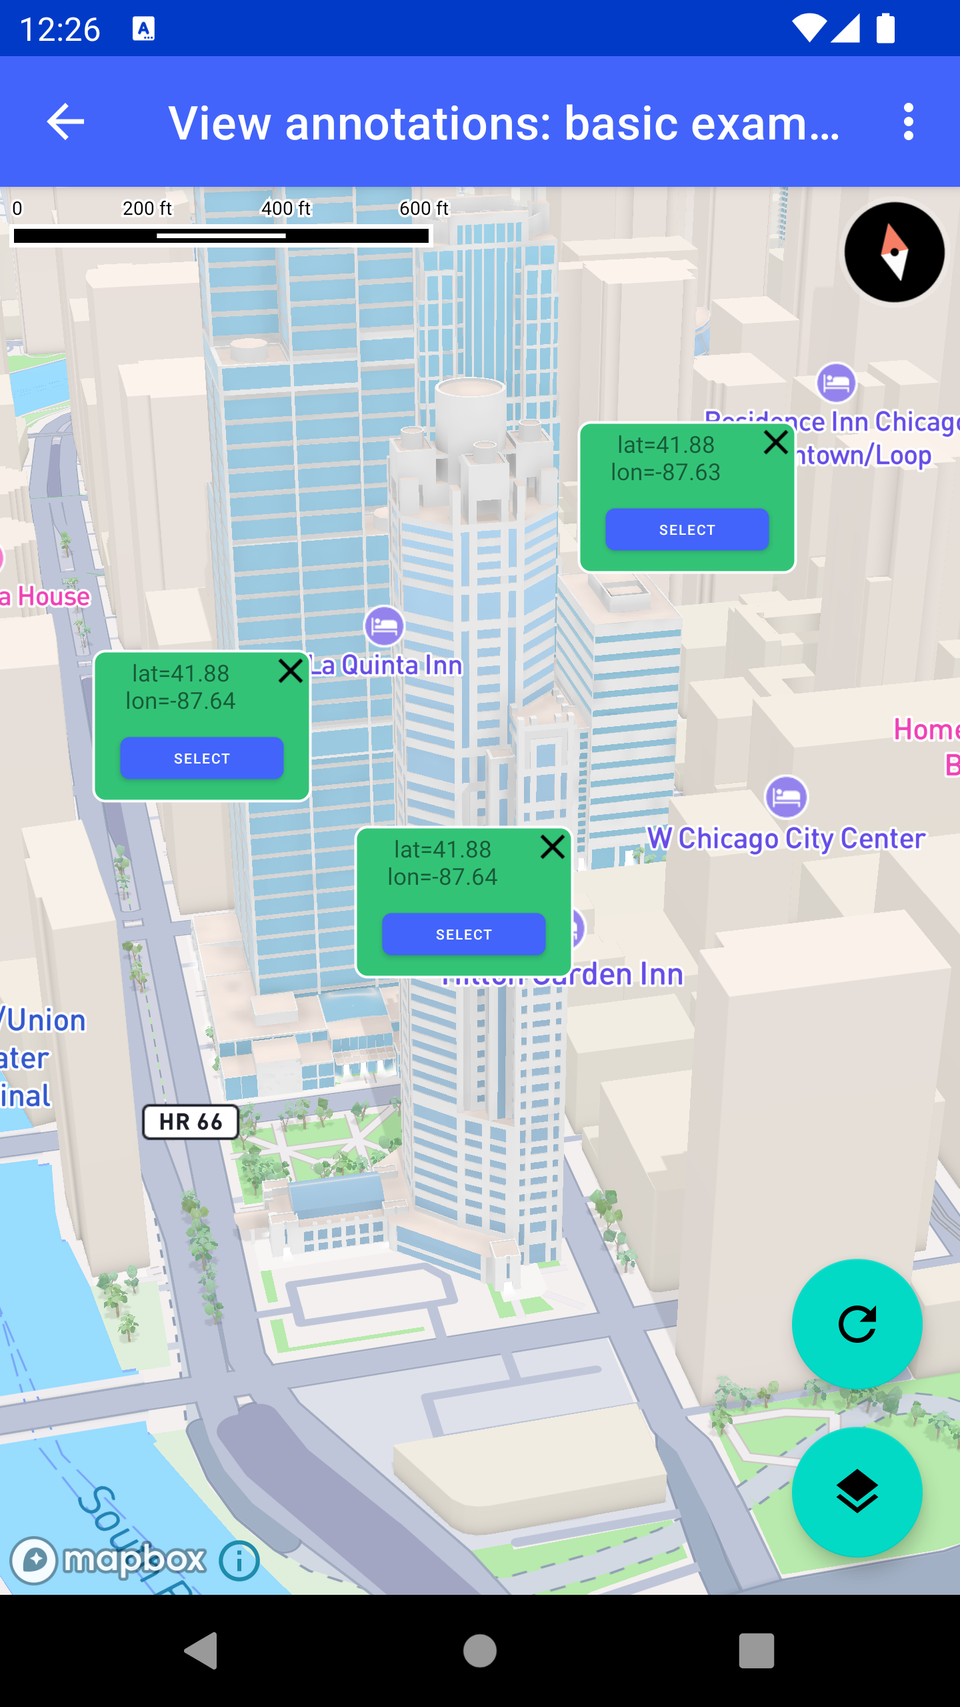
Mapbox uses Annotations instead of markers.
Single Marker
  void _addMapboxMarker() async {
    await _pointAnnotationManager.create(
      PointAnnotationOptions(
        geometry: Point(coordinates: Position(106.816666, -6.200000)),
        iconSize: 1.5,
        iconImage: "marker-icon", // must be registered first
      ),
    );
  }
Call it inside onMapCreated:
class _MapboxMapViewState extends State<MapboxMapView> {
  MapboxMap? mapboxMap;
  late PointAnnotationManager _pointAnnotationManager;

  @override
  Widget build(BuildContext context) {
    return MapWidget(
      styleUri: MapboxStyles.MAPBOX_STREETS,
      onMapCreated: (controller) async {
        mapboxMap = controller;
        // Create annotation manager
        _pointAnnotationManager = await mapboxMap!.annotations
            .createPointAnnotationManager();
        _addMapboxMarker();
        _addMultipleMarkers();
        mapboxMap!.setCamera(
          CameraOptions(
            center: Point(coordinates: Position(106.816666, -6.200000)),
            zoom: 12,
          ),
        );
      },
    );
  }

  ...
}
Using a Custom Asset Marker
Register the image first:
mapboxMap?.loadStyle(uri: MapboxStyles.MAPBOX_STREETS).then((_) async {
  final bytes = await rootBundle.load('assets/marker.png');
  await mapboxMap?.style.addImage(
    'marker-icon',
    bytes.buffer.asUint8List(),
  );
});
Then the same createPointAnnotation call will use your asset.
Multiple Markers
void _addMultipleMarkers() async {
final points = [
Position(106.816666, -6.200000), // Jakarta
Position(107.609810, -6.914744), // Bandung
Position(112.768845, -7.250445), // Surabaya
];
for (var pos in points) {
await _pointAnnotationManager.create(
PointAnnotationOptions(
geometry: Point(coordinates: pos),
iconImage: "marker-icon",
),
);
}
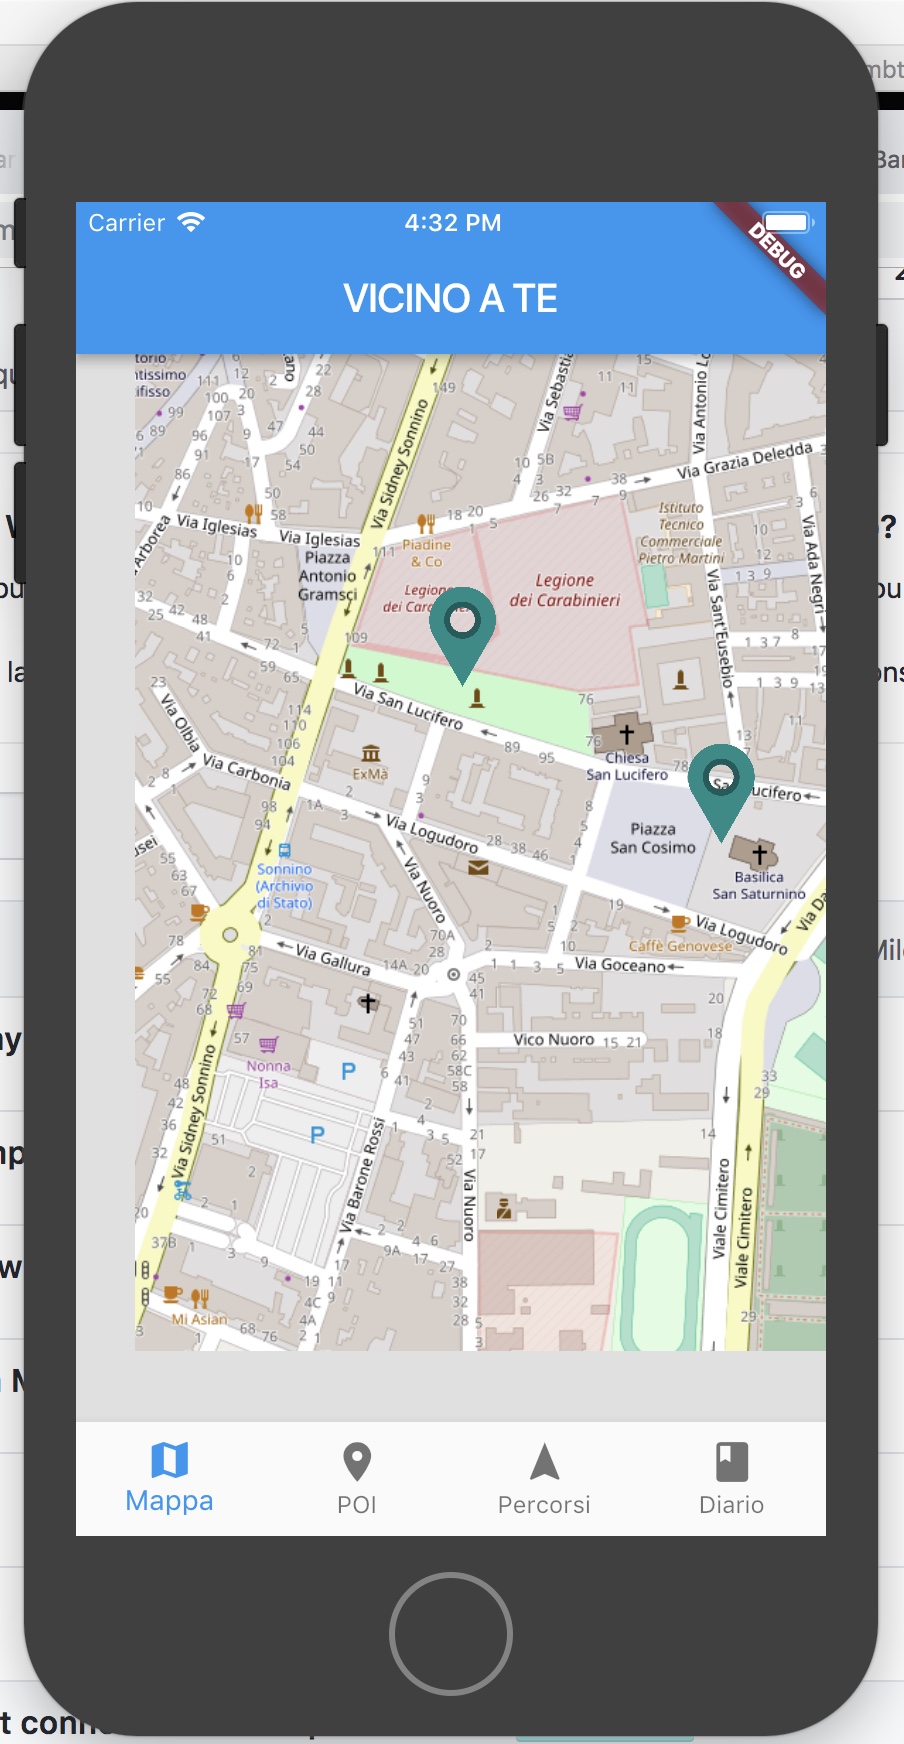
}3. Adding Markers in OpenStreetMap (flutter_map)

flutter_map makes marker creation extremely flexible — you can use any Flutter widget.
Single Marker
MarkerLayer(
  markers: [
    Marker(
      width: 40,
      height: 40,
      point: LatLng(-6.200000, 106.816666),
      child: const Icon(Icons.location_pin, color: Colors.red, size: 40),
    ),
  ],
)
Multiple Markers
final points = [
LatLng(-6.200000, 106.816666),
LatLng(-6.914744, 107.609810),
LatLng(-7.250445, 112.768845),
];
MarkerLayer(
markers: points.map((p) {
return Marker(
width: 40,
height: 40,
point: p,
child: const Icon(Icons.location_on, color: Colors.blue),
);
}).toList(),
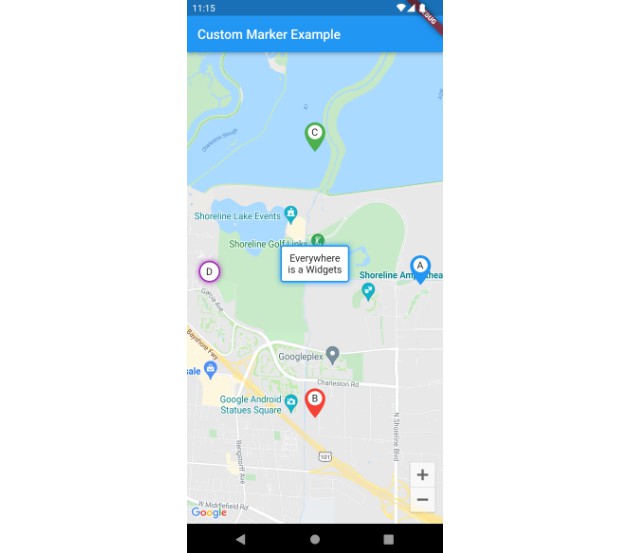
)Custom Marker Widgets
You can use any widget: images, containers, animations, etc.
Marker(
  width: 50,
  height: 50,
  point: LatLng(-6.200000, 106.816666),
  child: Column(
    children: [
      Image.asset("assets/custom_pin.png", width: 40),
      const Text("Jakarta", style: TextStyle(fontSize: 12)),
    ],
  ),
)
This level of customization is not possible in Google Maps, making OSM ideal for UI-heavy maps.
4. Comparison Table
| Feature | Google Maps | Mapbox | OpenStreetMap (flutter_map) |
|---|---|---|---|
| Basic Marker | ✔️ | ✔️ | ✔️ |
| Custom Image Marker | ✔️ (limited) | ✔️ | ✔️ |
| Widget Marker | ❌ | ❌ | ✔️ |
| Dynamic Marker Updates | Medium | Excellent | Excellent |
| Annotation API | Basic | Powerful | Flexible |
5. Summary
At this point, your Flutter app can show:
-
Basic markers
-
Multiple markers
-
Custom markers depending on provider capabilities
Markers are one of the most commonly used map features — and now you have a working implementation for all three providers.
User Location & Permissions
Displaying the user’s current location is one of the most requested features in map-based apps.
In this section, we will:
-
Request location permissions
-
Retrieve the user’s current GPS coordinates
-
Move the map camera to the user’s location
-
Show a blue dot or custom user marker, depending on the map provider
We'll use the geolocator package because it provides a unified, reliable API for Android & iOS.
1. Installing & Configuring Geolocator
You already added it earlier:
geolocator: ^14.0.2Now configure permissions.
Android Permissions
In android/app/src/main/AndroidManifest.xml:
<uses-permission android:name="android.permission.ACCESS_FINE_LOCATION" />
<uses-permission android:name="android.permission.ACCESS_COARSE_LOCATION" />
Android 12+ also requires:
<uses-permission android:name="android.permission.ACCESS_BACKGROUND_LOCATION" />(Only if your app needs location in the background.)
iOS Permissions
In ios/Runner/Info.plist:
<key>NSLocationWhenInUseUsageDescription</key>
<string>We need your location to show your current position on the map.</string>
2. Requesting Permission in Flutter
Create a helper function:
import 'package:geolocator/geolocator.dart';

Future<Position?> determinePosition() async {
  bool serviceEnabled;
  LocationPermission permission;

  // Check if location service is enabled
  serviceEnabled = await Geolocator.isLocationServiceEnabled();
  if (!serviceEnabled) {
    return Future.error('Location services are disabled.');
  }

  // Check permission status
  permission = await Geolocator.checkPermission();
  if (permission == LocationPermission.denied) {
    permission = await Geolocator.requestPermission();
    if (permission == LocationPermission.denied) {
      return Future.error('Location permissions are denied.');
    }
  }

  if (permission == LocationPermission.deniedForever) {
    return Future.error(
        'Location permissions are permanently denied, we cannot request.');
  }

  // Get current position
  return await Geolocator.getCurrentPosition();
}
3. Showing User Location on Google Maps


Google Maps makes this easy with myLocationEnabled.
Modify your GoogleMapView:
class _GoogleMapViewState extends State<GoogleMapView> {
  late GoogleMapController mapController;
  LatLng? _currentPos;

  @override
  void initState() {
    super.initState();
    _getCurrentLocation();
  }

  void _getCurrentLocation() async {
    final pos = await determinePosition();
    setState(() {
      _currentPos = LatLng(pos!.latitude, pos.longitude);
    });

    mapController.animateCamera(
      CameraUpdate.newLatLng(_currentPos!),
    );
  }

  @override
  Widget build(BuildContext context) {
    return GoogleMap(
      initialCameraPosition: const CameraPosition(
        target: LatLng(-6.200000, 106.816666),
        zoom: 12,
      ),
      onMapCreated: (c) => mapController = c,
      myLocationEnabled: true,
      myLocationButtonEnabled: true,
    );
  }
}
Google Maps automatically displays the blue dot.
4. Showing User Location on Mapbox
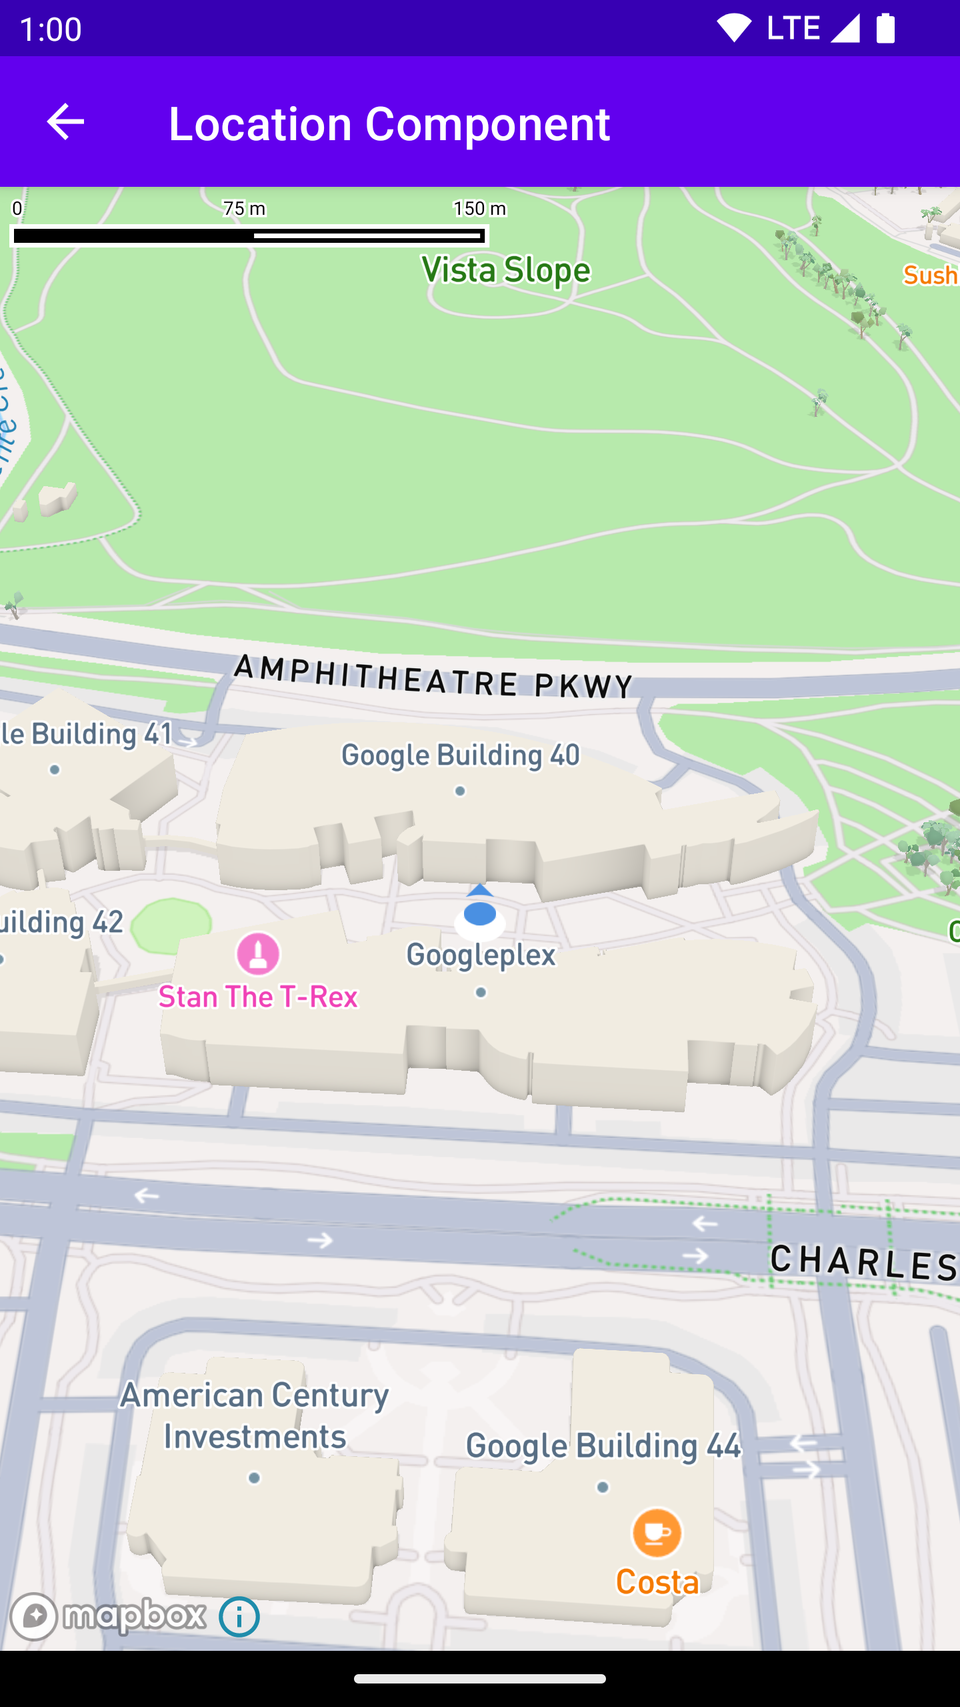
Mapbox uses a location puck (a stylized blue dot).
Inside onMapCreated:
mapboxMap!.location.updateSettings(LocationComponentSettings(
  enabled: true,
));
To move the camera to the user position:
void _moveToUserLocation() async {
  final pos = await determinePosition();

  mapboxMap!.setCamera(
    CameraOptions(
      center: Point(
        coordinates: Position(pos.longitude, pos.latitude),
      ),
      zoom: 14,
    ),
  );
}
Call it after enabling the location component:
_moveToUserLocation();5. Showing User Location on OpenStreetMap (flutter_map)
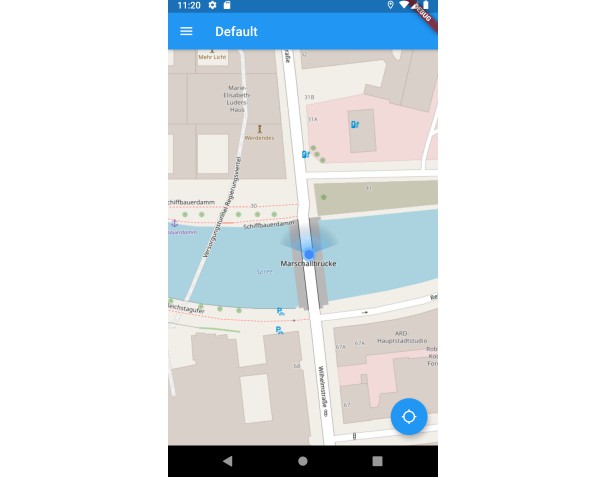

flutter_map has no built-in blue dot, but you can add a custom marker.
Example:
class OSMMapView extends StatefulWidget {
  const OSMMapView({super.key});

  @override
  State<OSMMapView> createState() => _OSMMapViewState();
}

class _OSMMapViewState extends State<OSMMapView> {
  LatLng? _userLocation;

  @override
  void initState() {
    super.initState();
    _getLocation();
  }

  void _getLocation() async {
    final pos = await determinePosition();
    setState(() {
      _userLocation = LatLng(pos!.latitude, pos.longitude);
    });
  }

  @override
  Widget build(BuildContext context) {
    return FlutterMap(
      options: MapOptions(
        initialCenter:
            _userLocation ?? const LatLng(-6.200000, 106.816666),
        initialZoom: 13,
      ),
      children: [
        TileLayer(
          urlTemplate: "https://tile.openstreetmap.org/{z}/{x}/{y}.png",
          userAgentPackageName: "com.example.flutter_maps_demo",
        ),
        if (_userLocation != null)
          MarkerLayer(
            markers: [
              Marker(
                width: 40,
                height: 40,
                point: _userLocation!,
                child: const Icon(Icons.my_location, color: Colors.blue),
              )
            ],
          ),
      ],
    );
  }
}
6. Comparison Table
| Feature | Google Maps | Mapbox | OSM (flutter_map) |
|---|---|---|---|
| Built-in blue dot | ✔️ | ✔️ Location Puck | ❌ (manual marker) |
| Auto camera tracking | ✔️ | ✔️ | ✔️ (custom logic) |
| Permission handling | Manual | Manual | Manual |
| Easiest setup | ⭐ | ⭐⭐ | ⭐⭐⭐ (fully custom) |
7. Summary
At this stage, your Flutter app can:
✔ Request and check location permissions
✔ Get the user’s GPS position
✔ Show the current location on Google Maps
✔ Show the location puck on Mapbox
✔ Render a custom location marker on OSM
✔ Move the map camera dynamically
Map Interactions (Gestures, Taps, Camera Events)
Interactive maps must respond to user actions such as tapping, dragging, zooming, and camera movement.
In this section, we’ll cover how to handle:
-
Tap events
-
Long-press events
-
Camera movement
-
Camera idle (movement stopped)
-
Gesture controls (enable/disable zoom, rotate, scroll)
Each provider handles map interactions differently, so we’ll explore Google Maps, Mapbox, and OpenStreetMap (flutter_map) individually.
1. Google Maps — Gestures & Events


Google Maps provides simple callbacks for events.
Tap Event
onTap: (LatLng position) {
  print("Tapped: $position");
}
Long-Press Event
onLongPress: (LatLng position) {
  print("Long pressed: $position");
}
Camera Movement Events
Detect when the camera is moving:
onCameraMove: (CameraPosition position) {
  print("Camera moving: ${position.target}");
}
Detect when movement stops:
onCameraIdle: () {
  print("Camera idle");
}
Enable/Disable Gestures
zoomGesturesEnabled: true,
rotateGesturesEnabled: true,
scrollGesturesEnabled: true,
tiltGesturesEnabled: true,
Full Example
GoogleMap(
  initialCameraPosition: CameraPosition(
    target: LatLng(-6.2, 106.8),
    zoom: 12,
  ),
  onTap: (pos) => print("Tap at $pos"),
  onLongPress: (pos) => print("Long press at $pos"),
  onCameraMove: (camera) => print("Camera moving"),
  onCameraIdle: () => print("Camera stopped"),
  zoomGesturesEnabled: true,
  rotateGesturesEnabled: true,
)
2. Mapbox — Gestures & Events


Mapbox offers a richer event system with listeners.
Version 1.x of mapbox_maps_flutter uses platform channels with stream-based callbacks.
Tap Listener
mapboxMap!.gestures.addOnMapClickListener((point, screenPos) {
  print("Tapped at: ${point.coordinates}");
  return true; // consume event
});
Long Press Listener
mapboxMap!.gestures.addOnMapLongClickListener((point, screenPos) {
  print("Long pressed: ${point.coordinates}");
  return true;
});
Camera Change Events
While moving:
mapboxMap!.camera.addCameraChangeListener((cameraChangedEvent) {
  print("Camera moving...");
});
When movement ends:
mapboxMap!.camera.addCameraIdleListener(() {
  print("Camera idle");
});
Gesture Control
mapboxMap!.gestures.updateSettings(
  GestureSettings(
    rotateEnabled: true,
    zoomEnabled: true,
    scrollEnabled: true,
    pinchToZoomEnabled: true,
  ),
);
Full Example
onMapCreated: (controller) async {
  mapboxMap = controller;

  mapboxMap!.gestures.addOnMapClickListener((point, screenPos) {
    print("Mapbox tap: ${point.coordinates}");
    return true;
  });

  mapboxMap!.camera.addCameraIdleListener(() {
    print("Mapbox camera idle");
  });
}
3. OpenStreetMap (flutter_map) — Gestures & Events
flutter_map gives you full control via MapOptions.
Tap Event
onTap: (tapPosition, point) {
  print("OSM tap: $point");
}
Long-Press Event
onLongPress: (tapPosition, point) {
  print("OSM long press: $point");
}
Camera Movement Events
While moving:
onPositionChanged: (MapPosition pos, bool hasGesture) {
  print("Camera moving: ${pos.center}");
}
End movement:
onMapEvent: (event) {
  if (event is MapEventMoveEnd) {
    print("OSM camera idle");
  }
}
Gesture Configurations
interactionOptions: const InteractionOptions(
  flags: InteractiveFlag.all, // enable everything
),
Disable rotation/zoom:
interactionOptions: const InteractionOptions(
  flags: InteractiveFlag.pinchZoom | InteractiveFlag.drag,
),
Full Example
FlutterMap(
  options: MapOptions(
    onTap: (tapPos, latLng) => print("Tap: $latLng"),
    onLongPress: (tapPos, latLng) => print("Long press: $latLng"),
    onPositionChanged: (pos, _) => print("Camera moving"),
    onMapEvent: (event) {
      if (event is MapEventMoveEnd) print("Camera idle");
    },
  ),
  children: [
    TileLayer(...),
  ],
)
4. Comparison Table
| Feature | Google Maps | Mapbox | OSM (flutter_map) |
|---|---|---|---|
| Tap event | ✔️ | ✔️ | ✔️ |
| Long press | ✔️ | ✔️ | ✔️ |
| Camera move | ✔️ | ✔️ | ✔️ |
| Camera idle | ✔️ | ✔️ | ✔️ |
| Gesture control granularity | Medium | High | Very High |
| Best for advanced interactions | ⭐⭐ | ⭐⭐⭐ | ⭐⭐⭐⭐ |
5. Summary
So far, your map app can:
✔ Detect tap, long press, and drag interactions
✔ Track camera movement and idle states
✔ Customize gesture behaviors (zoom, rotate, drag)
✔ Handle events differently across 3 major map providers
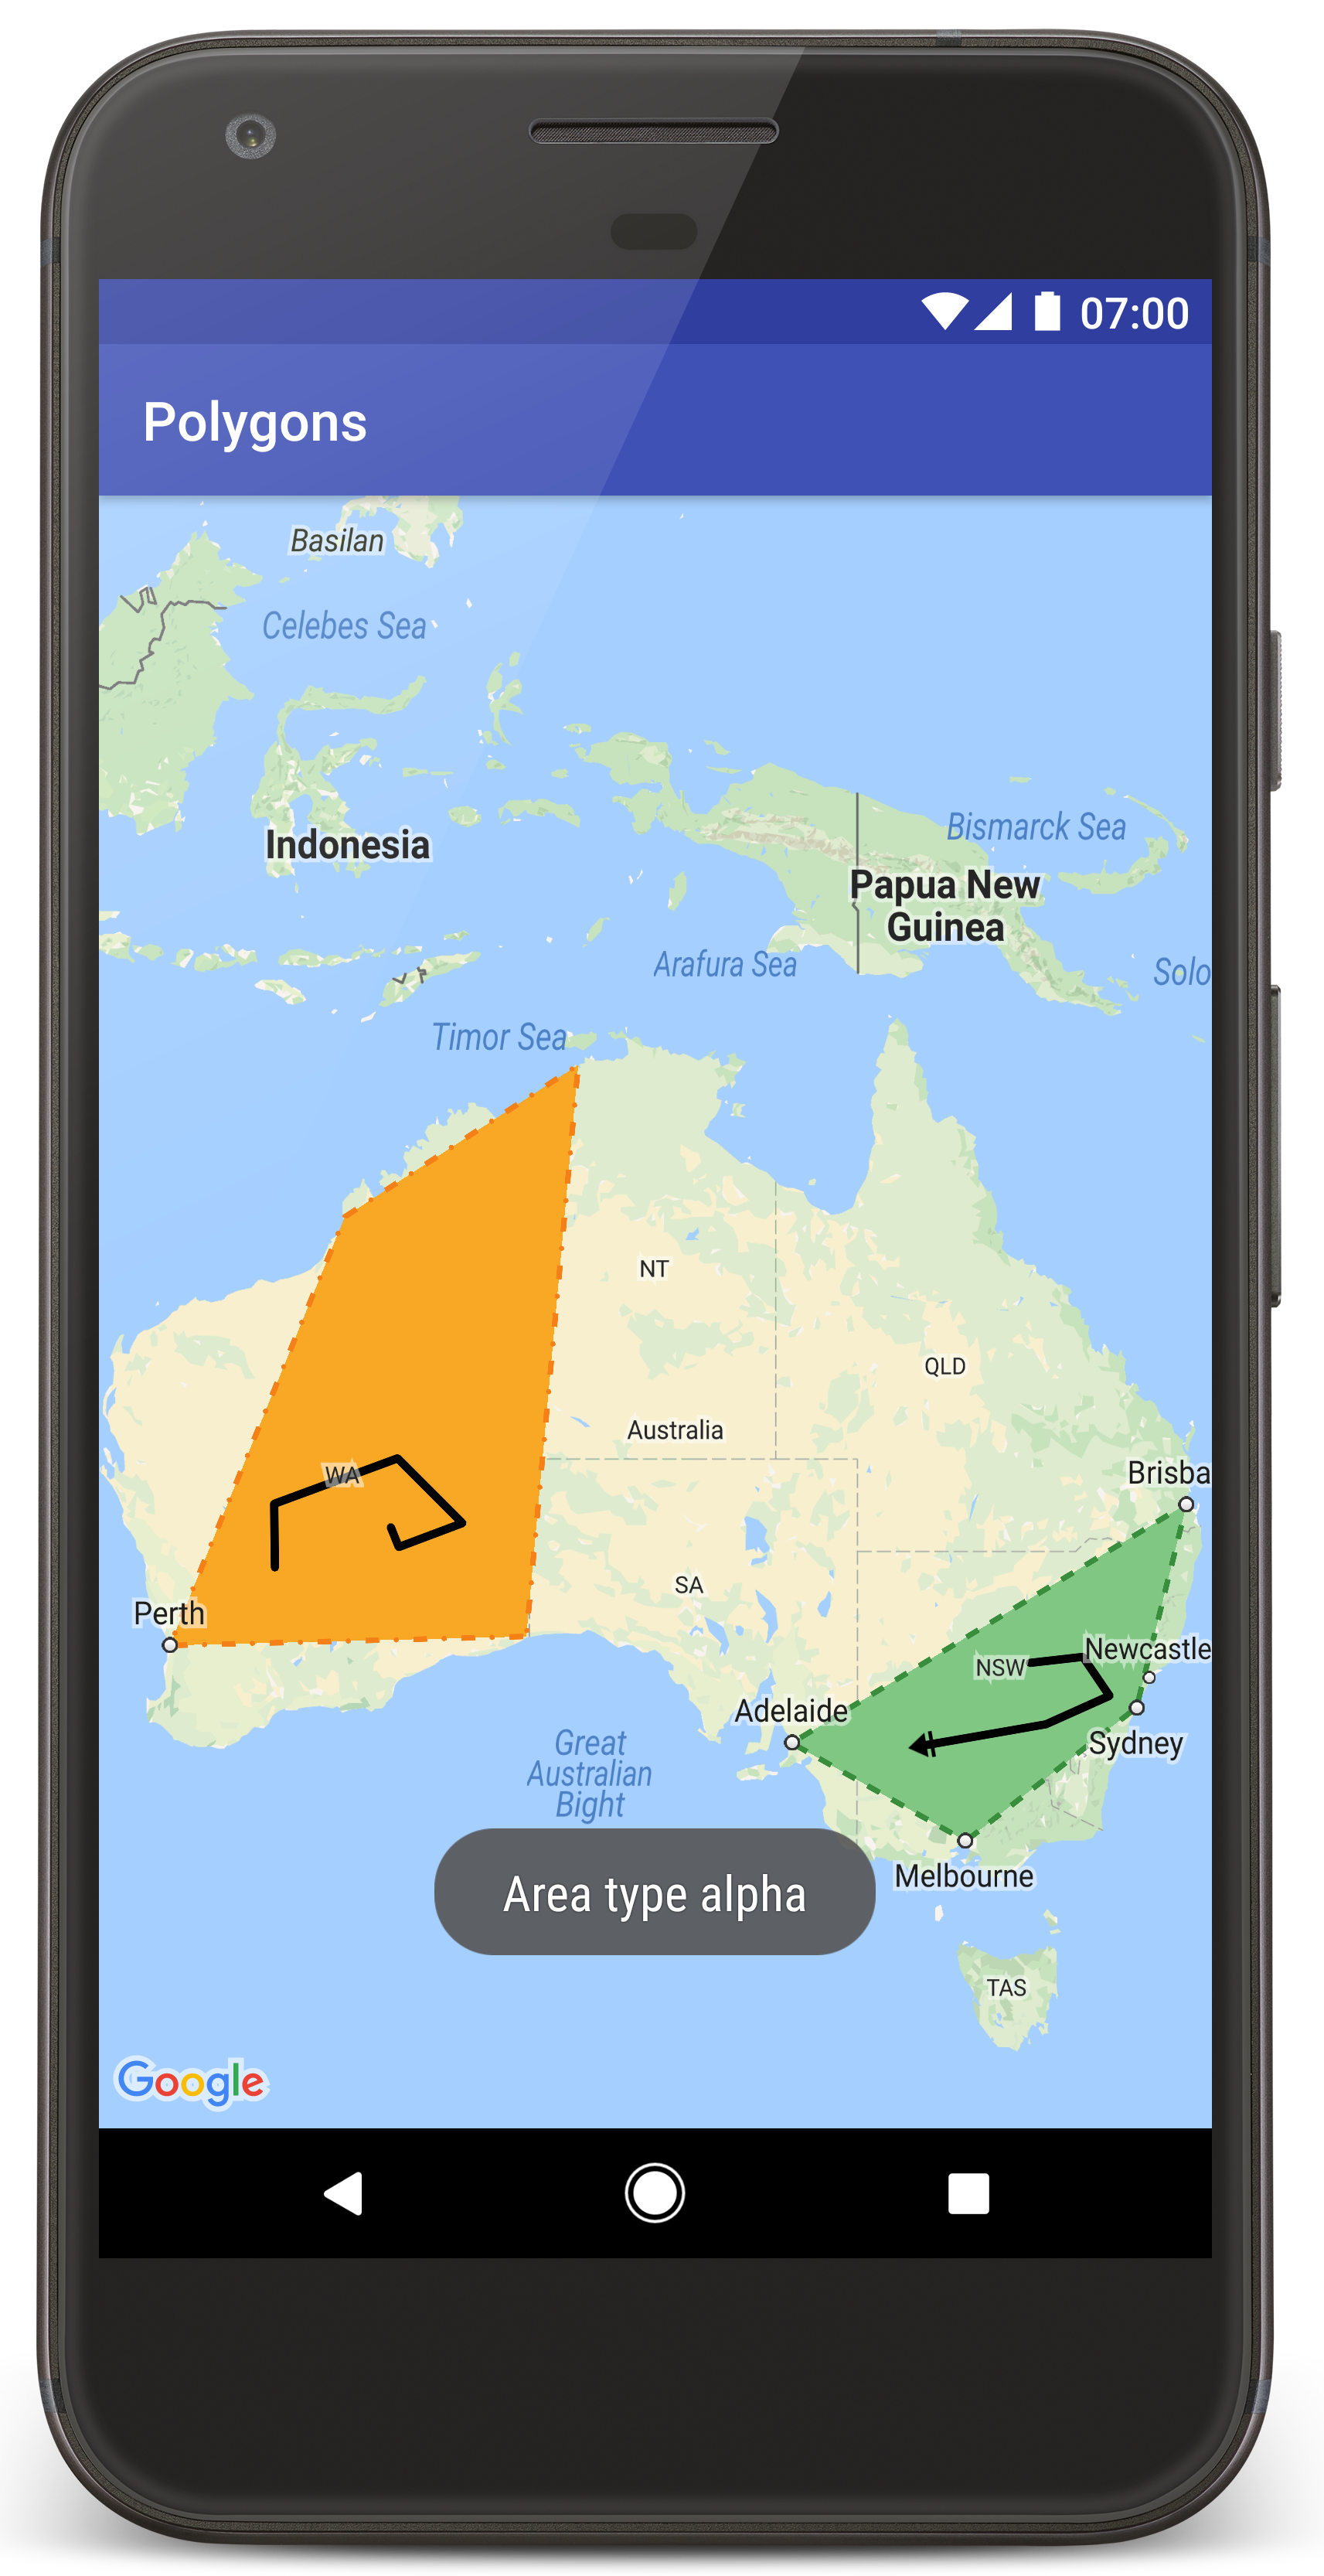
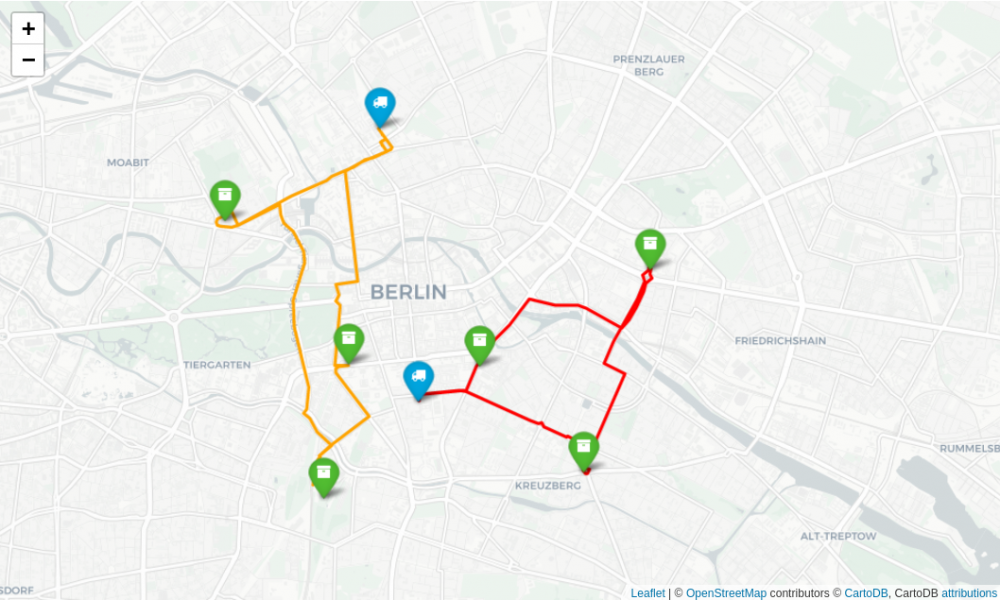
Drawing Shapes (Polylines, Polygons, Circles)
Maps often need shapes to represent routes, boundaries, service areas, zones, and more.
In this section, you will learn how to draw:
-
Polylines (paths, routes)
-
Polygons (areas, regions)
-
Circles (radius zones)
For each provider (Google Maps, Mapbox, and OpenStreetMap), the APIs differ—so we’ll cover them independently and then compare.
1. Polylines, Polygons, and Circles in Google Maps

Google Maps supports all three shapes using built-in overlay objects.
✅ Polyline Example
Set<Polyline> polylines = {
  Polyline(
    polylineId: const PolylineId("route"),
    width: 4,
    color: Colors.blue,
    points: const [
      LatLng(-6.200000, 106.816666),
      LatLng(-6.914744, 107.609810),
      LatLng(-7.250445, 112.768845),
    ],
  ),
};
Add to GoogleMap:
GoogleMap(
  polylines: polylines,
  ...
)
🔺 Polygon Example
Set<Polygon> polygons = {
  Polygon(
    polygonId: const PolygonId("area"),
    fillColor: Colors.green.withOpacity(0.3),
    strokeColor: Colors.green,
    strokeWidth: 2,
    points: const [
      LatLng(-6.18, 106.80),
      LatLng(-6.20, 106.82),
      LatLng(-6.22, 106.80),
    ],
  ),
};
🟢 Circle Example
Set<Circle> circles = {
  Circle(
    circleId: const CircleId("radius"),
    center: const LatLng(-6.200000, 106.816666),
    radius: 3000, // meters
    fillColor: Colors.red.withOpacity(0.3),
    strokeColor: Colors.red,
    strokeWidth: 2,
  )
};
2. Polylines, Polygons, and Circles in Mapbox


Mapbox uses Annotation Managers (new SDK).
There are separate managers for:
-
PointAnnotationManager
-
PolylineAnnotationManager
-
PolygonAnnotationManager
-
CircleAnnotationManager
🟦 Polyline Example
late PolylineAnnotationManager _polylineManager;

void _addPolyline() async {
  _polylineManager = await mapboxMap!.annotations.createPolylineAnnotationManager();

  await _polylineManager.create(
    PolylineAnnotationOptions(
      geometry: LineString(
        coordinates: [
          Position(106.816666, -6.200000),
          Position(107.609810, -6.914744),
          Position(112.768845, -7.250445),
        ],
      ),
      lineColor: Colors.blue.value,
      lineWidth: 4.0,
    ),
  );
}
🔺 Polygon Example
late PolygonAnnotationManager _polygonManager;

void _addPolygon() async {
  _polygonManager = await mapboxMap!.annotations.createPolygonAnnotationManager();

  await _polygonManager.create(
    PolygonAnnotationOptions(
      geometry: Polygon(
        coordinates: [
          [
            Position(106.80, -6.18),
            Position(106.82, -6.20),
            Position(106.80, -6.22),
          ],
        ],
      ),
      fillColor: Colors.green.withOpacity(0.3).value,
      fillOutlineColor: Colors.green.value,
    ),
  );
}
🟢 Circle Example
Mapbox renders circles via circle annotations:
late CircleAnnotationManager _circleManager;

void _addCircle() async {
  _circleManager = await mapboxMap!.annotations.createCircleAnnotationManager();

  await _circleManager.create(
    CircleAnnotationOptions(
      geometry: Point(
        coordinates: Position(106.816666, -6.200000),
      ),
      circleRadius: 30.0,
      circleColor: Colors.red.withOpacity(0.4).value,
      circleStrokeColor: Colors.red.value,
      circleStrokeWidth: 2.0,
    ),
  );
}
Note: Mapbox circles are rendered in pixels, not meters. For geospatial radius zones, you must calculate lat/lng buffers manually or use a custom polygon.
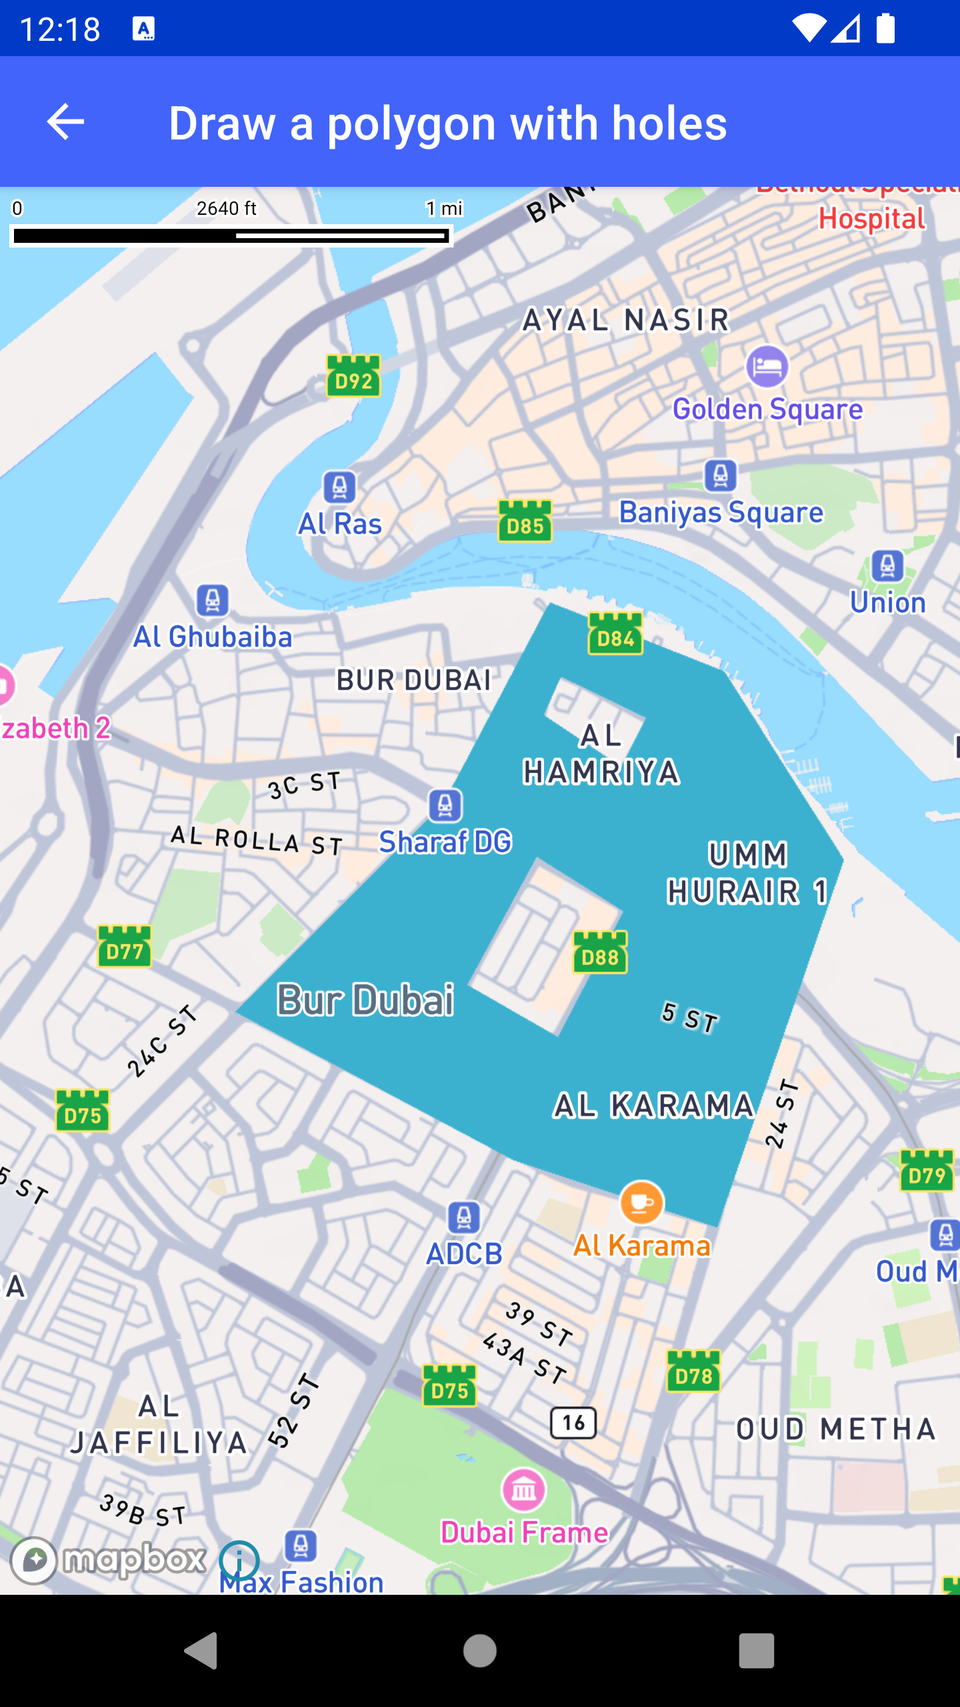
3. Polylines, Polygons, and Circles in OpenStreetMap (flutter_map)


flutter_map is highly flexible and supports all shapes via layers.
🟦 Polyline Example
PolylineLayer(
  polylines: [
    Polyline(
      points: [
        LatLng(-6.200000, 106.816666),
        LatLng(-6.914744, 107.609810),
        LatLng(-7.250445, 112.768845),
      ],
      color: Colors.blue,
      strokeWidth: 4,
    ),
  ],
)
🔺 Polygon Example
PolygonLayer(
  polygons: [
    Polygon(
      points: [
        LatLng(-6.18, 106.80),
        LatLng(-6.20, 106.82),
        LatLng(-6.22, 106.80),
      ],
      color: Colors.green.withOpacity(0.3),
      borderStrokeWidth: 2,
      borderColor: Colors.green,
    ),
  ],
)
🟢 Circle Example (true meters radius)
flutter_map supports CircleLayer with real-world radii:
CircleLayer(
  circles: [
    CircleMarker(
      point: LatLng(-6.200000, 106.816666),
      radius: 3000, // meters
      useRadiusInMeter: true,
      color: Colors.red.withOpacity(0.3),
      borderColor: Colors.red,
      borderStrokeWidth: 2,
    ),
  ],
)
This is more geospatially accurate than Mapbox’s pixel-based circles.
4. Comparison Table
| Shape Type | Google Maps | Mapbox | OSM (flutter_map) |
|---|---|---|---|
| Polyline | ✔️ Easy | ✔️ AnnotationManager | ✔️ Layer-based |
| Polygon | ✔️ | ✔️ | ✔️ |
| Circle | ✔️ Geodesic | ⚠️ Pixel radius only | ✔️ Real radius in meters |
| Styling flexibility | Medium | High | Very High |
| Best for advanced visuals | ⭐⭐ | ⭐⭐⭐ | ⭐⭐⭐⭐ |
5. Summary
By now, your app can draw:
✔ Routes using polylines
✔ Regions using polygons
✔ Radius areas using circles
✔ Shapes on Google Maps, Mapbox, and OSM with proper styling
You now have the tools to create:
-
Delivery routes
-
Geofencing circles
-
Service area polygons
-
Custom-shaded regions
-
Highlighted walking paths
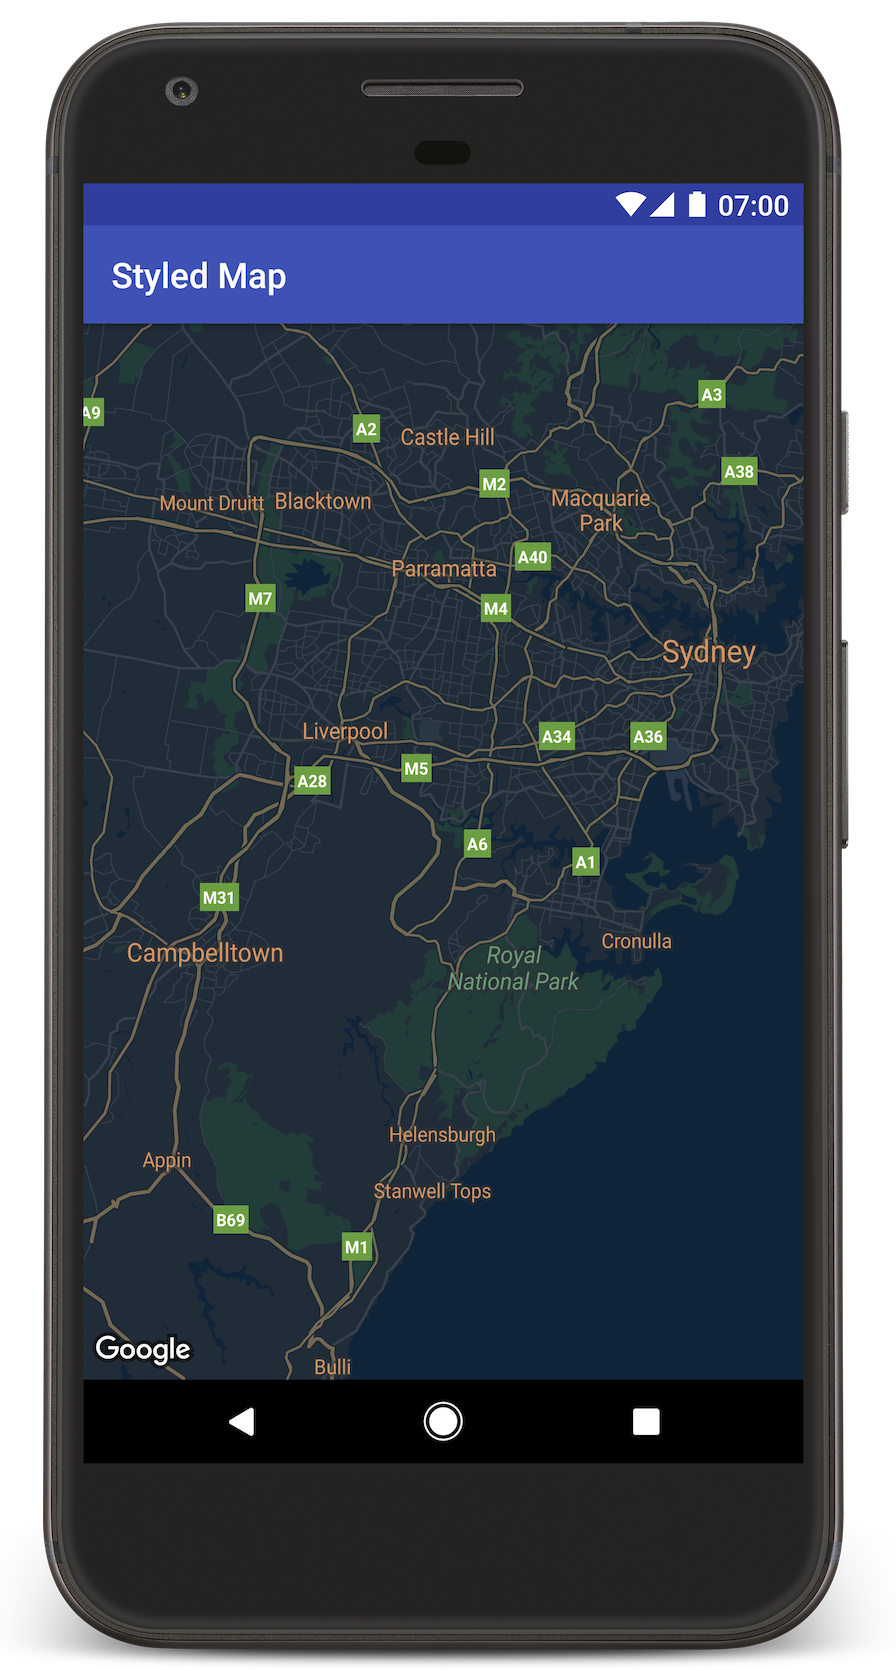
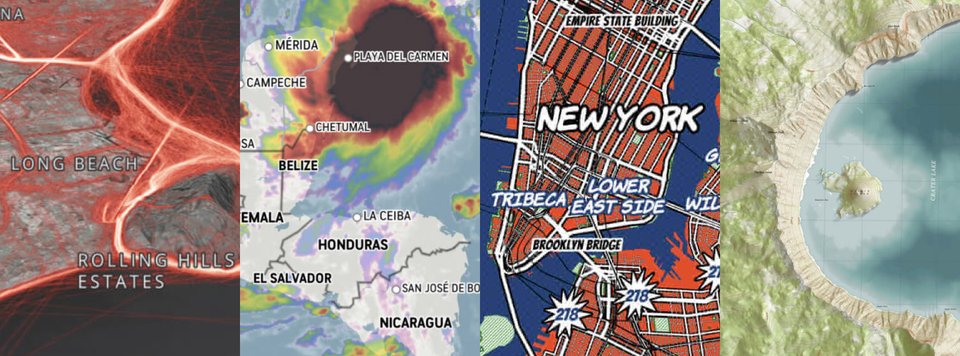
Using Map Styles (Google Maps, Mapbox, and OpenStreetMap)
Map styling transforms the look and feel of your maps—useful for branding, dark mode, highlighting features, or achieving a unique design language.
Each provider offers different levels of customization:
-
Google Maps → JSON-based styling
-
Mapbox → Full styling system with custom style URLs
-
OSM (
flutter_map) → Style changes depend on the tile provider
Let’s explore how to apply map styles for all three.
1. Google Maps — JSON Styling


Google Maps supports custom styles using a JSON schema generated by:
-
Google Maps Styling Wizard: https://mapstyle.withgoogle.com/
You can create themes like dark, night, road-focused, or minimalistic maps.
Step 1 — Create a style JSON file
Example: assets/map_style_dark.json
[
  {
    "elementType": "geometry",
    "stylers": [
      { "color": "#212121" }
    ]
  },
  {
    "elementType": "labels.text.fill",
    "stylers": [
      { "color": "#757575" }
    ]
  }
]
Step 2 — Load the style in Flutter
Add the file in pubspec.yaml:
assets:
  - assets/map_style_dark.json
Step 3 — Apply style to Google Map
Inside GoogleMapView:
late GoogleMapController mapController;

void _applyMapStyle() async {
  final style = await rootBundle.loadString('assets/map_style_dark.json');
  mapController.setMapStyle(style);
}
Call it in onMapCreated:
onMapCreated: (controller) {
  mapController = controller;
  _applyMapStyle();
}
✔️ You now have a fully styled Google Map.
Google supports both light and dark modes, plus highly customized color schemes.
2. Mapbox — Custom Styles via Style URIs


Mapbox is the most powerful provider for styling.
You can use:
-
Built-in styles
-
Your own custom styles from Mapbox Studio
Built-in Styles
styleUri: MapboxStyles.MAPBOX_STREETS
styleUri: MapboxStyles.SATELLITE
styleUri: MapboxStyles.OUTDOORS
styleUri: MapboxStyles.DARK
styleUri: MapboxStyles.LIGHT
Custom Style from Mapbox Studio
-
Go to Mapbox Studio: https://studio.mapbox.com
-
Create or edit a style
-
Copy your Style URL (e.g.,
mapbox://styles/yourname/abc123xyz) -
Use it in the widget:
return MapWidget(
  styleUri: "mapbox://styles/yourname/custom-style-id",
  onMapCreated: (controller) {
    mapboxMap = controller;
  },
);
Advanced Style Customization (Layers, Colors)
You can update styles dynamically once the style loads:
mapboxMap!.style.onStyleLoaded.listen((style) async {
  await mapboxMap!.style.setStyleLayerProperty(
    "water",
    "fill-color",
    Colors.blue.value,
  );
});
✔️ Mapbox Styling Power Highlights
-
Change every layer: water, buildings, roads, parks
-
Add custom images (icons), fonts, 3D buildings
-
Switch styles dynamically (dark mode toggle)
-
Perfect for highly branded map experiences
3. OpenStreetMap (OSM) — Tile Provider Based Styling


OSM itself does not support dynamic styling like Google or Mapbox.
Instead, styling depends on the tile provider you choose.
Common tile providers:
| Provider | Style Examples | Key Required |
|---|---|---|
| OSM Default | Standard Map | No |
| Stadia Maps | Dark, Alidade Smooth, Outdoors | Yes |
| MapTiler | Street, Hybrid, Satellite, Dark | Yes |
| OpenMapTiles | Fully customizable | Yes |
| Thunderforest | Transport, Outdoors | Yes |
Example: OSM Default
TileLayer(
  urlTemplate: "https://tile.openstreetmap.org/{z}/{x}/{y}.png",
)
Example: Dark Mode Map (MapTiler)
TileLayer(
  urlTemplate: "https://api.maptiler.com/maps/darkmatter/{z}/{x}/{y}.png?key=YOUR_KEY",
)
Example: Stadia Maps Smooth Style
TileLayer(
  urlTemplate: "https://tiles.stadiamaps.com/tiles/alidade_smooth_dark/{z}/{x}/{y}.png",
)
Custom Offline Vector Styles
Using OpenMapTiles:
TileLayer(
  urlTemplate: "https://yourserver.com/styles/basic/{z}/{x}/{y}.png",
)
OSM styling is extremely flexible if you control the tile source.
4. Dynamic Map Style Switching
You can add a toggle (light/dark mode):
Google Maps
bool isDark = true;

void toggleStyle() {
  mapController.setMapStyle(
    isDark ? darkStyleJson : lightStyleJson,
  );
}
Mapbox
mapboxMap!.setStyleUri(
  isDark ? MapboxStyles.DARK : MapboxStyles.LIGHT,
);
OSM
setState(() {
  _tileUrl = isDark
    ? mapTilerDarkUrl
    : mapTilerLightUrl;
});
5. Comparison Table
| Styling Power | Google Maps | Mapbox | OSM (flutter_map) |
|---|---|---|---|
| Built-in themes | Medium | Many | Depends on the provider |
| Custom styles | JSON | Full Studio-based | Tile-level only |
| Dynamic updates | Yes | Very deep | Limited |
| Branding flexibility | ⭐⭐ | ⭐⭐⭐⭐⭐ | ⭐⭐⭐ |
| Best for custom UI | Mapbox | Mapbox | OSM (with custom tiles) |
6. Summary
By now, you can:
✔ Apply advanced JSON styles in Google Maps
✔ Use Mapbox Studio for highly customized map themes
✔ Load styled OSM tiles from external providers
✔ Switch styles dynamically (dark/light mode)
This allows you to create visually consistent and brand-compliant maps across all providers.
Routing & Directions (Google Maps, Mapbox, and OSM Options)
Routing is essential for apps like delivery services, ride-hailing, tourism guides, or anything requiring navigation.
Flutter itself does NOT provide built-in routing APIs — you must use each provider’s Directions API or a third-party routing service.
This section covers:
-
Google Directions API
-
Mapbox Directions API
-
OSM Routing via OpenRouteService (or similar)
We’ll fetch route data, decode polylines, and display them on the map.
1. Google Directions API (via HTTP request)


Google’s Directions API returns encoded polylines, which must be decoded and drawn on the map.
Step 1 — Enable Directions API
In Google Cloud Console:
✔ Enable Directions API
Step 2 — Make a directions request
Example request:
https://maps.googleapis.com/maps/api/directions/json?origin=-6.2,106.8&destination=-6.914744,107.609810&key=YOUR_KEY
Step 3 — Decode polyline
Install helper:
flutter_polyline_points: ^3.1.0Decode:
final polylinePoints = PolylinePoints();

List<LatLng> decodePolyline(String encoded) {
  final result = polylinePoints.decodePolyline(encoded);
  return result
      .map((p) => LatLng(p.latitude, p.longitude))
      .toList();
}
Step 4 — Draw a polyline on the Google Map
void _getRouteGoogle() async {
  final url =
      "https://maps.googleapis.com/maps/api/directions/json?origin=-6.2,106.8&destination=-6.914744,107.609810&key=YOUR_KEY";

  final response = await http.get(Uri.parse(url));
  final data = jsonDecode(response.body);

  final encodedPolyline =
      data["routes"][0]["overview_polyline"]["points"];

  final List<LatLng> points = decodePolyline(encodedPolyline);

  setState(() {
    _polylines.add(Polyline(
      polylineId: const PolylineId("route"),
      color: Colors.blue,
      width: 5,
      points: points,
    ));
  });
}
2. Mapbox Directions API
Mapbox returns GeoJSON LineString, which is easier to work with than Google’s encoded polyline.
Step 1 — Request route
Example GET request:
https://api.mapbox.com/directions/v5/mapbox/driving/106.816666,-6.2;107.609810,-6.914744?geometries=geojson&access_token=YOUR_MAPBOX_TOKENStep 2 — Parse GeoJSON
void _getRouteMapbox() async {
  final url =
      "https://api.mapbox.com/directions/v5/mapbox/driving/106.816666,-6.2;107.609810,-6.914744?geometries=geojson&access_token=YOUR_TOKEN";

  final response = await http.get(Uri.parse(url));
  final data = jsonDecode(response.body);

  final coords =
      data["routes"][0]["geometry"]["coordinates"] as List;

  final List<Position> positions = coords
      .map((c) => Position(c[0], c[1]))
      .toList();

  _drawPolylineMapbox(positions);
}
Step 3 — Draw route as a Mapbox polyline
void _drawPolylineMapbox(List<Position> coords) async {
  final manager =
      await mapboxMap!.annotations.createPolylineAnnotationManager();

  await manager.create(
    PolylineAnnotationOptions(
      geometry: LineString(coordinates: coords),
      lineColor: Colors.blue.value,
      lineWidth: 5.0,
    ),
  );
}
3. OSM Routing via OpenRouteService
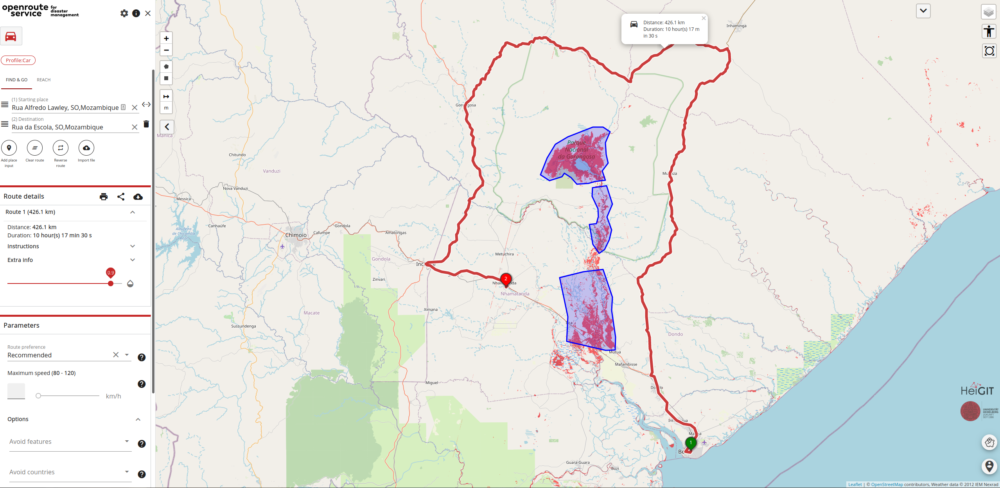

OSM has no built-in routing API.
Instead, you can use:
-
OpenRouteService (ORS)
-
GraphHopper
-
OSRM
-
Your own routing engine
We’ll use OpenRouteService, which returns GeoJSON routes.
Step 1 — Get ORS API key
Step 2 — Request route
https://api.openrouteservice.org/v2/directions/driving-car?api_key=YOUR_KEY&start=106.816666,-6.2&end=107.609810,-6.914744Step 3 — Parse coordinates
void _getRouteOSM() async {
  final url =
      "https://api.openrouteservice.org/v2/directions/driving-car?"
      "api_key=YOUR_KEY&start=106.816666,-6.2&end=107.609810,-6.914744";

  final res = await http.get(Uri.parse(url));
  final data = jsonDecode(res.body);

  final coords =
      (data["features"][0]["geometry"]["coordinates"] as List);

  final List<LatLng> points =
      coords.map((c) => LatLng(c[1], c[0])).toList();

  setState(() => _routePoints = points);
}
Step 4 — Draw route on OSM
PolylineLayer(
  polylines: [
    Polyline(
      points: _routePoints,
      strokeWidth: 5,
      color: Colors.blue,
    ),
  ],
)
4. Comparison Table
| Feature | Google Directions API | Mapbox Directions API | OpenStreetMap (via ORS) |
|---|---|---|---|
| Built-in routing | ✔️ | ✔️ | ❌ (external API) |
| Geometry format | Encoded polyline | GeoJSON | GeoJSON |
| Ease of parsing | Medium | Easy | Easy |
| Traffic-aware routing | ✔️ | ✔️ | ✔️ (premium ORS) |
| Cost | Pay-as-you-go | Free tier + paid | Free tier + paid |
| Offline routing | ❌ | ✔️ (Mapbox Navigation SDK) | ✔️ (self-host OSRM) |
5. Summary
You now know how to implement routing across all three map providers:
✔ Fetch routes using HTTP from Google, Mapbox, or OpenRouteService
✔ Decode polyline or parse GeoJSON
✔ Draw the route using polylines on your map
✔ Support navigation-style experiences
This unlocks features like:
-
Turn-by-turn navigation
-
Delivery tracking routes
-
Trips & Tours planning
-
Measuring distances
-
Geofencing-aware routing
Best Practices for Flutter Maps (Google Maps, Mapbox, and OSM)
As your map-based Flutter application grows in features—markers, shapes, routing, user location, styles—performance and reliability become critical.
This section highlights essential best practices for using Google Maps, Mapbox, and OpenStreetMap efficiently and safely.
1. Performance Best Practices


✅ 1. Avoid Rebuilding the Entire Map Widget
When using setState, unnecessary rebuilds of the map widget cause lag.
Good:
setState(() {
  markers.add(newMarker);
});
Bad:
setState(() {
  rebuild full GoogleMap();
});
Keep the map widget stable—update only overlays (markers, polylines, etc.).
✅ 2. Batch Marker and Shape Updates
Instead of adding 500 markers one by one:
-
Google Maps → use Sets
-
Mapbox → use AnnotationManager batch operations
-
OSM → combine markers into a single
MarkerLayer
✅ 3. Lazy Load or Cluster Markers
For thousands of markers:
-
Google Maps → implement marker clustering manually
-
Mapbox → built-in clustering via GeoJSON source
-
OSM →
MarkerClusterLayerplugin
Marker clustering improves performance dramatically.
✅ 4. Avoid Large Bitmaps for Custom Icons
Keep icon sizes under 64x64px for best performance.
Large PNGs = slow rendering.
✅ 5. Debounce Camera Events
Camera events fire continuously. Debounce them to avoid excessive API calls:
Timer? _debounce;

onCameraMove: (pos) {
  _debounce?.cancel();
  _debounce = Timer(const Duration(milliseconds: 300), () {
    // handle idle logic
  });
};
2. API Key Management

🔑 1. Restrict Google Maps API Key
Use:
-
Android app SHA-1 signatures
-
iOS bundle identifiers
Always restrict which APIs can be used with the key.
🔑 2. Mapbox Tokens
Use:
-
Public tokens for client-side maps
-
Secret tokens for server-side routing (never expose)
🔑 3. Don’t Hardcode Keys in Source Control
Use env vars or build-time configs:
-
flutter_dotenv -
CI/CD environment variables
-
Firebase Remote Config (if needed)
3. User Location Best Practices
📍 1. Request Location Permission Gradually
Explain why you need the location:
-
Google Maps → shows built-in prompt
-
Mapbox → equivalent
-
OSM → manual marker, so be explicit
📍 2. Avoid Constant High-Accuracy Updates
High-accuracy = battery drain.
Use:
Geolocator.getCurrentPosition()
Only when needed.
📍 3. Handle "Location Disabled" Cases
Show user-friendly prompts:
Please enable GPS to use location features.
Provide a button to open device settings:
Geolocator.openLocationSettings();
4. Routing Best Practices
🚗 1. Cache API Responses
Avoid repeating expensive routing API calls.
🚗 2. Avoid Over-Routing
Call routing APIs:
-
When the user confirms a destination
-
When the camera idle ends — NOT on every move
-
When the user explicitly requests routing updates
🚗 3. Use GeoJSON Whenever Possible
Mapbox + ORS return GeoJSON (easier to parse than Google’s encoded polylines).
5. Map Style Best Practices
🎨 1. Pre-load styles
Avoid style flickering by loading styles early.
🎨 2. Use dark/light mode switching
Match system theme for better UX.
🎨 3. Minimize custom JSON styling attributes
Too many overrides = slower Google Maps rendering.
6. Memory & Resource Management
🧹 1. Dispose of controllers properly
@override
void dispose() {
  mapController.dispose();
  super.dispose();
}
🧹 2. Clear annotations when switching pages
Mapbox:
manager.deleteAll();
OSM:
polylines.clear();
markers.clear();
7. Offline & Caching Best Practices
📦 Google Maps
No offline tiles allowed
(but limited caching happens automatically).
📦 Mapbox
Supports:
-
Offline regions
-
Offline routing
-
Tile packs
Ideal for apps needing offline navigation.
📦 OSM
You can self-host tiles or use:
-
MBTiles
-
Local tile server
-
Cached tiles
Best option for truly free offline maps.
8. Comparison Summary
| Category | Google Maps | Mapbox | OSM (flutter_map) |
|---|---|---|---|
| Performance | ⭐⭐⭐ | ⭐⭐⭐⭐ | ⭐⭐⭐⭐ |
| Styling | ⭐⭐ | ⭐⭐⭐⭐⭐ | ⭐⭐⭐ |
| Offline support | ⭐ | ⭐⭐⭐⭐ | ⭐⭐⭐⭐ |
| API ecosystem | ⭐⭐⭐⭐ | ⭐⭐⭐⭐ | ⭐⭐ |
| Flexibility | ⭐⭐⭐ | ⭐⭐⭐⭐⭐ | ⭐⭐⭐⭐ |
| Best for | Enterprise apps | Customized apps | Open-source/Offline apps |
9. Final Recommendations
If you need the easiest setup
➡ Google Maps
If you want full customization
➡ Mapbox
If you want totally free + offline**
➡ OpenStreetMap (flutter_map)
If your app supports multiple map providers
➡ Build a Map Abstraction Layer to avoid writing different logic everywhere.
Conclusion
In this comprehensive guide, you learned how to integrate and work with three major mapping solutions in Flutter—Google Maps, Mapbox, and OpenStreetMap (via flutter_map). Each provider comes with its own strengths, flexibility, and capabilities, giving you the freedom to choose the best mapping approach based on your project’s requirements.
Here’s a quick recap of what you accomplished:
✅ You Set Up Three Map Providers
-
Google Maps with API keys, iOS & Android configuration
-
Mapbox with modern Annotation Managers and style URIs
-
OpenStreetMap using various tile providers for free and customizable maps
✅ You Displayed Maps & Added Core Map Features
-
Basic maps with camera positioning
-
Markers (default, custom, and widget-based for OSM)
-
User location and permissions (blue dot / puck / custom marker)
-
Map interactions (taps, long presses, camera movement, gesture control)
✅ You Built Geospatial Overlays
-
Polylines for routes
-
Polygons for areas
-
Circles for distance radiuses or geofencing zones
-
Compared behavior across each provider
✅ You Styled Maps for Better UX
-
Google Maps JSON styling
-
Mapbox Studio custom designs
-
OSM tile provider theming (MapTiler, Stadia, etc.)
-
Dynamic theme switching (dark/light mode)
✅ You Implemented Routing & Directions
-
Google Directions API (encoded polylines)
-
Mapbox Directions API (GeoJSON routes)
-
OpenRouteService for OSM-based routing
-
Rendering routes on each map type
🎉 What You Now Have
A fully functional Flutter mapping foundation that supports:
-
Multiple map providers in a single app
-
Dynamic markers, shapes, styles, and routing
-
Real-time location features
-
Abstraction layers for scalable architecture
Whether you’re building:
-
A ride-hailing app
-
A delivery system
-
A tourism/travel map
-
A navigation or hiking app
-
A real estate/geofencing platform
…you’re now equipped with the skills to implement professional-grade mapping experiences in Flutter.
📌 Final Advice
Each provider has trade-offs—Google for accuracy & simplicity, Mapbox for customization & offline capabilities, and OSM for cost-free flexibility.
Choose the one that aligns with your:
-
Budget
-
Styling needs
-
Offline requirements
-
License considerations
-
Performance profile
-
Level of control and customization
You can get the full source code on our GitHub.
That's just the basics. If you need more deep learning about Flutter and Dart, you can take the following cheap course:
- Flutter & Dart - The Complete Guide [2025 Edition]
- The Complete Flutter Development Bootcamp with Dart
- Complete Flutter Guide 2025: Build Android, iOS and Web apps
- Advanced Flutter: Build Enterprise-Ready Apps.
- Flutter , Nodejs, Express , MongoDB: Build Multi-Store App
- Flutter & Dart Essentials-Build Mobile Apps like a Pro
- Master Flutter with ML: Object Detection, OCR & Beyond
- Full-Stack Mobile Development: Flutter, Figma, and Firebase
- Dart & Flutter - Zero to Mastery [2025] + Clean Architecture
- Master Flame Game Engine with Flutter: Build 2D Mobile Games
Thanks!