In this tutorial, you’ll learn how to build a modern calendar UI in Ionic 8 and Angular 20 with interactive event integration. You’ll create a mobile-ready app where users can view, add, and manage events using the latest Ionic UI components and Angular features.
This updated version brings:
-
Ionic 8 (based on Angular 20)
-
Capacitor 6 for native functionality
-
Ion Datetime and Ion Modal for event management
-
A clean, responsive layout using Ionic’s new design tokens and theming
-
TypeScript 5+ syntax and standalone components
By the end of this tutorial, you’ll have a fully functional calendar app that works seamlessly on web and mobile, using up-to-date best practices.
What You’ll Build
A mobile calendar app where:
-
The calendar displays daily, weekly, and monthly views
-
Users can tap a date to view or add events
-
Event details are displayed in modals
-
All data is stored locally (you can later extend it to APIs or Firebase)
Why Ionic 8 + Angular 20?
Ionic 8 builds on Angular 20’s standalone architecture and enhanced performance. It removes outdated dependencies, simplifies routing, and provides a cleaner developer experience. Combined with Angular’s new signals and improved change detection, you can build faster and more reactive apps than ever before.
Preview
You’ll create something like this:
📅 Home Page Calendar UI
-
Modern responsive calendar
-
Event markers
-
Tap to view event details
📝 Event Modal
-
Add or edit events easily
-
Fully integrated with Ionic’s form controls and reactive forms
Prerequisites and Project Setup
Before diving into the code, make sure you have the latest tools and environment ready. Ionic 8 uses the latest Angular 20 and Capacitor 6, so we’ll start by setting up everything cleanly from scratch.
Prerequisites
You should have a basic understanding of:
-
Ionic Framework and Angular fundamentals
-
TypeScript and modern JavaScript (ES2022+)
-
Node.js and the terminal
System Requirements
Make sure your system has the following installed:
-
Node.js 20+
Check your version:node -vIf not installed, download it from nodejs.org.
-
Ionic CLI 7+
npm install -g @ionic/cli -
Capacitor 6+
This is included automatically with Ionic 8, but we’ll initialize it later.
1. Create a New Ionic 8 + Angular 20 Project
Run the following command to create a fresh Ionic Angular project:
ionic start ionic8-calendar blank --type=angularChoose “No” when asked to integrate with Capacitor for now — we’ll add it later manually.
Then move into the new project directory:
cd ionic8-calendar2. Install Required Dependencies
For our calendar UI, we’ll use ionic2-calendar, which now supports modern Angular versions.
Install it with:
npm install ionic2-calendarAlso, install Angular Forms (if not already included) and dayjs for date formatting:
npm install dayjs3. Run the App
You can test your setup by running:
ionic serveThis will open your default browser at http://localhost:8100/ showing the blank Ionic 8 starter.
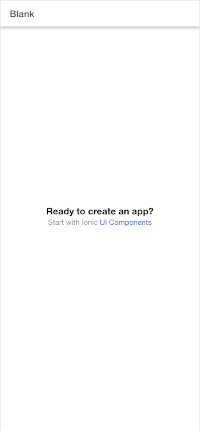
If everything loads without errors, your project setup is complete.
4. Project Structure Overview
Your project folder should now look like this:
ionic8-calendar/
│
├── src/
│   ├── app/
│   │   ├── app.component.ts
│   │   ├── app.routes.ts
│   │   └── app.config.ts
│   ├── assets/
│   ├── pages/
│   ├── theme/
│   ├── index.html
│   └── main.ts
│
├── capacitor.config.ts
├── package.json
└── angular.json
We’ll create a Calendar Page next and set up event data handling with modals.
Creating the Calendar Page (UI and Logic)
Now that your Ionic 8 and Angular 20 app is ready, let’s create the Calendar Page. This page will display a fully interactive calendar UI using the ionic2-calendar library.
1. Generate the Calendar Page
Run the following Ionic CLI command to generate a standalone page:
ionic generate page pages/calendar --standaloneThis will create a new folder under src/app/pages/calendar with the necessary files:
src/app/pages/calendar/
│
├── calendar.page.html
├── calendar.page.ts
├── calendar.page.scss
└── calendar.page.spec.ts
2. Import CalendarModule
Open src/main.ts (or app.module.ts if you’re using a module-based setup) and import the NgCalendarModule from ionic2-calendar:
import { bootstrapApplication } from '@angular/platform-browser';
import { RouteReuseStrategy, provideRouter, withPreloading, PreloadAllModules } from '@angular/router';
import { IonicRouteStrategy, provideIonicAngular } from '@ionic/angular/standalone';

import { routes } from './app/app.routes';
import { AppComponent } from './app/app.component';
import { importProvidersFrom } from '@angular/core';
import { NgCalendarModule } from 'ionic2-calendar';

bootstrapApplication(AppComponent, {
  providers: [
    { provide: RouteReuseStrategy, useClass: IonicRouteStrategy },
    provideIonicAngular(),
    provideRouter(routes, withPreloading(PreloadAllModules)),
    importProvidersFrom(NgCalendarModule)
  ],
});
3. Add Calendar HTML Layout
Open calendar.page.html and replace everything with the following:
<ion-header [translucent]="true">
  <ion-toolbar>
    <ion-title>Calendar</ion-title>
  </ion-toolbar>
</ion-header>

<ion-content class="ion-padding">
  <ion-segment [(ngModel)]="calendar.mode" mode="ios">
    <ion-segment-button value="month">Month</ion-segment-button>
    <ion-segment-button value="week">Week</ion-segment-button>
    <ion-segment-button value="day">Day</ion-segment-button>
  </ion-segment>

  <ion-item lines="none" class="calendar-controls">
    <ion-button fill="clear" (click)="back()">‹</ion-button>
    <ion-label class="ion-text-center">
      {{ calendar.currentDate | date: calendar.mode === 'month' ? 'MMMM yyyy' :
      'fullDate' }}
    </ion-label>
    <ion-button fill="clear" (click)="next()">›</ion-button>
  </ion-item>

  <div class="calendar-container">
    <calendar
      [eventSource]="eventSource"
      [calendarMode]="calendar.mode"
      [currentDate]="calendar.currentDate"
      (onEventSelected)="onEventSelected($event)"
      (onTimeSelected)="onTimeSelected($event)"
    >
    </calendar>
  </div>

  <ion-fab vertical="bottom" horizontal="end" slot="fixed">
    <ion-fab-button (click)="addEvent()">
      <ion-icon name="add"></ion-icon>
    </ion-fab-button>
  </ion-fab>
</ion-content>
4. Add Calendar Logic
Now open calendar.page.ts and add the following logic:
import { Component, OnInit } from '@angular/core';
import { CommonModule } from '@angular/common';
import { ModalController } from '@ionic/angular';
import { FormsModule } from '@angular/forms';
import dayjs from 'dayjs';
import { EventModalPage } from '../event-modal/event-modal.page';
import { NgCalendarModule } from 'ionic2-calendar';
import { CalendarMode } from 'ionic2-calendar';
import { IonContent, IonHeader, IonTitle, IonToolbar, IonSegmentButton, IonItem, IonButton, IonLabel, IonFab, IonFabButton, IonIcon } from '@ionic/angular/standalone';
import { add } from 'ionicons/icons';
import { addIcons } from 'ionicons';

@Component({
  selector: 'app-calendar',
  templateUrl: './calendar.page.html',
  styleUrls: ['./calendar.page.scss'],
  standalone: true,
  imports: [NgCalendarModule, IonIcon, IonFabButton, IonFab, IonLabel, IonButton, IonItem, IonSegmentButton, IonContent, IonHeader, IonTitle, IonToolbar, CommonModule, FormsModule]
})
export class CalendarPage {
  eventSource: any[] = [];
  calendar = {
    mode: 'month' as CalendarMode,
    currentDate: new Date()
  };
  selectedDate: Date = new Date();

  constructor(private modalCtrl: ModalController) {
    addIcons({ add });
  }

  next() {
    const nextDate = dayjs(this.calendar.currentDate).add(1, this.calendar.mode as any);
    this.calendar.currentDate = nextDate.toDate();
  }

  back() {
    const prevDate = dayjs(this.calendar.currentDate).subtract(1, this.calendar.mode as any);
    this.calendar.currentDate = prevDate.toDate();
  }

  async addEvent() {
    const modal = await this.modalCtrl.create({
      component: EventModalPage,
      componentProps: { selectedDate: this.selectedDate }
    });
    await modal.present();

    const { data } = await modal.onWillDismiss();
    if (data && data.event) {
      this.eventSource.push(data.event);
      this.eventSource = [...this.eventSource]; // refresh calendar
    }
  }

  onEventSelected(event: any) {
    alert(`Event: ${event.title}\nFrom: ${event.startTime}\nTo: ${event.endTime}`);
  }

  onTimeSelected(event: any) {
    this.selectedDate = event.selectedTime;
  }
}
5. Add Basic Styling
Open calendar.page.scss and add a few improvements:
.calendar-controls {
  display: flex;
  justify-content: space-between;
  align-items: center;
  margin-bottom: 10px;
}

ion-segment {
  margin-bottom: 50px;
}

.calendar-container {
  height: calc(100% - 10px);
  /* adjust for header height */
  overflow: auto;
  position: relative;
}

ion-fab {
  z-index: 10;
  bottom: 50px;
  /* ensures it floats above calendar */
}
At this point, your app should display a working monthly calendar view with navigation arrows and a floating “Add” button. When pressed, it will open a modal (which we’ll build next) to add new events.
Creating the Event Modal (Add/Edit Events)
The Event Modal will appear when the user taps the floating “Add” button or selects a date from the calendar. It will use Ionic’s modern modal system, Reactive Forms, and the IonDatetime component for date selection.
1. Generate the Event Modal Page
Run this command to generate a new standalone page:
ionic generate page pages/event-modal --standaloneThis creates the following structure:
src/app/pages/event-modal/
│
├── event-modal.page.html
├── event-modal.page.ts
├── event-modal.page.scss
└── event-modal.page.spec.ts
2. Build the Event Modal UI
Open src/app/pages/event-modal/event-modal.page.html and replace everything with:
<ion-header>
  <ion-toolbar color="primary">
    <ion-title>Add Event</ion-title>
    <ion-buttons slot="end">
      <ion-button (click)="dismiss()">Close</ion-button>
    </ion-buttons>
  </ion-toolbar>
</ion-header>

<ion-content class="ion-padding">
  <form [formGroup]="eventForm" (ngSubmit)="saveEvent()">
    <ion-item>
      <ion-label position="stacked">Event Title</ion-label>
      <ion-input
        formControlName="title"
        placeholder="Enter event title"
      ></ion-input>
    </ion-item>

    <ion-item>
      <ion-label position="stacked">Start Time</ion-label>
      <ion-datetime
        presentation="date-time"
        formControlName="startTime"
        [min]="minDate"
      >
      </ion-datetime>
    </ion-item>

    <ion-item>
      <ion-label position="stacked">End Time</ion-label>
      <ion-datetime
        presentation="date-time"
        formControlName="endTime"
        [min]="minDate"
      >
      </ion-datetime>
    </ion-item>

    <ion-item>
      <ion-label position="stacked">Description</ion-label>
      <ion-textarea
        rows="3"
        placeholder="Optional event description"
        formControlName="desc"
      >
      </ion-textarea>
    </ion-item>

    <ion-button
      expand="block"
      color="primary"
      class="ion-margin-top"
      type="submit"
      [disabled]="eventForm.invalid"
    >
      Save Event
    </ion-button>
  </form>
</ion-content>
3. Add Modal Logic
Now open src/app/pages/event-modal/event-modal.page.ts and add the following logic:
import { Component, Input, OnInit } from '@angular/core';
import { CommonModule } from '@angular/common';
import { FormBuilder, FormGroup, ReactiveFormsModule, Validators } from '@angular/forms';
import { ModalController } from '@ionic/angular/standalone';
import { IonicModule } from '@ionic/angular';
import dayjs from 'dayjs';

@Component({
  selector: 'app-event-modal',
  templateUrl: './event-modal.page.html',
  styleUrls: ['./event-modal.page.scss'],
  imports: [CommonModule, IonicModule, ReactiveFormsModule]
})
export class EventModalPage {
  @Input() selectedDate!: Date;

  eventForm!: FormGroup;
  minDate = new Date().toISOString();

  constructor(
    private modalCtrl: ModalController,
    private fb: FormBuilder
  ) { }

  ngOnInit() {
    this.eventForm = this.fb.group({
      title: ['', Validators.required],
      startTime: [this.selectedDate.toISOString(), Validators.required],
      endTime: [
        dayjs(this.selectedDate).add(1, 'hour').toDate().toISOString(),
        Validators.required,
      ],
      desc: ['']
    });
  }

  dismiss() {
    this.modalCtrl.dismiss();
  }

  saveEvent() {
    if (this.eventForm.valid) {
      const event = this.eventForm.value;
      event.startTime = new Date(event.startTime);
      event.endTime = new Date(event.endTime);
      this.modalCtrl.dismiss({ event });
    }
  }
}
4. Add Modal Styling
In event-modal.page.scss, add some spacing and alignment for readability:
ion-item {
  margin-bottom: 10px;
}

ion-textarea {
  resize: none;
}
5. Connect Modal to Calendar Page
If you recall, the calendar’s addEvent() method in calendar.page.ts already opens this modal:
const modal = await this.modalCtrl.create({
  component: EventModalPage,
  componentProps: { selectedDate: this.selectedDate }
});
So once the modal is created and closed with valid data, the new event will be automatically added to the calendar’s eventSource.
6. Update Your Routes (app.routes.ts)
In Ionic 8, routes are now defined in src/app/app.routes.ts
Make sure you replace the default route with your calendar page:
import { Routes } from '@angular/router';

export const routes: Routes = [
  {
    path: 'home',
    loadComponent: () => import('./home/home.page').then((m) => m.HomePage),
  },
  {
    path: '',
    redirectTo: 'calendar',
    pathMatch: 'full',
  },
  {
    path: 'calendar',
    loadComponent: () => import('./pages/calendar/calendar.page').then(m => m.CalendarPage)
  },
  {
    path: 'event-modal',
    loadComponent: () => import('./pages/event-modal/event-modal.page').then(m => m.EventModalPage)
  },
];
7. Test It Out
Now run your app again:
ionic serve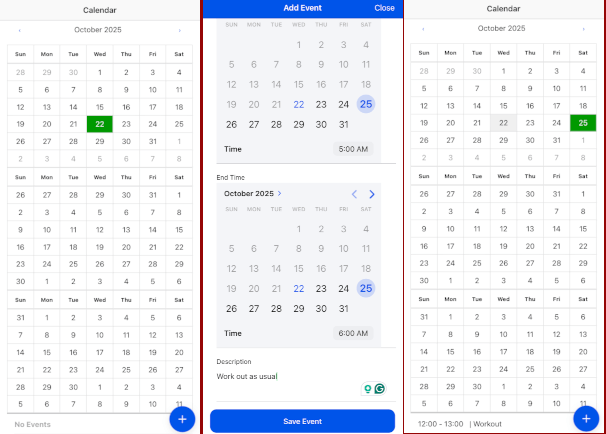
✅ You should see:
-
A month calendar view
-
A floating “+” button
-
When pressed, an Add Event Modal opens
-
You can set the title, start, and end times
-
Upon saving, the event appears on the selected date in your calendar
Viewing and Managing Events
In this section, we’ll add features that allow users to view, select, and manage existing events — including editing or deleting them directly from the calendar page.
We'll enhance the calendar’s event click handler, add an event details modal, and integrate basic CRUD actions using local state (you can later replace this with a backend API).
🧠 Step 1: Update Calendar Event Handlers
Open calendar.page.ts and add logic to handle event selection and event deletion.
✅ calendar.page.ts
import { Component, OnInit } from '@angular/core';
import { CommonModule } from '@angular/common';
import { ModalController } from '@ionic/angular';
import { FormsModule } from '@angular/forms';
import dayjs from 'dayjs';
import { EventModalPage } from '../event-modal/event-modal.page';
import { NgCalendarModule } from 'ionic2-calendar';
import { CalendarMode, Step } from 'ionic2-calendar';
import { IonContent, IonHeader, IonTitle, IonToolbar, IonSegmentButton, IonItem, IonButton, IonLabel, IonFab, IonFabButton, IonIcon } from '@ionic/angular/standalone';
import { add } from 'ionicons/icons';
import { addIcons } from 'ionicons';
import { CalendarEvent } from '../models/calendar-event.model';

@Component({
  selector: 'app-calendar',
  templateUrl: './calendar.page.html',
  styleUrls: ['./calendar.page.scss'],
  standalone: true,
  imports: [NgCalendarModule, IonIcon, IonFabButton, IonFab, IonLabel, IonButton, IonItem, IonSegmentButton, IonContent, IonHeader, IonTitle, IonToolbar, CommonModule, FormsModule]
})
export class CalendarPage implements OnInit {
  eventSource: any[] = [];
  calendar = {
    mode: 'month' as CalendarMode,
    currentDate: new Date()
  };
  selectedDate: Date = new Date();

  viewTitle = '';

  constructor(private modalCtrl: ModalController) {
    addIcons({ add });
  }

  ngOnInit() {
    this.loadEvents();
  }

  loadEvents() {
    const storedEvents = localStorage.getItem('events');
    if (storedEvents) {
      this.eventSource = JSON.parse(storedEvents);
    }
  }

  next() {
    const nextDate = dayjs(this.calendar.currentDate).add(1, this.calendar.mode as any);
    this.calendar.currentDate = nextDate.toDate();
  }

  back() {
    const prevDate = dayjs(this.calendar.currentDate).subtract(1, this.calendar.mode as any);
    this.calendar.currentDate = prevDate.toDate();
  }

  async addEvent() {
    const modal = await this.modalCtrl.create({
      component: EventModalPage,
      componentProps: { selectedDate: this.selectedDate }
    });
    await modal.present();

    const { data } = await modal.onWillDismiss();
    if (data && data.event) {
      this.eventSource.push(data.event);
      this.eventSource = [...this.eventSource]; // refresh calendar
    }
  }

  async onEventSelected(event: CalendarEvent) {
    const alert = await this.alertCtrl.create({
      header: event.title,
      message: `
        <strong>Start:</strong> ${new Date(event.startTime).toLocaleString()}<br>
        <strong>End:</strong> ${new Date(event.endTime).toLocaleString()}<br>
        <strong>All Day:</strong> ${event.allDay ? 'Yes' : 'No'}
      `,
      buttons: [
        {
          text: 'Edit',
          handler: () => this.openEditEventModal(event)
        },
        {
          text: 'Delete',
          role: 'destructive',
          handler: () => this.deleteEvent(event)
        },
        { text: 'Close', role: 'cancel' }
      ]
    });
    await alert.present();
  }

  onTimeSelected(event: any) {
    this.selectedDate = event.selectedTime;
  }

  async openEditEventModal(event: CalendarEvent) {
    const modal = await this.modalCtrl.create({
      component: EventModalPage,
      componentProps: { isEdit: true, event }
    });
    modal.onDidDismiss().then((result) => {
      if (result.data && result.data.event) {
        const index = this.eventSource.findIndex(e => e.startTime === event.startTime && e.title === event.title);
        if (index > -1) {
          this.eventSource[index] = result.data.event;
          localStorage.setItem('events', JSON.stringify(this.eventSource));
          this.calendarComponent.loadEvents();
        }
      }
    });
    await modal.present();
  }

  deleteEvent(event: CalendarEvent) {
    this.eventSource = this.eventSource.filter(e => e !== event);
    localStorage.setItem('events', JSON.stringify(this.eventSource));
    this.calendarComponent.loadEvents();
  }

  onViewTitleChanged(title: string) {
    this.viewTitle = title;
  }
}
🧱 Step 2: Add a Model for Events
Create a simple model file for better structure.
✅ src/app/models/calendar-event.model.ts
export interface CalendarEvent {
  title: string;
  desc?: string;
  startTime: Date;
  endTime: Date;
  allDay: boolean;
}
🧩 Step 3: Update Event Modal for Editing
Update the event modal so it supports editing existing events.
✅ Add in event-modal.page.ts (at the top of ngOnInit)
  isEdit: boolean = false;
  event: any;

  ngOnInit() {
    this.eventForm = this.fb.group({
      title: ['', Validators.required],
      startTime: [this.selectedDate.toISOString(), Validators.required],
      endTime: [
        dayjs(this.selectedDate).add(1, 'hour').toDate().toISOString(),
        Validators.required,
      ],
      desc: ['']
    });

    if (this.isEdit && this.event) {
      this.eventForm.patchValue({
        title: this.event.title,
        desc: this.event.desc,
        startTime: this.event.startTime,
        endTime: this.event.endTime,
        allDay: this.event.allDay
      });
    }
  }
💡 Step 4: Local Storage Integration
Events are saved locally so users can refresh without losing them.
You can later replace localStorage with an API call to your backend.
✅ Result
You can now:
-
Click an event on the calendar to view details
-
Choose Edit to modify it
-
Choose Delete to remove it
-
Add new events from the floating
+button -
Persist events locally between reloads
Styling and Enhancements
We’ll polish the app with:
-
A cleaner layout and better spacing
-
A visible floating “Add Event” button
-
Color-coded events
-
Toast notifications for feedback
-
Dark mode compatibility
🧱 Step 1: Improve Calendar Page Layout
Open calendar.page.html and update it with enhanced styling and positioning.
✅ calendar.page.html
<ion-header translucent="true">
  <ion-toolbar color="primary">
    <ion-title>{{ viewTitle }}</ion-title>
  </ion-toolbar>
</ion-header>

<ion-content [fullscreen]="true">
  <div class="calendar-container">
    <calendar
      [eventSource]="eventSource"
      [calendarMode]="calendar.mode"
      [currentDate]="calendar.currentDate"
      (onEventSelected)="onEventSelected($event)"
      (onViewTitleChanged)="onViewTitleChanged($any($event))"
      (onTimeSelected)="onTimeSelected($event)"
    >
    </calendar>
  </div>

  <ion-fab slot="fixed" vertical="bottom" horizontal="end">
    <ion-fab-button color="success" (click)="addEvent()">
      <ion-icon name="add-outline"></ion-icon>
    </ion-fab-button>
  </ion-fab>
</ion-content>
💅 Step 2: Add Modern Styling
Now, open calendar.page.scss and add the following styles.
✅ calendar.page.scss
.calendar-container {
  padding: 8px;
  background: var(--ion-background-color);
  height: 100%;
}

calendar {
  border-radius: 12px;
  box-shadow: 0 2px 6px rgba(0, 0, 0, 0.15);
  background: var(--ion-color-light);
  overflow: hidden;
}

ion-fab-button {
  box-shadow: 0 4px 8px rgba(0, 0, 0, 0.25);
  border-radius: 50%;
}

ion-fab-button:hover {
  transform: scale(1.05);
  transition: transform 0.2s ease-in-out;
}
💡 These SCSS rules give your calendar a modern card-like feel and make the floating action button stand out.
🧩 Step 3: Add Event Color Coding
Let’s give each event a color (e.g., blue for normal events, green for all-day events).
Update the event creation logic in your modal submission.
✅ In event-modal.page.ts, inside save():
const newEvent = {
  title: this.eventForm.value.title,
  desc: this.eventForm.value.desc,
  startTime: new Date(this.eventForm.value.startTime),
  endTime: new Date(this.eventForm.value.endTime),
  allDay: this.eventForm.value.allDay,
  color: this.eventForm.value.allDay ? '#10dc60' : '#3880ff' // green or blue
};
🪄 Step 4: Add Toast Notifications
Provide user feedback when events are created, updated, or deleted.
✅ Add Toast Controller to calendar.page.ts
import { ToastController } from '@ionic/angular';

private toastCtrl = inject(ToastController);

async showToast(message: string) {
  const toast = await this.toastCtrl.create({
    message,
    duration: 2000,
    position: 'bottom',
    color: 'tertiary'
  });
  await toast.present();
}
Now call this.showToast('Event added successfully!'), this.showToast('Event updated!'), or this.showToast('Event deleted!') after each respective action.
🌗 Step 5: Ensure Dark Mode Support
Add color variables that automatically adapt to dark mode.
✅ src/theme/variables.scss
:root {
  --calendar-bg: var(--ion-color-light);
  --calendar-text: var(--ion-color-dark);
}

@media (prefers-color-scheme: dark) {
  :root {
    --calendar-bg: #1e1e1e;
    --calendar-text: #f5f5f5;
  }
}
Then apply them in your calendar.page.scss:
calendar {
  background: var(--calendar-bg);
  color: var(--calendar-text);
}
🎯 Result
Your Ionic 8 + Angular 20 calendar app now features:
✅ Modern, responsive UI
✅ Persistent events with local storage
✅ Add/Edit/Delete functionality
✅ Floating “Add Event” button that’s always visible
✅ Color-coded events
✅ Toast messages for user feedback
✅ Full dark mode compatibility
Conclusion + Next Steps
Congratulations! 🎊
You’ve successfully built a modern Calendar UI app using Ionic 8 and Angular 20 with full event integration. This app demonstrates how easy it is to combine Ionic’s UI components with Angular’s reactive forms and modular architecture to build beautiful, responsive, and interactive applications.
🧩 What You’ve Learned
By completing this tutorial, you learned how to:
-
✅ Set up a new Ionic 8 + Angular 20 project
-
✅ Use the ionic7-calendar component for scheduling
-
✅ Build a custom event modal for adding and editing events
-
✅ Handle local data persistence with
localStorage -
✅ Manage calendar events (view, edit, delete)
-
✅ Enhance UX with color coding, toast notifications, and dark mode
This project gives you a solid foundation for creating scheduling or productivity apps that feel native on both mobile and web platforms.
🚀 Next Steps and Improvements
Here are a few ideas to expand your app further:
-
Sync Events with Firebase or an API
-
Replace
localStoragewith a real backend using Firebase Firestore, NestJS, or Spring Boot REST API.
-
-
Add Authentication
-
Secure user data with login/registration using JWT, Firebase Auth, or Supabase.
-
-
Integrate Notifications
-
Use Capacitor Local Notifications to remind users about upcoming events.
-
-
Add Drag-and-Drop Scheduling
-
Enable users to drag events between days for a more interactive experience.
-
-
Offline Support & PWA Features
-
Turn your app into a Progressive Web App (PWA) with offline caching and installable support.
-
🌟 Final Thoughts
Ionic 8 and Angular 20 provide a fast, flexible framework for building modern hybrid apps that run anywhere. By leveraging standalone components, TypeScript 5+, and Capacitor 6, you’re developing apps with the latest best practices and future-ready architecture.
Whether you’re creating a personal planner, company scheduling tool, or event tracker, the techniques in this guide give you everything you need to start building right away.
You can find the full source code on our GitHub.
We know that building beautifully designed Ionic apps from scratch can be frustrating and very time-consuming. Check Ionic 6 - Full Starter App and save development and design time. Android, iOS, and PWA, 100+ Screens and Components, the most complete and advanced Ionic Template.
That's just the basics. If you need more deep learning about Ionic, Angular, and TypeScript, you can take the following cheap course:
- Ionic - Build iOS, Android & Web Apps with Ionic & Angular
- Master Ionic 8+: Beginner to Expert Food Delivery App Course
- Ionic 8+ Masterclass:Build Real-Time Chat Apps with Firebase
- Ionic 8+ & Supabase Full-Stack Mastery: Build Real-Time Apps
- Learn Ionic React By Building a WhatsApp Clone
- Progressive Web Apps (PWA) - The Complete Guide
- IONIC - Build Android & Web Apps with Ionic
- Ionic Framework with VueJS: Build a CRUD App Using SQLite
- Angular, Ionic & Node: Build A Real Web & Mobile Chat App
- Ionic Apps with Firebase
Thanks!