When working with large datasets, rendering every item at once can hurt performance and user experience. That’s where virtual scrolling comes in. Instead of loading hundreds or thousands of elements into the DOM, virtual scroll only renders the items visible within the viewport, making your Angular app faster and more efficient.
In this tutorial, we’ll show you how to build a virtual scrolling list using Angular 20 and Angular Material CDK. You’ll learn how to:
-
Set up a new Angular 20 project with Angular Material.
-
Use the Angular CDK Virtual Scroll module.
-
Efficiently render large lists with smooth scrolling.
-
Apply styling and customization for a clean UI.
By the end, you’ll have a working Angular app with a high-performance list ready for real-world use cases like chat apps, data tables, or infinite feeds.
Setup & Installation
Before we dive into building the virtual scroll, let’s set up a fresh Angular 20 project and install the required dependencies.
1. Create a New Angular 20 Project
Make sure you have the latest Node.js (20+) and Angular CLI installed. Then, create a new project:
npm install -g @angular/cli
ng new angular20-virtual-scroll
cd angular20-virtual-scroll
When prompted, choose:
-
Standalone components: Yes (default in Angular 20).
-
Routing: Yes.
-
Stylesheet format: CSS (or SCSS if you prefer).
2. Install Angular Material & CDK
Next, add Angular Material and the Component Dev Kit (CDK):
ng add @angular/material
npm install @angular/animations
This command will:
-
Install Angular Material and Angular CDK.
-
Configure theme and typography automatically.
-
Add browser animations support.
3. Import ScrollingModule
To use the virtual scrolling feature, import the ScrollingModule from Angular CDK. Open src/app/app.config.ts and add it to the providers via importProvidersFrom:
import { ApplicationConfig, importProvidersFrom, provideBrowserGlobalErrorListeners, provideZoneChangeDetection } from '@angular/core';
import { provideRouter } from '@angular/router';

import { routes } from './app.routes';
import { BrowserAnimationsModule } from '@angular/platform-browser/animations';
import { ScrollingModule } from '@angular/cdk/scrolling';

export const appConfig: ApplicationConfig = {
  providers: [
    provideBrowserGlobalErrorListeners(),
    provideZoneChangeDetection({ eventCoalescing: true }),
    provideRouter(routes),
    importProvidersFrom(
      BrowserAnimationsModule,
      ScrollingModule
    )
  ]
};
4. Verify Setup
Run the development server to ensure everything works:
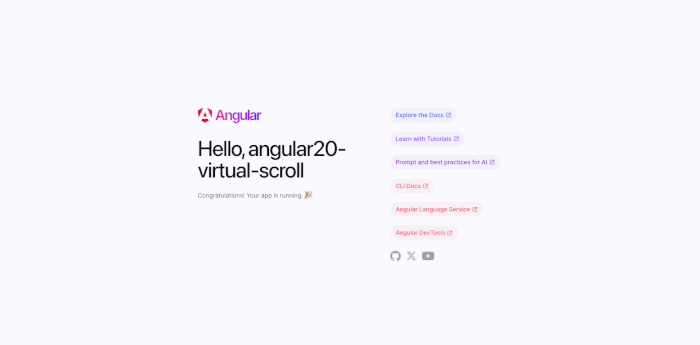
ng serve -oIf successful, Angular 20 will compile and open a blank app in your browser at http://localhost:4200/.

✅ Now that the project is ready, we can move on to Implementing Virtual Scroll with Angular Material CDK.
Creating a Virtual Scroll List
The Angular CDK Virtual Scroll helps render only the visible portion of a long list, which significantly improves performance when dealing with thousands of items.
1. Generate a New Component
Let’s create a component to hold our virtual scroll list:
ng generate component virtual-scrollThis will generate the files under src/app/virtual-scroll/.
2. Update the Component Template
Open src/app/virtual-scroll/virtual-scroll.html and add the cdk-virtual-scroll-viewport:
<cdk-virtual-scroll-viewport itemSize="50" class="example-viewport">
  <div *cdkVirtualFor="let item of items" class="example-item">
    {{ item }}
  </div>
</cdk-virtual-scroll-viewport>
Here’s what’s happening:
-
cdk-virtual-scroll-viewport→ defines the scrolling container. -
itemSize="50"→ tells Angular the fixed height (in px) of each item. -
*cdkVirtualFor→ replaces*ngForto efficiently render only visible items.
3. Add Data in the Component
Open src/app/virtual-scroll/virtual-scroll.ts and add a large dataset:
import { Component } from '@angular/core';
import { ScrollingModule } from '@angular/cdk/scrolling';

@Component({
  selector: 'app-virtual-scroll',
  imports: [ScrollingModule],
  templateUrl: './virtual-scroll.html',
  styleUrl: './virtual-scroll.scss'
})
export class VirtualScroll {
  items = Array.from({ length: 10000 }).map((_, i) => `Item #${i}`);
}
This creates 10,000 items, but only a fraction will be rendered at a time
4. Add Some Styling
Open src/app/virtual-scroll/virtual-scroll.css:
.example-viewport {
  height: 400px;
  width: 300px;
  border: 1px solid #ccc;
  margin: 20px auto;
  display: block;
}

.example-item {
  height: 50px;
  display: flex;
  align-items: center;
  justify-content: center;
  border-bottom: 1px solid #eee;
  font-size: 16px;
}
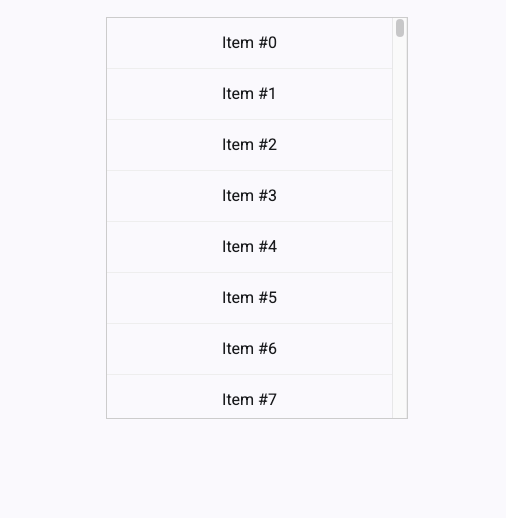
This makes the viewport scrollable with clearly visible list items.
5. Add a Route for the Component
Open src/app/app.routes.ts and register the new route:
import { Routes } from '@angular/router';
import { VirtualScroll } from './virtual-scroll/virtual-scroll';

export const routes: Routes = [
  { path: '', redirectTo: 'virtual-scroll', pathMatch: 'full' },
  { path: 'virtual-scroll', component: VirtualScroll }
];
6. Test It Out
Run the app:
ng serve -oNavigate to /virtual-scroll and try scrolling. You’ll see 10,000 items rendered seamlessly, without performance lag. 🎉

Using Virtual Scroll with Angular Material Components
So far, we’ve displayed a simple list of items with virtual scroll. But in real-world apps, you’ll often want to combine virtual scroll with Angular Material components like mat-card, mat-list, or even custom item templates.
Here’s an example of using mat-card inside a virtual scroll container:
<cdk-virtual-scroll-viewport itemSize="120" class="example-viewport">
  <div *cdkVirtualFor="let item of items" class="example-item">
    <mat-card>
      <mat-card-header>
        <div mat-card-avatar class="example-header-image"></div>
        <mat-card-title>Item {{ item }}</mat-card-title>
        <mat-card-subtitle>Subtitle {{ item }}</mat-card-subtitle>
      </mat-card-header>
      <mat-card-content>
        <p>
          This is a sample card content for item number {{ item }}. You can add
          text, images, or any Angular Material components here.
        </p>
      </mat-card-content>
    </mat-card>
  </div>
</cdk-virtual-scroll-viewport>
Explanation:
-
Each
mat-cardis rendered only when it’s visible in the viewport. -
The
itemSizeproperty is set to120to match the approximate height of each card (you can adjust it to your card size). -
You can use other Angular Material components like
mat-listormat-expansion-panelin the same way.
Example with mat-list:
<cdk-virtual-scroll-viewport itemSize="60" class="example-viewport">
  <mat-list>
    <mat-list-item *cdkVirtualFor="let item of items">
      <mat-icon matListIcon>person</mat-icon>
      <div matLine>{{ item }}</div>
      <div matLine class="secondary">Email: {{ item }}</div>
    </mat-list-item>
  </mat-list>
</cdk-virtual-scroll-viewport>
Update virtual-scroll.ts:
import { Component } from '@angular/core';
import { ScrollingModule } from '@angular/cdk/scrolling';
import { MatCardModule } from '@angular/material/card';
import { MatListModule } from '@angular/material/list';
import { MatIconModule } from '@angular/material/icon';

@Component({
  selector: 'app-virtual-scroll',
  imports: [ScrollingModule, MatCardModule, MatListModule, MatIconModule],
  templateUrl: './virtual-scroll.html',
  styleUrl: './virtual-scroll.scss'
})
export class VirtualScroll {
  items = Array.from({ length: 10000 }).map((_, i) => `Item #${i}`);
}
Here, we wrapped a mat-list inside the viewport and applied *cdkVirtualFor to mat-list-item. This is perfect for things like chat lists, contact directories, or activity feeds.
Styling & Customization
Virtual scroll works out of the box, but without styling, the viewport and items may look plain. Let’s improve the presentation with some CSS and layout adjustments.
Basic Styles for the Viewport
.example-viewport {
  height: 400px;            /* fixed height for scroll */
  width: 100%;              /* responsive width */
  border: 1px solid #ddd;   /* subtle border */
  border-radius: 8px;
  overflow: auto;           /* enable scrolling */
  background-color: #fafafa;
}

.example-item {
  display: flex;
  justify-content: center;
  align-items: center;
  height: 50px;             /* matches itemSize */
  border-bottom: 1px solid #eee;
  font-size: 16px;
  color: #333;
}
Styling Cards inside Virtual Scroll
If you’re using Angular Material mat-card, you can make them look consistent:
mat-card {
  margin: 8px;
  border-radius: 12px;
  box-shadow: 0 2px 6px rgba(0, 0, 0, 0.1);
}

mat-card-content p {
  font-size: 14px;
  color: #666;
}
Adding Hover Effects
Hover effects make items feel interactive:
.example-item:hover mat-card {
  transform: translateY(-2px);
  box-shadow: 0 4px 12px rgba(0, 0, 0, 0.2);
  transition: all 0.2s ease-in-out;
}
Responsive Adjustments
You can also use CSS media queries to adjust the viewport height based on screen size:
@media (max-width: 600px) {
  .example-viewport {
    height: 300px;
  }
}
This ensures the scroll container looks good on both desktop and mobile.
✅ At this stage, you’ve got a functional virtual scroll list with Angular Material components and a polished, responsive design.
Performance Optimization & Best Practices
Virtual scrolling already improves performance by rendering only visible items, but we can push it further with these techniques:
1. Use trackBy with *cdkVirtualFor
Angular re-renders items unnecessarily if it can’t identify them uniquely. The trackBy function helps Angular reuse DOM elements when scrolling.
<cdk-virtual-scroll-viewport itemSize="50" class="example-viewport">
  <div
    *cdkVirtualFor="let item of items; trackBy: trackById"
    class="example-item"
  >
    {{ item.name }}
  </div>
</cdk-virtual-scroll-viewport>
trackById(index: number, item: any): number {
return item.id; // unique identifier
}✅ This reduces DOM re-creation and improves smooth scrolling.
2. Optimize itemSize
The itemSize property should match the actual height of each item (in pixels). If the size is too large or small, the scroll may appear jumpy.
-
Fixed height items → set
itemSizeonce. -
Variable height items → consider alternatives (like Angular CDK’s
AutosizeVirtualScrollStrategyin future updates).
3. Lazy Load Data
Instead of loading all items at once, load chunks as the user scrolls. This is especially useful with large datasets or API calls.
@ViewChild(CdkVirtualScrollViewport) viewport!: CdkVirtualScrollViewport;

fetchMoreData() {
  if (this.viewport.getRenderedRange().end === this.viewport.getDataLength()) {
    // Fetch next chunk from API
    this.loadMoreItems();
  }
}
You can subscribe to scroll events and trigger infinite scrolling for server-side data.
4. Minimize Expensive Rendering
Avoid putting complex components inside the scroll if possible. For example:
-
Use lightweight UI elements instead of deeply nested Material components.
-
Pre-format data in the component rather than computing it in the template.
5. Debounce User Interactions
If the virtual scroll includes search or filtering, debounce the input to avoid re-rendering on every keystroke:
searchTerms.pipe(
  debounceTime(300),
  distinctUntilChanged()
).subscribe(term => this.applyFilter(term));
6. Avoid Inline Styles & Functions
Inline template functions (like {{ computeSomething(item) }}) or styles cause recalculations on every scroll event.
✅ Move logic into component properties instead.
7. Use OnPush Change Detection
When dealing with large datasets, consider using Angular’s ChangeDetectionStrategy.OnPush to reduce change detection cycles.
@Component({
  selector: 'app-virtual-scroll',
  templateUrl: './virtual-scroll.component.html',
  styleUrls: ['./virtual-scroll.component.css'],
  changeDetection: ChangeDetectionStrategy.OnPush
})
export class VirtualScrollComponent { }
With these optimizations, your virtual scroll list will handle tens of thousands of items smoothly while keeping memory and CPU usage low.
Conclusion
Virtual scrolling is one of the most effective techniques for improving the performance of Angular applications that deal with large datasets. By leveraging the Angular Material CDK’s cdk-virtual-scroll-viewport, we can keep the DOM lean and responsive, ensuring smooth scrolling even with thousands of items.
In this tutorial, we covered:
-
Setting up Angular 20 with Angular Material and CDK.
-
Creating a virtual scroll list with just a few lines of code.
-
Combining virtual scroll with Angular Material components like
mat-list. -
Styling and customizing the virtual scroll container.
-
Applying best practices like
trackByand lazy loading to maximize performance.
With these tools and techniques, you can confidently integrate virtual scrolling into real-world apps—whether you’re building chat interfaces, long tables, or infinite feeds.
Now it’s your turn to try it out: experiment with different layouts, add dynamic data, or combine virtual scroll with server-side pagination for even greater scalability. 🚀
You can check the working source code from our GitHub.
If you don’t want to waste your time designing your front-end or your budget to spend by hiring a web designer, then Angular Templates is the best place to go. So, speed up your front-end web development with premium Angular templates. Choose your template for your front-end project here.
That's just the basics. If you need more deep learning about Angular, you can take the following cheap course:
- Angular - The Complete Guide (2025 Edition)
- Complete Angular Course 2025 - Master Angular in only 6 days
- Angular Deep Dive - Beginner to Advanced (Angular 20)
- Modern Angular 20 with Signals - The missing guide
- The Modern Angular Bootcamp
- Angular (Full App) with Angular Material, Angularfire & NgRx
- Angular Front End Development Beginner to Master 2025
- 30 Days of Angular: Build 30 Projects with Angular
- Angular 20 Full Course - Complete Zero to Hero Angular 20
- Angular Material In Depth (Angular 20)
Thanks!
