A comprehensive step by step tutorial Ionic 3 and Angular 4 app authentication with Ionic 3 native Google plus plugin. Before start with the app, there's a setup of Google Plus via the Google Developer Console. Google plus was an Internet-based social network owned and operated by Google. The service, Google's fourth foray into social networking, experienced strong growth in its initial years, although usage statistics varied, depending on how the service was defined.
Jumps to the steps:
- Google API Setup
- Create Ionic 3 App
- Setup Ionic 3 Native Google Plus Plugin
- Add Google Login Button on The Page
- Run Ionic 3 Google Plus Login App on Android and iOS Device
Google API Setup
The first thing to set up from Google is generating configuration files for iOS and Android. For iOS, open your browser then point to this address then log in with your Google account.
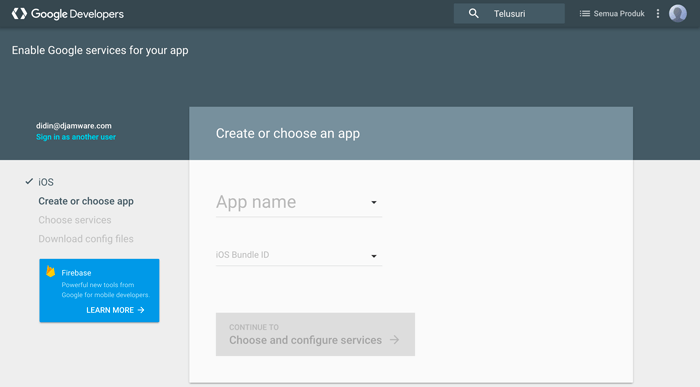
Create the new iOS app from thereby filling the form. Enter app name and iOS bundle ID, our example is "MyGooglePlusAuth" for app name and "com.mygoogleplusauth" for iOS bundle ID. Please, remember that iOS bundle ID will use in Ionic 3 config later and that would be easy if we use the same bundle ID for Android.
Leave other option to default then click "Choose and Configure Service" button.
Click "ENABLE GOOGLE SIGN IN" button. After that, click "Generate configuration file" button. Click the button "Download GoogleService-info.plist", we will use these files later on the Ionic 3 project.
Next, we have to generate the Google service configuration file for Android too. Go to this address then choose app name that previously created. File Android package name same as iOS bundle ID "com.mygoogleplusauth".
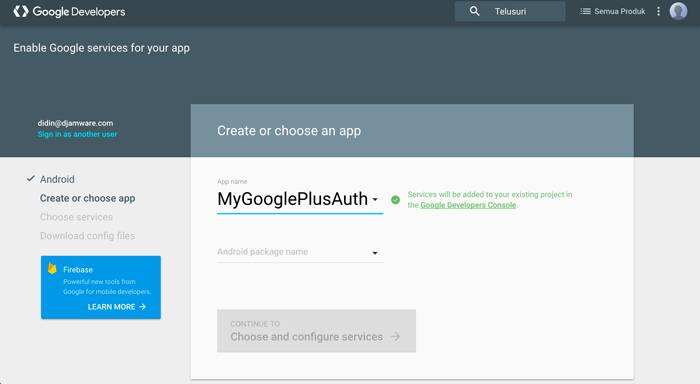
Click "Choose and configure service" button. Before enabling this service, we have to create a new SHA-1 signing certificate which uses for release and debug. Open terminal or command line, then type this command to create certificate fingerprint for debugging.
keytool -exportcert -list -v \
> -alias androiddebugkey -keystore ~/.android/debug.keystore
or from the command line (windows).
keytool -exportcert -list -v \
-alias androiddebugkey -keystore %USERPROFILE%\.android\debug.keystore
Enter the password, by default for "debug.keystore is "android".
Alias name: androiddebugkey
Creation date: Nov 8, 2015
Entry type: PrivateKeyEntry
Certificate chain length: 1
Certificate[1]:
Owner: CN=Android Debug, O=Android, C=US
Issuer: CN=Android Debug, O=Android, C=US
Serial number: 5e9752f4
Valid from: Sun Nov 08 22:25:34 WIB 2015 until: Tue Oct 31 22:25:34 WIB 2045
Certificate fingerprints:
     MD5:  0A:2D:96:6B:B8:84:F7:37:2E:7E:83:09:43:BB:B7:D4
     SHA1: 2B:52:02:F0:82:94:34:68:FC:B6:DD:81:1D:3A:66:D7:57:3B:B9:11
     SHA256: B1:40:EB:9D:03:50:A2:0F:F2:D4:1B:6D:AA:F6:F9:6A:57:52:B0:70:5A:3C:87:9E:15:F0:BE:7C:90:00:DA:51
     Signature algorithm name: SHA256withRSA
     Version: 3

Extensions:

#1: ObjectId: 2.5.29.14 Criticality=false
SubjectKeyIdentifier [
KeyIdentifier [
0000: C0 3A D3 06 65 23 89 A1   5D 80 CC 55 88 D8 BD 23  .:..e#..]..U...#
0010: 80 6E 67 01                                        .ng.
]
]
Copy Certificate fingerprints SHA1 value then paste in "Android Signing Certificate SHA-1" of Google Developer to enable Google Sign-In service.
Next, just click the "CLOSE" button and not necessary to download generated configuration files for Android only. If you plan to use your app in production/published, change the certificate fingerprint with this command.
keytool -exportcert -list -v \
-alias <your-key-name> -keystore <path-to-production-keystore>
Keystore using same as your Keystore of build release for publishing. Then edit manually in Google developer console. Choose credentials from side menu then find "OAuth 2.0 client IDs" for Android. You can replace the SHA1 certificate fingerprint with production/release key.
Create Ionic 3 App
As usually in almost all of our tutorial, we create an app from scratch. Back to the terminal or command line then go to your apps folder. Type this command to create a new Ionic 3 app.
ionic start mygoogleplusauth blank --v2Or if you are using the latest Ionic CLI, type this command.
ionic start mygoogleplusauth blank --type ionic-angularGo to the newly created app folder.
cd mygoogleplusauthNow, open and edit config.xml in the root of the app folder. Replace app id on the <widget> tag to match Android package or iOS bundle ID that previously created on the Google Developer page.
<widget id="com.mygoogleplusauth" version="0.0.1" xmlns="http://www.w3.org/ns/widgets" xmlns:cdv="http://cordova.apache.org/ns/1.0">Run the app, to make sure everything still on the path.
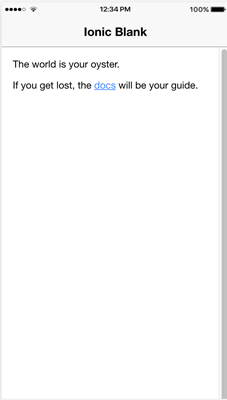
ionic serve -lIf you see the Ionic 3 blank app page below then we ready to continue.
For now, stop the app by push control+c at the same time.
Setup Ionic 3 Native Google Plus Plugin
To install Ionic 3 native Google Plus plugin you can refer to the official Ionic Framework documentation. Back to the terminal or command line. Type this command to install Cordova plugin and ionic module of Google Plus plugin. You can find "REVERSED_CLIENT_ID" on generated "GoogleService-info.plist" file.
ionic plugin add cordova-plugin-googleplus --variable REVERSED_CLIENT_ID=myreversedclientid
npm install --save @ionic-native/google-plus
If you see warning like below then we should update the "@ionic-native/core" module.
npm WARN @ionic-native/[email protected] requires a peer of @ionic-native/core@^3.6.1 but none was installed.Update the @ionic-native/core module by type this commands.
npm uninstall --save @ionic-native/core
npm install --save @ionic-native/core@^3.6.1
Add Google Login Button on The Page
To implement Google authentication, we put Google login button to trigger Google Plus authentication. Open and edit "src/pages/home/home.ts" then replace all codes with this Google plus module, login, and logout functions.
import { Component } from '@angular/core';
import { NavController } from 'ionic-angular';
import { GooglePlus } from '@ionic-native/google-plus';

@Component({
  selector: 'page-home',
  templateUrl: 'home.html',
  providers: [GooglePlus]
})
export class HomePage {

  displayName: any;
  email: any;
  familyName: any;
  givenName: any;
  userId: any;
  imageUrl: any;

  isLoggedIn:boolean = false;

  constructor(public navCtrl: NavController, private googlePlus: GooglePlus) {

  }

  login() {
    this.googlePlus.login({})
      .then(res => {
        console.log(res);
        this.displayName = res.displayName;
        this.email = res.email;
        this.familyName = res.familyName;
        this.givenName = res.givenName;
        this.userId = res.userId;
        this.imageUrl = res.imageUrl;

        this.isLoggedIn = true;
      })
      .catch(err => console.error(err));
  }

  logout() {
    this.googlePlus.logout()
      .then(res => {
        console.log(res);
        this.displayName = "";
        this.email = "";
        this.familyName = "";
        this.givenName = "";
        this.userId = "";
        this.imageUrl = "";

        this.isLoggedIn = false;
      })
      .catch(err => console.error(err));
  }
}
Next, open and edit "src/pages/home/home.ts" then replace all codes with this.
<ion-header>
  <ion-navbar>
    <ion-title>
      Ionic Blank
    </ion-title>
  </ion-navbar>
</ion-header>

<ion-content padding>
  <div *ngIf="isLoggedIn; else loginTemplate">
    <h1>Welcome, {{displayName}}!</h1>
    <p>Email: {{email}}<br>
      Family Name: {{familyName}}<br>
      Given Name: {{givenName}}<br>
      User ID: {{userId}}</p>
    <p><ion-avatar item-left>
        <img src="{{imageUrl}}">
       </ion-avatar></p>
    <p><button ion-button (click)="logout()">Logout From Google</button></p>
  </div>

  <ng-template #loginTemplate>
    <h1>Please Login to see your Google Account Information</h1>
    <p><button ion-button (click)="login()">Login With Google</button></p>
  </ng-template>
</ion-content>
Run Ionic 3 Google Plus Login App on Android and iOS Device
For Android is really easy. Before running make sure we have to add the Android platform.
ionic platform add androidThen run the app on Android device, make sure you have connected your device to your computer.
ionic run android
After clicking the button "Login With Google", it will show a dialog to choose your existing Google credentials on the device. Choose one of it then it will back to the app with Google user detail.

For iOS type this command.
ionic build iosAfter the finished build, open the file with extension ".xcodeproj" on "/platforms/ios" folder using XCode.
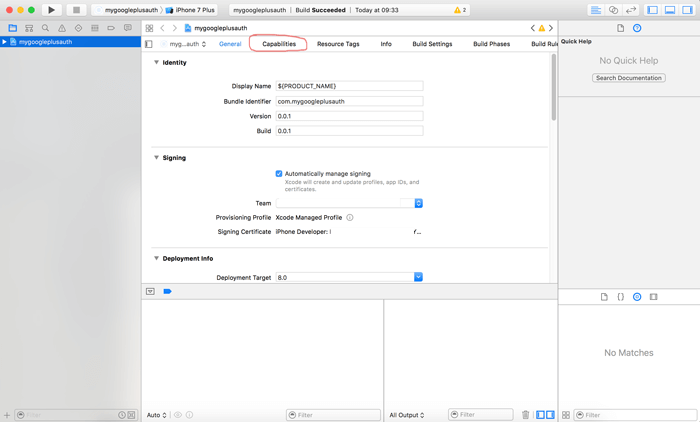
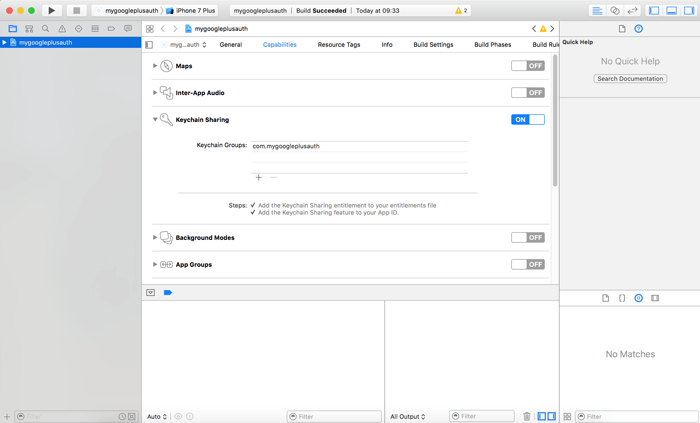
Click/highlight project name on the left pane, then choose Capabilities. Turn on Keychain Sharing, for that, you have to use your Apple developer account.
Now, we can run the app to an iOS device from XCode, make sure there's a Google account on the device.
That it's for now, you can find the full source code on GitHub.
We know that building beautifully designed Ionic apps from scratch can be frustrating and very time-consuming. Check Ionic 4 - Full Starter App and save development and design time. Android, iOS, and PWA, 100+ Screens and Components, the most complete and advance Ionic Template.
That just the basic. If you need more deep learning about Ionic, Angular, and Typescript, you can take the following cheap course:
- IONIC 4 Design Hybrid Mobile Applications IOS & Android
- Wordpress Rest API and Ionic 4 (Angular) App With Auth
- Mobile App from Development to Deployment - IONIC 4
- Ionic 4 Crash Course with Heartstone API & Angular
- Ionic 4 Mega Course: Build 10 Real World Apps
Thanks!
